
A handmade greeting card with a mechanical surprise turns a simple message into an interactive experience. By combining a tension-based slingshot pop-up mechanism with personalized calligraphy, you can create a stunning, professional-quality card that stands out. This project relies on clever paper engineering and precise lettering, making it a rewarding endeavor for crafters of all skill levels.
The magic of a slingshot card lies in its kinetic energy. When the recipient opens the card, an internal elastic band or a folded paper tension system snaps a central design element forward, bringing the card to life. Pairing this playful movement with elegant, hand-lettered calligraphy creates a beautiful contrast between modern paper mechanics and classic artistry.
Gather Your Tools and Materials
Before starting, gathering the right stationery and crafting supplies ensures a smooth building process. The foundation of your card requires heavyweight cardstock, ideally between 220 and 270 gsm. This weight provides the structural integrity needed to withstand the tension of the slingshot mechanism without warping. For the pop-up elements, a lighter paper of around 120 to 160 gsm is preferred, as it reduces weight and allows the mechanism to snap forward effortlessly.
Products mentioned in this guide
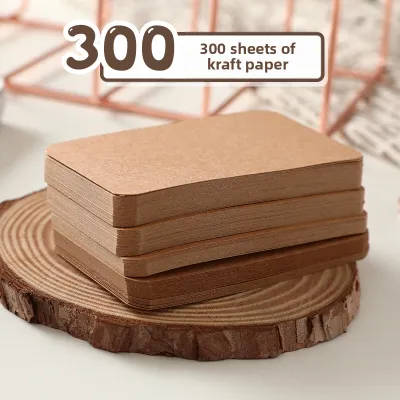
Prices are valid at publication and may change. Please refer to the product page for the latest price.
Precision is key when cutting and folding. You will need a sharp precision craft knife, a metal ruler, a self-healing cutting mat, and a scoring tool or bone folder. Because this project involves sharp blades and strong adhesives, always work on a stable surface and cut away from your body to ensure safety. For adhesives, a high-tack double-sided tape or a quick-drying, low-moisture paper glue is ideal. In warm, humid tropical climates like the Philippines, standard water-based liquid glues can introduce excess moisture, causing the cardstock to warp or buckle. Using dry adhesives or specialized paper glues prevents this issue entirely.
Your calligraphy supplies must be carefully matched to your paper. Select a high-quality calligraphy brush pen, fine liner, or dip pen with pigment-based ink. Because ink drying speed, smoothness, and bleed resistance depend heavily on the exact combination of paper and ink, always perform a trial run on a scrap piece of your cardstock. This test allows you to verify that the ink does not feather or bleed through to the other side, and that it dries quickly enough to avoid smudging during assembly. Finally, you will need a small, highly elastic rubber band—such as a tiny hair elastic—to act as the engine for your slingshot mechanism.
Build the Card Base and Slingshot Mechanism
To begin, cut your heavyweight cardstock to your desired card size, such as a standard A6 or 5″x7″ format. Fold the cardstock in half to create the main card base. To ensure a crisp, clean hinge that allows for smooth mechanical operation, always score the fold line first using your scoring tool and a metal ruler. Scoring compresses the paper fibers, preventing the outer spine from cracking when folded.

Next, you will construct the internal slingshot anchor points. Cut a separate piece of cardstock slightly smaller than the main card base to serve as an inner liner. Fold this liner in half and score it. On the center fold of this liner, mark two parallel lines about two centimeters apart, extending roughly one centimeter into each side of the fold. Carefully cut along these lines with your craft knife to create a pop-out tab. When the liner is opened, this tab will project forward, creating the anchor points for your elastic band.
Slip your small elastic band over this central tab. The band should sit snugly but should not be stretched to its absolute limit when the card is open. Test the natural tension of the paper by gently folding the liner closed. If the paper resists too strongly or begins to tear at the corners of the cuts, adjust the depth of your cuts or use a slightly looser elastic band. The mechanism should fold flat easily and snap back dynamically when released.
Design and Attach the Pop-Up Element
The pop-up element is the visual focal point of your card, launched forward by the slingshot mechanism. This element can be any shape you choose, such as a heart, a star, a floral bouquet, or a custom hand-cut illustration. When designing this piece, keep its dimensions strictly within the boundaries of the closed card. If the element is too large, it will peek out of the edges when the card is shut, ruining the surprise.
Weight is a critical factor in the success of your slingshot mechanism. If the pop-up element is too heavy, the elastic band will struggle to lift it, resulting in a sluggish rise rather than a sharp snap. Use medium-weight paper for this decorative piece, and avoid adding heavy embellishments like thick plastic gems or multiple layers of heavy cardstock.
To attach the pop-up element, apply a small amount of strong double-sided tape or quick-drying glue to the front face of the tension tab where the elastic band is anchored. Carefully align your design over the tab, ensuring it does not touch the main spine of the card, which could cause it to catch. Press firmly to secure the bond. Open and close the card slowly to check the clearance, verifying that the element folds flat without catching on the outer edges of the card.
Add Personalized Calligraphy
Integrating personalized calligraphy adds a deeply thoughtful touch to your mechanical card. Before putting pen to paper, plan your layout carefully. Keep your hand-lettered messages away from the moving parts, hinges, and glue zones of the internal mechanism. The best areas for calligraphy are the front cover of the card and the quiet, flat panels of the inner liner surrounding the pop-up element.
Because tropical humidity can slow down ink drying times, selecting the right pen and ink combination is essential. A pigment-based brush pen or a high-quality gel pen is highly recommended for its crisp lines and reliable drying speed. To verify the performance of your tools, write a few test words on a scrap piece of your cardstock. Check for smoothness, bleed resistance, and how long the ink takes to dry completely. If the ink smears when touched after a minute, allow extra drying time or switch to a faster-drying ink.
Always practice your lettering on scrap paper first to perfect your spacing, style, and layout. Once you are confident, use a light pencil to draw faint guidelines on your actual card panels. Write your calligraphy with a steady hand, keeping your pressure consistent. Let the ink dry completely—ideally for at least ten to fifteen minutes—before using a soft, clean eraser to gently remove the pencil guidelines. This prevents any accidental smudging of your beautiful script.
Assemble, Test, and Troubleshoot the Mechanism
With your calligraphy complete and dry, and your pop-up element securely attached to the inner liner, it is time for final assembly. Apply double-sided tape or a thin layer of paper-safe glue to the back of the inner liner, taking care to avoid the area directly behind the moving slingshot tab. Carefully align the liner with the main card base and press them together, smoothing out any air bubbles.
Allow all adhesives to cure completely before testing the card. Attempting to operate the mechanism while the glue is still wet can cause the components to shift or detach. Once dry, perform a series of slow test folds. Watch the mechanism closely as you close the card to identify any areas where the paper might catch, rub, or experience excessive friction.
If you notice weak tension, you can shorten the elastic band slightly or reinforce the anchor points. If the paper hinges show signs of wear or tearing after a few folds, reinforce them by gluing small, thin strips of scrap cardstock over the stressed areas. A well-constructed card should open smoothly, launching the pop-up element forward with a satisfying, reliable snap every single time.
Frequently Asked Questions (FAQ)
What type of paper works best for the slingshot tension?
To find the perfect paper for your slingshot card, you can perform a simple flexibility and memory test on scrap pieces. Take a small strip of paper and bend it into a loop without creasing it, then release it. High-quality cardstock between 220 and 270 gsm should spring back to its original flat shape immediately, indicating excellent paper memory. Avoid flimsy paper like standard printer paper, which lacks the stiffness to support the mechanism and will sag under the tension of the elastic band. Conversely, avoid overly thick board or heavy watercolor paper, as it resists folding and will prevent the card from closing flat.
How do I fix a pop-up element that won't stay flat when closed?
If your pop-up element refuses to stay flat when the card is closed, first check for clearance issues. Ensure that no part of the pop-up design extends past the outer edges of the card or collides with the main center fold. Another common culprit is glue seepage; if excess liquid glue has escaped from the anchor tab, it may have accidentally bonded adjacent parts of the mechanism together. Finally, verify your scoring lines. If the folds on your card base or inner liner are not deep and crisp, the paper will naturally resist staying flat. Re-score the lines gently with a bone folder to encourage a sharp, clean fold.

Community discussion
Share your experience or ask a question. Comments are reviewed before publication.