
Crafting custom party favors is a wonderful way to personalize any celebration, whether it is a children’s birthday party, a baby shower, or a whimsical garden gathering. Creating a loot bag butterfly theme using wrapping paper, ribbons, and bows allows you to control the exact size, durability, and style of your packaging while keeping costs budget-friendly. By transforming standard sheets of gift wrap into sturdy, three-dimensional bags, you can match your party’s aesthetic perfectly.
This guide walks you through the entire process of measuring, folding, reinforcing, and embellishing these custom bags to ensure they hold up beautifully throughout your event. With a few basic stationery tools and some creative styling, you can produce professional-looking favor bags that your guests will love to take home.
Materials and Tools You Will Need for a Loot Bag Butterfly Theme
To achieve clean folds and a professional finish, gathering the correct stationery supplies is essential before you begin. Using the right combination of paper weight and adhesives ensures your bags look polished and remain structurally sound.
Products mentioned in this guide
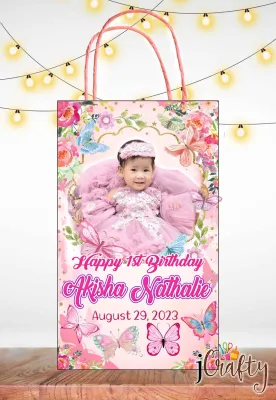
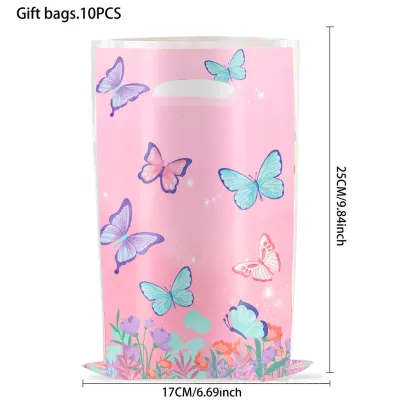
Prices are valid at publication and may change. Please refer to the product page for the latest price.
- Butterfly-print wrapping paper: Select a high-quality paper with a weight of at least 80 to 120 GSM (grams per square meter). Standard thin gift wrap tends to tear easily when folded into a bag structure, especially when holding heavier party favors. A thicker matte-finish paper or a sturdy kraft paper printed with butterfly motifs provides the structural integrity needed to stand upright.
- Coordinating ribbons: Choose ribbons that complement the colors in your wrapping paper. Satin ribbons offer a polished, classic sheen, while organza ribbons provide a sheer, airy texture that mimics the delicate nature of butterfly wings. Grosgrain ribbon is another excellent option, offering a ribbed texture that holds knots securely.
- Decorative bows: Ready-made bows or hand-tied bows in matching shades (such as pastel pinks, purples, or metallic golds) add a dimensional focal point to your bag.
- Precision scissors: A pair of sharp, long-blade stationery scissors ensures straight, clean cuts without jagged edges.
- Metal ruler and pencil: A heavy metal ruler is indispensable for measuring precise dimensions and serving as a straight edge for scoring.
- Double-sided tape or quick-dry craft glue: Double-sided tape is highly recommended for assembling the body of the bag because it provides an instant hold without warping the paper. If using glue, opt for a low-water-content craft adhesive.
- Hole punch: A standard single-hole punch is needed to create clean entry points for your ribbon handles.
- Bone folder: This plastic or bone tool is used to crease paper cleanly. If you do not have one, the blunt edge of a butter knife or the plastic handle of your scissors can serve as a substitute.
- Optional decorative edge scissors: These can be used along the top collar of the bag to create a scalloped or wavy border.
Using a thicker wrapping paper is especially important if you plan to fill the bags with heavier items like small toys, notebooks, or local treats. Thin paper can sag or puncture easily under pressure, whereas a heavier stock maintains its shape and showcases the beautiful butterfly designs without distorting.
Step-by-Step Guide to Assembling the Loot Bags
Making your own gift bags from wrapping paper is a straightforward process once you understand the basic geometry of a paper bag. By carefully measuring, scoring, and folding, you can turn a flat sheet of paper into a sturdy container capable of holding treats, small toys, or stationery gifts.

Cutting and Scoring the Wrapping Paper
To begin, you must determine the size of your bag. A standard, versatile loot bag can be made from a rectangular sheet of wrapping paper measuring 30 centimeters in height by 45 centimeters in width. This size allows for a finished bag that is approximately 18 centimeters tall, 12 centimeters wide, and 6 centimeters deep. Lay your wrapping paper face down on a clean, flat work surface, and use your metal ruler and pencil to mark these dimensions on the reverse side.
Once your rectangle is cut, you need to mark the fold lines that will define the sides, bottom, and top collar of the bag. From the top edge of the paper, measure down 3 centimeters and draw a light horizontal line; this will be folded inward to reinforce the top rim. From the bottom edge, measure up 6 centimeters and draw another horizontal line; this will form the base of the bag. For the vertical folds, make marks from the left edge at 3 centimeters (for the seam overlap), then at 15 centimeters, 21 centimeters, 33 centimeters, and 39 centimeters.
Before folding, use your bone folder and the metal ruler to score along all of these marked lines. Press firmly but gently to compress the paper fibers without tearing through the sheet. Scoring is crucial when working with printed wrapping paper, as it prevents the printed ink from cracking or peeling along the creases, resulting in a crisp, professional edge.
Folding and Securing the Bag Structure
With the paper scored, begin assembly by folding the 3-centimeter top flap downward toward the unprinted side of the paper. Apply a strip of double-sided tape along the inside of this flap and press it down firmly to secure it. This reinforced top collar will prevent your ribbon handles from tearing the paper later. Next, fold the paper along the vertical score lines to form a rectangular tube, overlapping the 3-centimeter left seam over the right edge. Apply double-sided tape along this overlap, aligning the edges carefully before pressing them together to create a clean vertical seam.
Now, focus on forming the bottom of the bag. With the tube lying flat, fold the bottom 6-centimeter section upward along the horizontal score line. Open this folded section and press the left and right outer corners inward, creating two neat triangular flaps on either side. Fold the top and bottom horizontal flaps of this section toward the center, overlapping them slightly to close the bottom of the bag.
To secure the base, apply double-sided tape generously to the overlapping flaps. Ensure the tape covers the entire surface of the overlap to prevent any gaps where small items could slip out. Reach inside the bag from the open top and press down firmly against the bottom flaps to ensure the adhesive bonds completely.
Adding Ribbon Handles and Closures
To transform your folded paper structure into a functional loot bag, you need to add secure handles. Stand the bag upright and gently press the side panels inward along their center lines to form neat side gussets. Near the top reinforced collar, mark two symmetrical points on both the front and back panels of the bag, approximately 3 centimeters from the side edges and 1.5 centimeters down from the top rim.
Use your single-hole punch to create holes at these four marked locations. To prevent the weight of the party favors from ripping the paper, apply a small square of clear adhesive tape or a small piece of scrap cardstock to the inside of the bag over each hole before punching through them a second time. This simple reinforcement step dramatically increases the durability of your bag.
Cut two equal lengths of your chosen ribbon, each measuring approximately 30 centimeters. Thread one end of the ribbon from the outside of the bag to the inside through one of the front holes, and tie a double knot on the inside. Pull the ribbon tight so the knot rests against the inner wall of the bag. Thread the other end through the adjacent front hole and tie another secure knot. Repeat this process on the back panel with the second piece of ribbon to complete your matching handles.
Styling With Ribbons and Decorative Bows
Once the structural base of your bag is complete, you can focus on the creative details that highlight your butterfly theme. The key to an elegant design is balancing the colors and textures of your ribbons and bows with the pattern on your wrapping paper.
Start by analyzing the colors in your butterfly-print paper. If the print features soft pastel shades like lavender, mint, and blush pink, choose a satin ribbon in lavender for the handles and a blush pink organza bow for the front. Pulling these secondary colors from the print creates a cohesive, intentional look rather than an overwhelming clash of bright tones. If the wrapping paper has a neutral kraft background with white butterflies, metallic gold or silver ribbons can elevate the design, making it feel premium and festive.
The texture of the ribbon plays a significant role in the overall aesthetic. Satin ribbon has a smooth, heavy drape that looks sophisticated and holds its shape well when tied into traditional loops. Organza, being semi-transparent and lightweight, naturally evokes the delicate, airy quality of butterfly wings. You can combine these textures by using a solid satin ribbon for the structural handles and a larger, sheer organza bow as a decorative accent.
There are several ways to position your decorative bows for maximum visual impact. You can tie a small, delicate bow directly around the base of one of the ribbon handles, allowing the tails of the bow to drape down the front of the bag. Alternatively, run a horizontal band of ribbon around the upper collar of the bag, securing it with double-sided tape, and place a pre-made butterfly-shaped bow directly in the center of this band. If you prefer a clean look, attach a single, large statement bow to the exact center of the bag’s front panel. Secure these decorative elements using high-tack glue dots or double-sided tape, pressing gently to avoid crushing the bow’s loops.
Tips for a Clean and Durable Finish
When crafting paper bags, attention to detail and material behavior makes the difference between a bag that lasts and one that falls apart before the party ends.
Always perform an adhesive test on a scrap piece of your chosen wrapping paper before assembling your entire batch of bags. Different paper coatings—such as glossy, matte, or metallic finishes—react differently to various glues. In the warm and humid climate of the Philippines, standard liquid white glues dry very slowly and can introduce excess moisture to the paper, causing thin sheets to warp, ripple, or pucker. Double-sided tape, glue dots, or low-moisture quick-dry tacky glues are highly recommended because they provide an immediate, dry bond that is unaffected by environmental humidity.
If your loot bags are intended to hold heavier items, such as small books, glass jars of homemade jam, or heavy candies, the paper bottom will need extra support. Cut a piece of lightweight cardstock to the exact dimensions of your bag’s bottom (12 centimeters by 6 centimeters for the example size). Slide this cardstock rectangle inside the bag and push it flat against the bottom. This insert distributes the weight of the contents evenly across the entire base, preventing the folded paper flaps from sagging or tearing open.
Finally, allow all adhesives to cure fully before placing any items inside the bags. Even quick-dry options benefit from sitting undisturbed for a few hours. Assemble your bags a day or two before the event, store them in a cool, dry place away from direct sunlight, and pack them with favors only once the seams are completely set.
Frequently Asked Questions (FAQ)
What type of adhesive works best for wrapping paper in humid weather?
High humidity can prevent standard liquid school glues from drying properly, leading to warped paper and weak seams. For flat seams, double-sided tape is the most reliable option as it bonds instantly without moisture. For attaching 3D elements like bows, use high-tack glue dots or a minimal amount of quick-dry tacky glue.
How can I prevent the bottom of the loot bag from tearing?
To reinforce the base, cut a piece of lightweight cardstock to match the inner dimensions of your bag’s bottom. Place this cardstock insert flat inside the bag before filling it. This helps distribute the weight of your party favors evenly and protects the folded paper seams from direct pressure.

Community discussion
Share your experience or ask a question. Comments are reviewed before publication.