
Achieving a glass-smooth finish with acrylic paint can be a challenging task for artists and crafters alike. Visible brush ridges, uneven coverage, and rapid drying times often leave unwanted textures on your canvas or wooden panels. Using floetrol for painting is a highly effective way to solve these issues, allowing you to achieve professional-looking, streak-free results.
This versatile additive alters the physical properties of acrylic paint, improving its flow and leveling capabilities without compromising color intensity. By understanding how to properly mix and apply this conditioner, you can transform your painting experience and produce flawless, flat color fields.
Understanding Floetrol for Acrylic Painting: Benefits and Limitations
Floetrol is a water-based paint conditioner originally formulated for commercial latex and emulsion paints. Its primary purpose in home improvement is to help exterior and interior paints glide smoothly onto walls, eliminating the brush and roller marks left by thick coatings. Over the years, fine artists and hobbyists discovered that these same flow-enhancing properties work beautifully with artistic acrylic paints.
Products mentioned in this guide
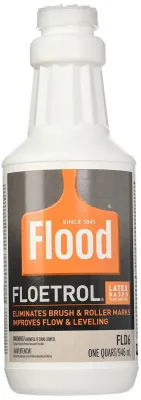
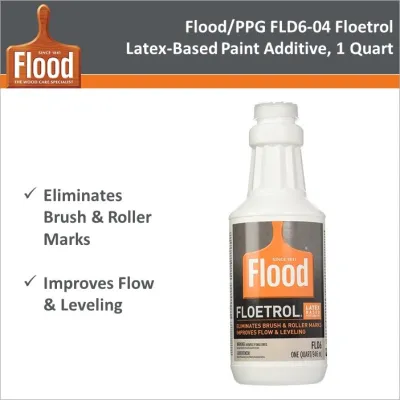
Prices are valid at publication and may change. Please refer to the product page for the latest price.
When mixed with acrylics, this conditioner acts as both a flow improver and a drying retarder. It reduces the viscosity of the paint, allowing it to level out naturally across your surface before it sets. By extending the “open time”—the window during which the paint remains wet and workable—it gives you more time to blend colors and smooth out transitions without the fear of the paint skinning over prematurely.
However, it is crucial to recognize the limitations of using a commercial paint conditioner for fine art. Floetrol is not an archival-grade, artist-series medium. It contains industrial surfactants, conditioning agents, and preservatives that are not formulated to resist yellowing or degradation over many decades. Over time, heavy concentrations of this additive may affect the long-term flexibility and adhesion of the paint film, potentially leading to cracking or peeling on flexible canvases.
Because of these archival limitations, this product is best suited for practice pieces, craft projects, murals, decorative furniture, and non-archival illustrations. If you are preparing high-end gallery work intended to last centuries, you should opt for dedicated, artist-grade acrylic flow release mediums and retarders. For everyday projects and learning exercises, however, it offers an incredibly cost-effective way to master smooth paint application.
Essential Tools and Materials
Before you begin mixing, preparing a clean and organized workspace will help you achieve the best results. Having all your tools within reach ensures you can work efficiently once the paint is mixed and ready to apply.

Gather your core materials first. You will need your chosen acrylic paints—either heavy body paints for rich pigmentation or fluid acrylics for easier mixing—along with a bottle of Floetrol. Ensure your painting surface is properly prepared; a primed canvas, smooth gessoed wood panel, or heavy-duty acrylic paper will yield the smoothest results. If you are using a bottle of conditioner that has been sitting on the shelf for a while, it is wise to strain it through a fine mesh or nylon stocking to remove any dried paint skins or lumps.
Next, assemble your mixing and application tools. Clean plastic cups or small jars with airtight lids are ideal for mixing and storing leftover paint. Use wooden stirring sticks or metal palette knives to blend the mixture thoroughly. For application, select high-quality soft synthetic brushes or high-density foam rollers. Stiff bristle brushes should be avoided, as they will defeat the purpose of the flow conditioner by carving deep grooves into the wet paint.
Finally, keep a few optional but helpful items nearby. A small spray bottle filled with distilled water is excellent for lightly misting your palette to keep the paint fresh. If you are working on flat surfaces, a heat gun or a simple hairdryer can be useful for popping any stubborn micro-bubbles that rise to the surface of your wet paint film. Always prioritize safety: work in a well-ventilated room, wear an apron to protect your clothes, and consult the safety labels on all products before use.
How to Mix Floetrol with Acrylic Paint
Mixing is the most critical stage of the process. Achieving a homogeneous blend without introducing structural weaknesses or air bubbles requires patience and a systematic approach.
Finding the Right Mixing Ratio
There is no single, universal mixing ratio that works for every brand of paint. Acrylic paints vary wildly in viscosity; heavy body paints are thick like butter, while fluid acrylics behave more like heavy cream. The ideal ratio depends entirely on the initial thickness of your paint, your chosen surface, and how opaque you want the final layer to be.
For a safe and reliable starting point, try a conservative ratio of one part Floetrol to two or three parts acrylic paint (a 1:2 or 1:3 ratio by volume). This conservative mixture thins the paint sufficiently to improve flow while preserving the integrity of the acrylic binder and keeping the color highly saturated. If you are using fluid acrylics, you may only need a tiny splash of conditioner—roughly 10% to 15% of the total volume—to achieve a self-leveling consistency.
Always perform a small test swatch on a scrap piece of paper or cardboard before committing to your main project. Observe how the paint behaves as it glides off the brush. If the paint still feels sticky or leaves distinct ridges, add a few more drops of conditioner. If the paint becomes overly transparent, runny, or pools on the surface, you have added too much; correct this by mixing in a small amount of fresh paint to restore the body.
The Mixing Process
To begin mixing, squeeze your desired amount of acrylic paint into a clean mixing cup. It is much easier to incorporate the conditioner into the paint gradually rather than dumping a large volume of liquid over a thick paste all at once. Pour a small amount of the conditioner into the cup and begin blending.
Use a flat palette knife or a wooden stir stick to blend the two liquids. Work with a gentle, folding motion rather than a rapid whipping action. Whipping the mixture like egg whites will trap thousands of tiny air bubbles inside the paint. These micro-bubbles can remain suspended in the viscous liquid and dry as unsightly pinholes or rough craters on your finished artwork.
Once the mixture is completely uniform in color and texture, cover the cup and let it rest for five to ten minutes. This resting period is crucial, as it allows any air bubbles that were accidentally introduced during mixing to rise to the surface and pop naturally. After resting, give the paint one very slow, gentle stir before loading it onto your brush.
Application Techniques for a Smooth Finish
Even with a perfectly mixed paint, your physical application technique plays a massive role in the final texture of your artwork. Proper brush preparation and stroke mechanics will ensure a flawless finish.
Brush Selection and Preparation
Your choice of brush can make or break your finish. Stiff, natural hog bristles are designed to hold heavy paint and leave expressive, textured marks. For a smooth, flat finish, you must use soft synthetic brushes made of nylon or polyester. These bristles are flexible enough to glide over the wet paint film without digging into it, allowing the self-leveling properties of the modified paint to work effectively.
Before dipping your brush into the paint mixture, slightly dampen the bristles with clean water, then wipe away the excess on a paper towel. The brush should feel damp but not wet. This simple step prevents the dry bristles from thirstily soaking up the moisture from your paint, which can cause the paint to dry prematurely on the brush and create clumping.
Be extremely careful not to add excess water directly to your paint and conditioner mixture. While a tiny amount of water is harmless, combining too much water with Floetrol can over-dilute the acrylic polymer binder. This weakens the paint’s structural matrix, which can lead to poor adhesion, flaking, or a chalky, easily damaged surface once dry.
Applying the Paint
When you are ready to paint, load your brush generously. Dip the lower half of the bristles into the paint, wiping any excess off the rim of your cup. Dragging a dry or underloaded brush across your surface creates friction, which pulls at the paint and leaves deep, dry brush tracks that cannot level out.
Apply the paint using long, continuous, and unidirectional strokes. Work from one side of your surface to the other, maintaining a wet edge as you progress. Avoid short, choppy, or cross-hatched strokes, as these introduce multi-directional textures that catch the light unevenly.
One of the most common mistakes is overworking the paint. Because the conditioner extends the open time, you might feel tempted to keep brushing back and forth over an area to make it perfect. However, as the paint begins its initial evaporation phase, it enters a tacky state. Brushing over paint that has started to set will tear the fragile, semi-dry film, creating severe texture and lumps. Apply the paint quickly, lay it down, and leave it alone.
To achieve an ultra-smooth surface, use the “laying off” technique immediately after applying a section of paint. Hold a clean, soft, slightly damp brush at a 45-degree angle to the surface. Using almost zero pressure, lightly drag the tips of the bristles across the wet paint in one continuous, unbroken stroke from edge to edge. This feather-light pass pops any remaining surface bubbles and flattens out any minor ridges left by your initial application.
Drying, Curing, and Troubleshooting
Managing the drying environment and knowing how to address common issues will save you time and prevent frustration during the final stages of your project.
It is important to understand the difference between drying and curing. Drying refers to the evaporation of water from the paint film, making it dry to the touch. Curing is the chemical process where the acrylic polymer molecules cross-link and harden completely, which can take several weeks. Because this conditioner slows down water evaporation, your paint will take significantly longer to dry to the touch than unmodified acrylics.
In highly humid environments, such as the tropical climate of the Philippines, drying times will extend even further. High ambient moisture prevents water from evaporating quickly from the paint film. To ensure successful drying, place your painted piece in a clean, dust-free room with active air circulation, such as near a ceiling fan or an open window. Avoid placing wet paintings in damp, closed cupboards, as the trapped moisture can cause the paint to remain soft and sticky.
If you encounter issues, use these simple troubleshooting steps to correct them:
- Persistent Tackiness: If your painting remains sticky or tacky to the touch after several days, it is usually a sign that too much conditioner was used, the paint was applied in a very thick layer, or the room's humidity is too high. Move the painting to a drier room with better airflow. For future layers, reduce the ratio of conditioner.
- Visible Brush Marks: If ridges are still highly visible after drying, you may have overworked the paint while it was setting, or your mixture did not contain enough conditioner to level out. Try adding a slightly higher ratio of conditioner to your paint for the next coat, and ensure you are using a softer brush.
- Surface Bubbles: If you notice tiny bubbles forming on the wet surface, do not panic. You can pop them by passing a heat gun or a hairdryer on a low, cool setting over the surface from a safe distance of at least 30 centimeters. Alternatively, a very light mist of distilled water from a fine-art atomizer can help break the surface tension and dissolve the bubbles.
Frequently Asked Questions (FAQ)
Can I use Floetrol for acrylic pouring?
While many crafters use this product as a budget-friendly pouring medium for fluid art, it is not the ideal choice for high-end pouring projects. Because it is an industrial paint conditioner, using it in the very thick layers typical of acrylic pouring can lead to muddy colors, poor cell definition, and a high risk of crazing or cracking as the thick paint dries. For professional fluid art, dedicated acrylic pouring mediums will yield much cleaner, more vibrant, and structurally sound results.
Does Floetrol make acrylic paint waterproof?
No, this additive does not make acrylic paint waterproof, nor does it act as a protective sealer. While fully cured acrylic paint naturally possesses moderate water resistance, the conditioner itself does not add any protective qualities. To protect your finished artwork from moisture, dust, and UV damage, you must apply a dedicated, high-quality acrylic varnish over the surface once the paint has fully cured.

Community discussion
Share your experience or ask a question. Comments are reviewed before publication.