
Repurposing Venus dye powder into a fluid, watercolor-style painting medium is an exceptionally budget-friendly way to achieve vibrant, highly saturated washes. Traditionally used as a fabric dye in the Philippines, this powder consists of highly concentrated, completely soluble colorants. Unlike traditional watercolors, which use finely ground mineral pigments suspended in a binder, dissolved dye powders behave more like liquid inks, staining the paper fibers directly. To paint successfully with this medium, you must dissolve the dry powder completely, adjust its transparency with water, and incorporate a binding agent like gum arabic to ensure the color adheres permanently to your paper.
By mastering the preparation and application of this versatile powder, you can create luminous, transparent layers that flow beautifully. This guide walks you through the essential tools, step-by-step mixing methods, foundational painting techniques, and practical storage solutions tailored for tropical climates.
Essential Tools and Materials for Mixing Dye Powder
Gathering the correct tools before you begin ensures a clean, controlled mixing process. Because dye powders are highly concentrated and easily soluble, using the right equipment prevents unwanted staining and helps you achieve a consistent, professional-grade painting medium.
Products mentioned in this guide
Prices are valid at publication and may change. Please refer to the product page for the latest price.
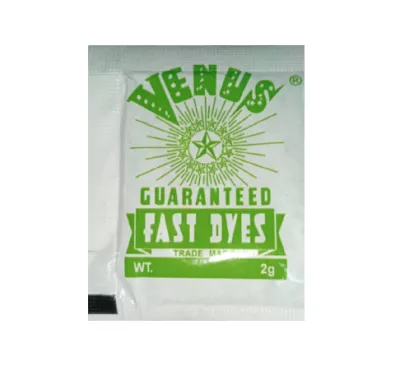
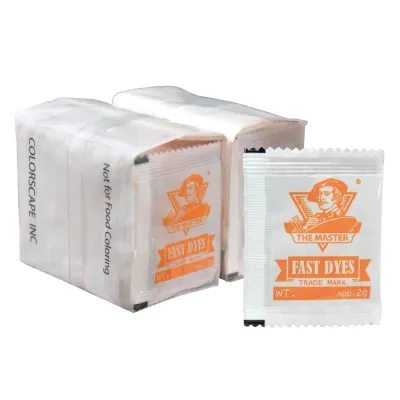
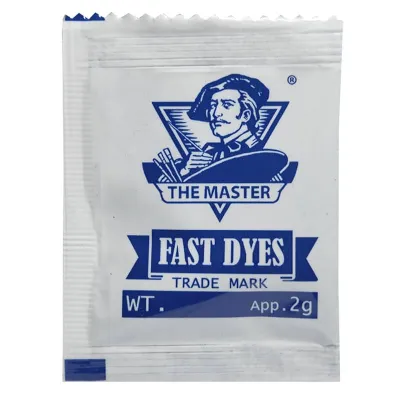
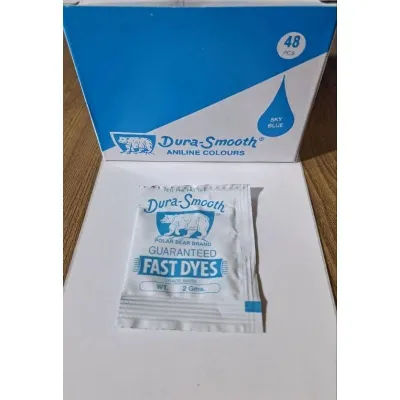
- Venus Dye Powder: This is your primary color medium. Available in small, highly affordable sachets (typically ranging from ₱5 to ₱15 in local craft stores and dry markets), a very small amount of this concentrated powder produces a significant volume of liquid paint.
- Mixing Vessels: Small glass jars with airtight lids, ceramic palettes, or deep porcelain paint wells are ideal. Avoid using porous plastic palettes, as the concentrated dye will stain the plastic permanently.
- Stirring Tools: Glass muddlers, small metal palette knives, or clean synthetic brushes work best to blend the powder. Avoid using high-quality natural-hair brushes for mixing, as the concentrated dye can stain and damage delicate natural bristles.
- Distilled or Filtered Water: Always use distilled or filtered water to dissolve the powder. Tap water often contains dissolved minerals, chlorine, or microscopic impurities that can chemically react with the dye, causing unexpected color shifts, cloudiness, or premature spoilage.
- Watercolor Paper: Select heavy watercolor paper with a minimum weight of 300 gsm (grams per square meter). Cold-pressed paper provides a textured surface that holds wet washes beautifully, while hot-pressed paper offers a smooth finish ideal for fine details. Light, thin papers will warp and buckle almost instantly under fluid dye washes.
- Binding Agents: Pure dye mixed with water has no natural adhesive properties and will easily smudge or rub off the paper once dry. Incorporating a binder, such as liquid gum arabic or a commercial watercolor medium, is highly recommended to lock the dye fibers into the paper.
Step-by-Step Guide to Mixing Venus Dye Powder into Watercolor
Mixing dry dye powder requires a careful, gradual approach to prevent clumping and ensure the color is fully dissolved. Because the dry powder is exceptionally fine, work in a draft-free space to avoid dispersing the particles into the air, and consider wearing utility gloves to prevent staining your hands.

Preparing the Base Mixture
Begin by placing a very small amount of Venus dye powder—about the size of a matchhead or a tiny pinch—into your mixing vessel. Because these dyes are incredibly concentrated, starting with a minimal amount makes it much easier to control the final volume and intensity of your paint.
Using a dropper, add distilled water drop by drop directly onto the dry powder. Do not pour water in all at once, as this can cause the fine powder to clump together, trapping dry pockets of dye inside stubborn, wet outer shells.
Use a glass muddler or the flat heel of a synthetic brush to press the damp powder against the bottom or sides of your mixing container. Work the mixture into a thick, completely smooth paste. Once you verify that no dry granules or clumps remain, you can begin adding more water to dilute the mixture to your desired volume.
Adjusting Consistency and Transparency
Achieving the perfect watercolor consistency relies on observing how the liquid flows and how transparently it behaves on paper. A well-mixed dye solution should have the viscosity of skim milk or light tea, flowing effortlessly off the bristles of your brush without pooling in thick, sticky drops.
To test the mixture’s transparency, paint a simple gradient wash on a piece of scrap watercolor paper and allow it to dry completely. Because dye solutions are highly concentrated, a mixture that looks dark and opaque in the mixing well will often dry into a beautiful, luminous, and transparent wash.
If your test swatch appears too dark or heavy, add distilled water a few drops at a time to dilute the concentration. If the color is too faint or washed out, do not add dry powder directly to the liquid; instead, mix a tiny amount of powder with water into a paste in a separate well, then stir that paste into your main mixture to deepen the tone.
Using a Binder for Better Adhesion
Because Venus dye powder is formulated for fabrics rather than paper, it lacks the natural binding agents found in professional watercolor pans. If you paint using only a water-and-dye mixture, the color may look vibrant initially but will easily smudge, rub off on your fingers, or lift off the page when touched.
To resolve this issue, incorporate a few drops of liquid gum arabic or a dedicated watercolor binder into your prepared liquid dye. A general starting ratio is roughly one drop of binder for every ten drops of concentrated dye solution, though you can adjust this depending on your paper’s absorbency.
Stir the binder thoroughly into the mixture until it is completely integrated. Note that adding gum arabic will slightly increase the viscosity of the liquid and may introduce a subtle, elegant gloss to the dry paint film. If the mixture becomes too thick to flow smoothly, simply balance it by adding one or two drops of distilled water.
Application Techniques for Watercolor-Style Painting
Once your Venus dye solutions are mixed and stabilized with a binder, you can apply them using traditional watercolor techniques. However, because dyes behave differently from mineral pigments, understanding their unique flow and absorption properties will help you control your artwork.
Testing and Swatching
Before starting your main painting, always create a dedicated color chart on the exact paper you plan to use. Dye-based paints are notorious for color shifting; they often look incredibly dark when wet but dry significantly lighter, sometimes revealing unexpected undertones.
Swatching also allows you to observe how the dye interacts with the paper fibers. Some colors may penetrate deeply and lock in place immediately, while others might remain slightly soluble on the surface, which affects how you will layer your colors later.
Wet-on-Wet and Wet-on-Dry Techniques
For the wet-on-wet technique, brush clean, distilled water over your paper until it has a uniform, satin sheen, then drop your mixed dye onto the wet surface. Because dye molecules are incredibly small and soluble, they will spread and diffuse across the wet paper much faster than traditional pigment paints, creating soft, dreamlike gradients. Water control is critical here; if the paper is too wet, the dye will run uncontrollably to the edges.
For the wet-on-dry technique, apply your dye mixture directly onto dry paper using a moderately damp brush. This method is ideal for creating crisp, defined edges, sharp details, and controlled graphic shapes. The dye will sink quickly into the dry fibers, leaving sharp boundaries that define your subject.
Layering and Color Blending
Layering, or glazing, involves painting a transparent wash over a previously dried layer to build depth or create secondary colors. When glazing with Venus dye mixtures, you must ensure the first layer is 100% dry. Apply the second layer with a soft brush using light, quick strokes.
Be careful not to overwork or scrub the paper during layering. Because dyes can be easily reactivated by moisture, heavy brushing will lift the underlying color, leading to muddy mixtures or damaged paper fibers. If you want to blend colors directly on the paper, do so while both colors are still wet.
Troubleshooting Common Mixing and Application Issues
Working with repurposed dye powders can present a few unique challenges, but most issues are easily resolved with minor adjustments to your tools or preparation steps.
- Gritty or Clumpy Texture: If your paint feels gritty or leaves tiny specks of undissolved powder on the paper, the dye was not fully dispersed. To fix this, let the mixture sit undisturbed for ten to fifteen minutes to allow the particles to fully hydrate, then stir vigorously. If stubborn particles remain, strain the liquid through a clean piece of fine nylon mesh or a paper coffee filter into a clean jar.
- Color Rubbing Off After Drying: When dry paint easily smudges or transfers to your fingertips, it indicates an insufficient amount of binder. Stir a few more drops of gum arabic directly into your remaining paint mixture. For artwork that is already finished and dry, protect the surface by applying a light, even coat of an archival fixative spray or a workable matte varnish.
- Colors Looking Muddy or Dull: Dull colors are usually the result of contaminated water, dirty mixing tools, or excessive layering of complementary colors. Always wash your brushes thoroughly between colors and mix fresh batches in clean wells. Keep your color schemes simple, limiting your layers to two or three transparent washes to preserve the dye's natural luminosity.
- Uneven or Streakish Washes: If the dye pools unevenly or resists the paper, the surface sizing may be uneven, or the paint may lack flow. You can improve the flow by adding a single, tiny drop of ox gall or a commercial watercolor flow improver to your mixture. Alternatively, lightly dampening the paper before painting can help the dye distribute more evenly.
Proper Storage and Cleanup for Humid Environments
The tropical, humid climate of the Philippines presents specific challenges when storing both dry dye powders and water-based mixtures. High humidity can quickly ruin your materials if they are not stored correctly.
- Storing Dry Powder: Keep your dry Venus dye powder sachets inside airtight plastic containers or glass jars. Always place a few food-grade silica gel desiccant packets inside the container to absorb ambient moisture, which prevents the dry powder from clumping, hardening, or degrading over time.
- Storing Mixed Liquid: Because home-mixed liquid dyes do not contain chemical preservatives, they are highly susceptible to mold growth when left at room temperature in warm, humid conditions. Only mix the amount of paint you plan to use for a single painting session. If you have leftover liquid dye, store it in a tightly sealed glass vial in the refrigerator and aim to use it within three to five days. Discard any mixture that develops an unusual odor or visible film.
- Tool Cleanup: Clean your brushes, palettes, and mixing jars immediately after your painting session. Because Venus dye is highly concentrated, it will permanently stain plastic palettes, synthetic brush bristles, and clothing if allowed to dry. Wash all tools thoroughly with warm water and mild dish soap, and avoid using your favorite natural-hair brushes, as the dye can be difficult to wash out of natural fibers.
Frequently Asked Questions (FAQ)
Can I mix Venus dye powder with acrylic mediums?
Yes, you can physically stir Venus dye powder into clear acrylic mediums, gloss gels, or matte varnishes. However, doing so changes how the medium behaves; the mixture will dry with a plastic-like, water-resistant finish characteristic of acrylics, completely losing the fluid, re-wettable, and highly transparent qualities of a true watercolor-style wash.
Why does my mixed color look different after it dries?
This color shift happens because wet paper and liquid water refract light differently than dry paper fibers. When wet, the dye appears darker and more saturated. As the water evaporates, the light reflects differently off the dry dye and paper, making the final color look lighter and softer, which is why preliminary swatching is so important.

Community discussion
Share your experience or ask a question. Comments are reviewed before publication.