
Working with natural fibers brings a unique, organic texture to paper crafts that synthetic materials cannot replicate. Abaca fiber, harvested from the leaf sheaths of the Musa textilis plant (a close relative of the banana family native to the Philippines), is highly prized in the stationery and paper-crafting world for its incredible tensile strength, distinct luster, and versatility. Whether you are looking to create custom greeting cards, add dimension to scrapbook layouts, or embed raw textures into handmade paper pulp, learning how to handle this resilient material is an excellent way to elevate your creative projects.
For beginners, the prospect of handling raw, hair-like plant fibers can feel intimidating. Unlike standard paper sheets, abaca fiber requires a bit of preparation, conditioning, and specialized handling to ensure it behaves exactly how you want it to on the page. By understanding its physical properties, gathering the right tools, and practicing basic separation and adhesive techniques, you can easily integrate this beautiful natural resource into your home or classroom craft sessions.
Understanding Abaca Fiber for Paper Crafts
Before you begin crafting, it is helpful to understand what makes abaca fiber unique compared to other common craft fibers like jute, sisal, or cotton. In its raw form, abaca fiber resembles long, lustrous bundles of coarse hair, ranging in color from pale cream and golden tan to deep brown. When you touch a raw bundle, you will notice a distinct natural sheen and a slightly rough, textured feel. Despite its delicate, thread-like appearance, abaca is incredibly strong; in fact, it is historically famous for its use in marine cordage because of its resistance to water damage and its exceptional tensile strength.
Products mentioned in this guide
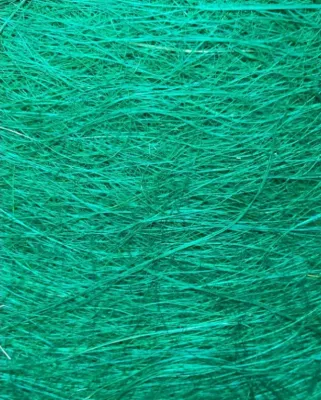
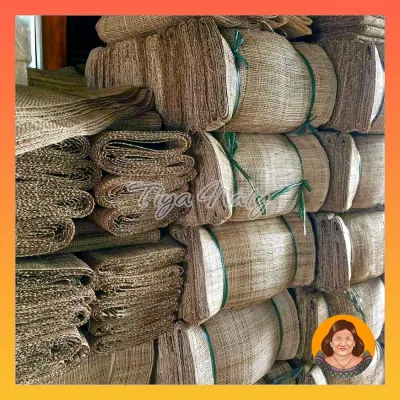
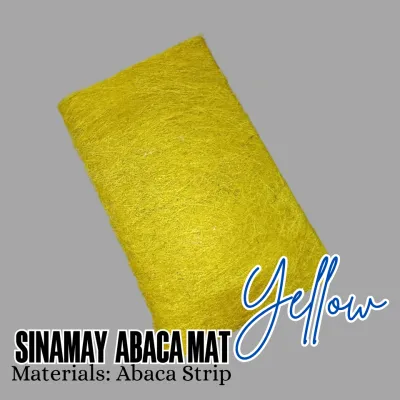
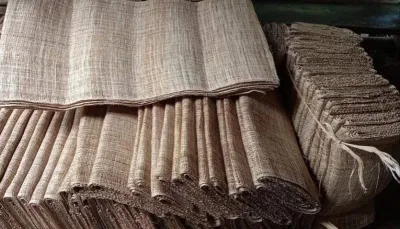
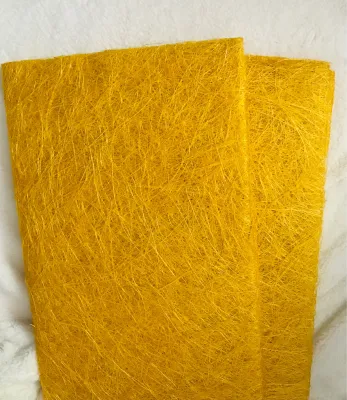
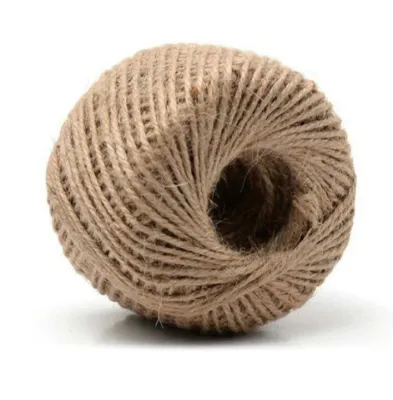
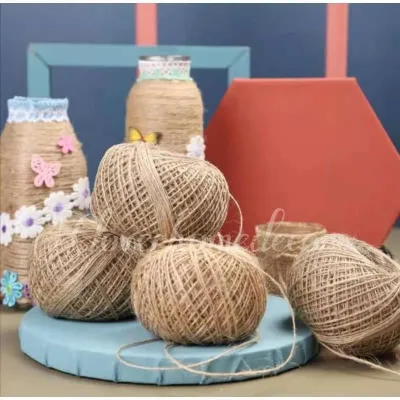
Prices are valid at publication and may change. Please refer to the product page for the latest price.
When compared to other natural fibers, abaca stands out for its length and flexibility. Jute fibers tend to be much coarser, darker, and stiffer, making them less suitable for delicate paper layering. Cotton fibers are soft and short, which is excellent for smooth paper pulp but lacks the dramatic, linear texture that abaca strands provide. Abaca fibers do not easily dissolve or tear when wet, which means they maintain their structural integrity even when embedded in wet paper pulp or heavy liquid adhesives.
For beginner-level paper projects, selecting the right grade of abaca is crucial for a frustration-free experience. Look for pre-cleaned, light-colored, medium-grade abaca fiber bundles or loose “tow” fibers at your local stationery store. These starter packs, often priced around ₱150 to ₱350 depending on the quantity, are already stripped of heavy plant bark and washed, saving you hours of preparation. Avoid purchasing industrial-grade raw abaca, which is extremely stiff, dirty, and requires boiling in alkaline solutions before it can be used for delicate paper crafts.
Essential Tools and Materials for Working with Abaca
Working with abaca does not require expensive machinery, but having the correct manual tools on hand will make the preparation process much smoother. First and foremost, you will need a pair of exceptionally sharp craft scissors. Because abaca fibers are incredibly tough, dull blades will slide off the strands, causing them to bend, fray, and tangle rather than cut cleanly. A pair of fine-tipped tweezers is also invaluable for picking up, separating, and placing individual fiber strands onto your paper base without getting adhesive on your fingers.

Selecting the right adhesive is another critical decision that affects the final look and durability of your craft. Because natural plant fibers are highly porous, they absorb liquids quickly. Standard school glues can sometimes soak through the fiber too rapidly, causing the paper base to warp or leaving shiny, stiff plastic residues when dry. Instead, look for pH-neutral, acid-free polyvinyl acetate (PVA) glue or methyl cellulose. Check the product label to ensure it is rated for porous materials and natural fibers. These adhesives dry clear, remain flexible, and help preserve the natural color of the abaca without causing yellowing over time.
Finally, prepare your workspace to handle the unique mess that natural fibers can create. Teasing and cutting abaca will release fine dust and tiny, loose fiber fragments. Work on a clean, flat table lined with a silicone craft mat or a sheet of wax paper; this prevents stray glue from bonding your project to the table. Keep a small bowl of clean water and a hand towel nearby. Dampening your fingertips slightly can help eliminate static electricity, making it much easier to control flyaway fibers as you arrange them on your paper.
Step-by-Step Preparation of Abaca Fiber
Properly preparing your abaca fiber before applying it to your paper project ensures a clean, professional finish. Start by gently untying your fiber bundle and shaking it out over a waste bin to release any loose dust or tiny plant fragments. Lay the bundle flat on your clean workspace and inspect it visually. Look for any remaining bits of dark outer bark or hard, knotted sections. Use your sharp craft scissors to carefully snip these imperfections away, keeping as much of the long, clean fiber intact as possible.
Once cleaned, you will need to separate the dense bundle into workable, thin strands. Hold a small section of the bundle firmly in one hand, about midway down the length. Using your other hand, gently tease the fibers apart starting from the very tips and working your way slowly up to your grip. You can use your fingers for a rustic look, or use a clean, wide-tooth comb to achieve ultra-fine, hair-like strands. Avoid pulling too hard or jerking the fibers, as this can cause them to snap and create uneven, frizzy clumps.
If your abaca fiber feels particularly stiff or brittle—which often happens in air-conditioned rooms or dry climates—you can condition it to increase its pliability. Lightly mist the separated fibers with clean water using a fine spray bottle. Do not soak them; a very light dampness is all that is required to make the cellulose walls relax. Let the fibers sit for a minute or two to absorb the moisture. You will notice they immediately become softer, draping gracefully and conforming much better to the curves and folds of your paper projects. Always check any specific preparation instructions provided by your craft pack manufacturer, as some specialty dyed fibers may require dry handling to prevent color bleeding.
Basic Techniques for Incorporating Abaca into Paper Crafts
Once your abaca fibers are cleaned, separated, and conditioned, you can begin incorporating them into your paper designs. One of the most popular methods for beginners is layering and embedding. If you are making handmade paper from scratch, you can stir short, cut pieces of abaca fiber directly into your paper pulp slurry just before dipping your mold and deckle. The abaca fibers will interlock with the paper pulp, creating a beautiful, translucent sheet with high tear resistance. For cardmaking or scrapbooking, you can achieve a similar look by applying a thin, even layer of diluted PVA glue to your cardstock, arranging your teased abaca strands on top, and gently brushing a second layer of diluted glue over the fibers to seal them flat.
Another excellent technique for beginners is simple weaving or framing. You can create a rustic, textured grid pattern by crossing individual abaca strands over one another on a flat paper surface, securing the intersections with a tiny dot of glue applied with a toothpick. Alternatively, try creating a natural frame for a photograph or a hand-written quote. Gather a small bundle of prepared abaca fibers, wrap them loosely around the edges of your paper project, and secure the corners with a decorative knot or a dab of adhesive. This adds a striking three-dimensional border that instantly draws the eye.
Regardless of the technique you choose, securing the fibers properly requires patience and attention to drying times. Because abaca is highly porous, the drying speed and final water resistance of your project will depend heavily on the specific combination of paper, fiber density, and adhesive you use. Always perform a quick trial on a scrap piece of paper first to observe how the glue dries and whether the paper warps. Press the fibers firmly into the adhesive using a clean bone folder or a dry sponge, and allow the project to dry completely in a well-ventilated area. Depending on local humidity levels, this can take anywhere from one to four hours. Avoid using heat guns or hair dryers, as rapid, uneven drying can cause the paper base to buckle.
Troubleshooting Common Beginner Mistakes
It is completely normal to encounter a few minor setbacks when working with a raw natural material like abaca for the first time. One of the most common issues is excessive fraying, tangling, or snapping during the teasing process. If you find the fibers are breaking easily, check the sharpness of your scissors and ensure you are not pulling too aggressively. If the fibers feel dry and brittle, a very light mist of water will instantly restore their elasticity. Remember to work in small, gradual steps rather than trying to separate a large bundle all at once.
Another frequent mistake is adhesive seepage, which leaves shiny, stiff spots or visible glue marks on your finished project. If you notice glue pooling around the fibers, you are likely using too much adhesive or applying it too thickly. To correct this, dilute your PVA glue with a few drops of water to create a thinner consistency, and apply it using a stiff-bristled brush. If a shiny spot does appear, try gently dabbing the wet glue with a clean, damp cotton swab to remove the excess before it cures. For dried glue marks, a light rub with a clean white eraser can sometimes reduce the shine, though prevention is always the best approach.
Finally, learn to recognize when a section of fiber is too compromised to save. If you have applied too much water or glue, the abaca fibers can become overly saturated, losing their natural luster and turning into a mushy, clumped mass. If this occurs, do not try to force the fibers back into shape. Stop working on that section, blot the area gently with a dry paper towel, and let it dry completely. Once dry, you can carefully snip away the ruined section with your sharp scissors and replace it with fresh, dry strands, blending the new ends into the existing design for a seamless repair.
Frequently Asked Questions (FAQ)
How should I store leftover abaca fiber to keep it usable?
To keep your unused abaca fiber in pristine condition for future paper crafts, store it in a cool, dry place away from direct sunlight. Prolonged exposure to UV rays can bleach the natural colors and weaken the fibers, making them brittle and prone to snapping. Avoid storing your fiber bundles in airtight plastic bags, especially in warm, humid climates, as any trapped moisture can quickly lead to mold, mildew, or a musty odor. Instead, wrap the bundles loosely in acid-free tissue paper or place them inside a breathable cotton drawstring bag. Before reusing your stored fiber, always inspect the bundle for any signs of moisture accumulation or pests.
Can I dye or paint abaca fiber before using it in paper crafts?
Yes, raw abaca fiber is highly receptive to coloring because of its porous, cellulose-based structure. You can easily dye the fibers using water-based fabric dyes, liquid watercolors, or highly diluted acrylic paints. Before starting, check the label of your coloring medium to ensure it is compatible with natural plant fibers. It is highly recommended to perform a quick test on a small, hidden scrap of fiber first. This allows you to observe how the fiber absorbs the pigment, how much the color bleeds, and how the texture behaves once dry. After dyeing, spread the fibers out flat on a non-stick surface, such as a silicone mat or plastic sheet, and let them dry completely before incorporating them into your paper projects.
Community discussion
Share your experience or ask a question. Comments are reviewed before publication.