
Designing custom transparent stickers is a fantastic way to create a sleek, modern look for packaging, water bottles, or laptop decals, but it often comes with a frustrating challenge: when printed, your vibrant digital designs can turn out looking faint, washed-out, or nearly invisible. To ensure your colors show up clearly and remain vibrant on clear sticker material, you must prepare your digital artwork with a dedicated white ink underbase layer that acts as a solid foundation beneath your colored inks. This simple step prevents light from passing through the translucent inks, preserving the contrast and saturation of your design regardless of the surface color it is applied to.
When you print on standard white sticker paper, the white background naturally reflects light back through the ink, making the colors appear bright and true to your screen. Clear vinyl or polyester (PET) sheets do not have this built-in reflective backing. Without proper file preparation, your custom stickers will lose their visual impact the moment they are peeled off their backing paper and applied to a dark or patterned surface.
Why Do Colors Look Faded on Clear Sticker Material?
Colors look faded on clear sticker material because standard printer inks are naturally translucent, allowing light to pass directly through them and reveal whatever surface lies beneath. Without a solid white background to reflect light, the printed colors lose their contrast and saturation. This physical limitation is inherent to the way standard commercial printing processes work on transparent substrates.
Products mentioned in this guide
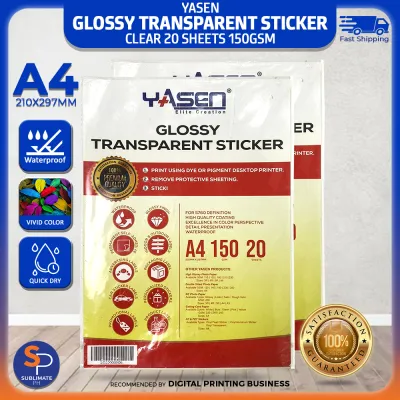
706 Lazada user ratings
Clear and glossy stickers!, Stays in place without peeling off., Design: GREAT Ease of Use: EASY 🔨Durability: DURABLE 🛡️Safety: SAFE Adhesive…Read full reviewShow less
Clear and glossy stickers!, Stays in place without peeling off., Design: GREAT Ease of Use: EASY 🔨Durability: DURABLE 🛡️Safety: SAFE Adhesiveness: STICKY Variety: MORE VARIETY 🌈 Variety: YES
High-quality vinyl material., Perfect for crafts and DIY projects!, FAST SHIPPING AND SECURED PACKAGING. HIGH QUALITY STICKERS.
Excellent value for money., Perfect for crafts and DIY projects!, FAST SHIPPING AND SECURED PACKAGING. HIGH QUALITY STICKERS.
maayos po Ang packaging no damage and complete order thank you po seller sa uulitin po salamat po
High-quality vinyl material., Stays in place without peeling off.,
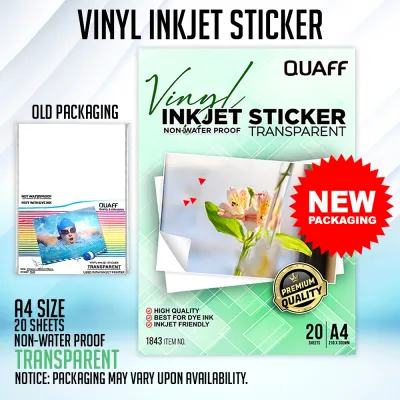
2,237 Lazada user ratings
Bought this to print labels for my wedding giveaways. It is definitely compatible with our inkjet printer and the print came out really well…Read full reviewShow less
Bought this to print labels for my wedding giveaways. It is definitely compatible with our inkjet printer and the print came out really well. The sticker paper is also thick and of good quality, it render vibrant colors that is perfect for crafting projects Will definitely purchase again purchase again for my other projects.
• Sobrang secure ng pag pack nila. Yung tipong ayaw magpabukas. Walang gusot. • Dumating earlier than ETA (Mindanao). • Good quality. • Affo…Read full reviewShow less
• Sobrang secure ng pag pack nila. Yung tipong ayaw magpabukas. Walang gusot. • Dumating earlier than ETA (Mindanao). • Good quality. • Affordable.
I got all of my orders safe and sound. No damages occured. Excellent quality. Will order again soon. Thank you.
Professional-looking results, Perfect for crafting projects, Value for money, Clear and vibrant prints.
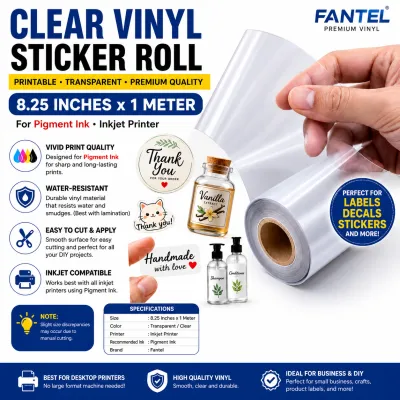
Prices are valid at publication and may change. Please refer to the product page for the latest price.
Commercial digital printers typically use CMYK (Cyan, Magenta, Yellow, and Key/Black) inks. These inks are formulated to be semi-transparent so they can blend together on a white surface to produce a full spectrum of colors. When you apply these translucent inks directly onto a clear vinyl sheet, there is no white surface to bounce light back to your eyes. Instead, the light passes straight through the ink and the sticker, making the colors look like a faint stain rather than a solid, solid graphic.
Furthermore, the color of the object where you place the sticker will drastically alter how your design looks. If you stick a transparent decal with yellow and light blue elements onto a black laptop or a dark green water bottle, the dark background absorbs the light, making your design virtually disappear. If placed on a busy, patterned surface, the pattern will show through the ink, distorting your artwork and making text unreadable.
What Is a White Ink Underbase and Why Is It Necessary?
A white ink underbase is a solid layer of opaque white ink printed directly onto the clear vinyl before the colored inks are applied on top. This white layer serves as a localized, artificial background that blocks light transmission and preserves the true colors of your design. It acts as a barrier between the transparent sticker material and the surface underneath.

During the printing process, specialized industrial printers lay down this opaque white ink first, cure it—often using UV light or heat depending on whether they use UV-curable or eco-solvent inks—and then print the CMYK design directly over it. Because the colored inks are printed on top of a solid white foundation, they retain their intended brightness, contrast, and color accuracy. This process ensures that a bright red or a soft pastel pink looks exactly as you designed it, no matter where the sticker is placed.
Using a white underbase is also essential for readability. If your sticker contains small text, fine lines, or intricate details, printing them without a white backing makes them incredibly difficult to see against anything other than a plain white surface. A white underbase provides the necessary contrast to make your text and design elements pop, giving your custom transparent stickers a professional, high-quality finish.
How Do You Set Up Design Layers for White Ink Printing?
To set up design layers for white ink printing, you must create a separate, dedicated layer or spot color channel in vector design software like Adobe Illustrator or CorelDRAW. This layer must contain a vector shape matching your design, filled with a specific spot color that is clearly named so the printer’s software recognizes it as white ink. This digital setup tells the printer’s Raster Image Processor (RIP) exactly where to lay down the white ink.
First, open your artwork in your vector design software and create a new layer. It is highly recommended to use vector paths for this process because they provide clean, sharp edges that prevent the white ink from bleeding past your colored design. Name this new layer “White Underbase” or follow the specific naming guidelines provided by your chosen print shop.
Next, you need to create a custom spot color swatch. In your color palette, create a new swatch and change the color type from “Process Color” to “Spot Color.” Name this swatch exactly as required by your printer; common industry standards include “White,” “Hwhite,” “Spot_White,” or “RDG_WHITE.” To make this spot color visible to you while designing on a white digital canvas, set its visual representation to a highly visible, contrasting color like 100% Magenta or a bright neon green. This color is purely a placeholder for your screen; the printer will read the spot color designation and load actual white ink.
Once your spot color is ready, copy the vector elements of your design that require a white backing, paste them onto your dedicated white ink layer, and fill them with your new spot color. Ensure this layer is perfectly aligned with your CMYK artwork. Depending on your print shop’s workflow, you may need to place the white layer directly underneath your color layer, or place it on top and set the fill to “Overprint Fill” in the Attributes panel. Overprinting prevents the printer from knocking out the background, ensuring both the white ink and CMYK inks print in the exact same spot.
Which Parts of Your Design Actually Need a White Underbase?
Deciding which parts of your design need a white underbase depends on whether you want a fully opaque sticker, selective transparency, or a stained-glass effect. You can apply white ink to the entire design, restrict it to specific elements, or omit it entirely to let light filter through the colors. Understanding these options allows you to use transparency as an active design element.
- Full Underbase: This option applies white ink behind the entire silhouette of your artwork. The printed portion of your sticker becomes completely opaque, while the surrounding border remains clear. This is the most common choice for logos, illustrations, and labels where you want the entire design to look solid and stand out sharply against any background.
- Selective Underbase: With this method, you only place white ink behind specific elements of your design, such as text, central characters, or key graphics. Other colored elements are printed directly onto the clear vinyl without a white backing. This creates a striking visual contrast where some parts of your sticker are solid and opaque, while others remain semi-transparent and let the background show through.
- No Underbase (Translucent Effect): If you intentionally omit the white underbase entirely, the CMYK inks are printed directly onto the clear material. This creates a beautiful, translucent "stained-glass" effect. It is highly effective for window decals, suncatchers, or glass jar labels where you want light to pass through the colored inks, giving them a glowing, luminous quality.
What File Formats and Export Settings Do Print Shops Require?
Print shops typically require layered vector files saved in PDF, AI, or EPS formats to ensure the white ink paths and cut lines remain perfectly sharp. Your artwork should be set to the CMYK color mode, while the white underbase and cut lines must be designated as distinct spot colors. Providing the correct file format prevents production delays and printing errors.
When exporting your file, always ensure your color mode is set to CMYK rather than RGB. RGB is designed for digital screens, whereas commercial printers use physical CMYK inks. Designing or exporting in RGB can cause unexpected color shifts, particularly with bright greens, pinks, and blues, which may look duller when converted to CMYK for printing.
Additionally, your file must include necessary production marks if you want a clean finish. If your design extends to the very edge of the sticker, include a bleed area of at least 1.5mm to 3mm to prevent thin, unprinted clear gaps along the edges due to minor shifting during the cutting process. Create a separate layer for your cut line—often named “CutContour” or “DieCut”—using another distinct spot color. Keep all critical text and design elements within a safe zone, at least 1.5mm inside the cut line, to ensure they are not clipped during finishing.
How Can You Proof Your Artwork Before Sending It to Print?
You can proof your artwork by creating a digital mockup with a dark or patterned background layer placed underneath your design to simulate how the clear and opaque areas will look in real life. Toggling the visibility of your white ink layer on and off will help you verify that the underbase aligns perfectly with your colored elements. This step is crucial for catching alignment errors before your file goes to production.
When reviewing your digital proof, zoom in closely to check for a common issue known as “halos.” If the white underbase is exactly the same size as your colored artwork, a tiny registration shift during printing can cause a thin white border to peek out from behind your design. To prevent this, you should “choke” or “trap” your white underbase. This means scaling down the white vector shape slightly—usually by 0.1mm to 0.2mm—so it sits comfortably inside the boundaries of your colored artwork, remaining completely hidden.
Pay close attention to enclosed shapes and letters, such as the counters inside the letters ‘O’, ‘A’, or ‘e’. Ensure that the white underbase is correctly removed from these areas if you want them to remain completely transparent. If you leave the white spot color inside these loops, they will print solid white instead of showing the clear vinyl.
Finally, evaluate whether to request a physical or digital press proof from your printer. If you are placing a large order, testing a new material combination, or using a complex selective underbase, a physical proof is highly recommended. This allows you to verify the actual ink drying speed, check for color bleed, and test the sticker’s water resistance and adhesion on your intended surface before committing to a full production run.
Community discussion
Share your experience or ask a question. Comments are reviewed before publication.