
Restoring a faded cap is a highly satisfying project that can breathe new life into your favorite headwear. When the painted logo, design, or lettering on your cap begins to fade, crack, or peel, you do not have to discard the entire hat. Successful cap paint restoration depends on selecting compatible paint formulas, preparing the fabric surface thoroughly, and applying the color in controlled layers that preserve the fabric’s natural flexibility.
By following a structured process, you can achieve a professional-looking, durable finish that resists cracking and washing. Taking the time to understand your cap’s materials and the unique demands of fabric paint will ensure your restored design looks vibrant and lasts for years to come.
Assessing Your Cap and Choosing the Right Paint
Before purchasing any restoration supplies, you must evaluate the fabric composition of your cap. Caps are commonly constructed from cotton, canvas, polyester, or synthetic blends. The weave density of these materials directly dictates how they absorb liquid and paint. Cotton and canvas feature relatively open, absorbent fibers that readily drink in liquid pigments, whereas polyester and synthetic blends have tightly packed, slick fibers that resist moisture. Understanding this difference helps you anticipate how the paint will behave during application.
Products mentioned in this guide
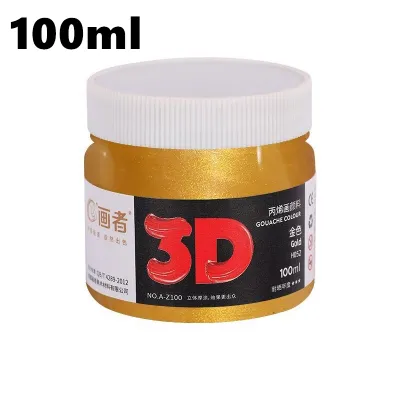
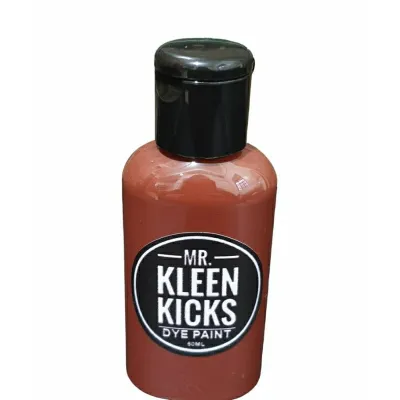
Prices are valid at publication and may change. Please refer to the product page for the latest price.
To determine the best approach, examine the interior care label of your cap for its precise material composition. This tag also provides crucial safety information regarding heat restrictions, which will dictate how you set the paint later. If the care label is missing or illegible, you must proceed with caution, particularly when applying heat. Keep in mind that material names on tags are for identification purposes only; you must always cross-reference the cap’s fabric type with the compatibility guidelines printed on the paint manufacturer’s label.
Choosing the correct medium is the most critical decision in the restoration process. You have three primary options: dedicated fabric paints, fabric markers, or standard acrylic paints combined with a textile medium. Dedicated fabric paints are formulated with flexible acrylic polymers that bond directly with porous fibers, keeping the fabric soft. Fabric markers offer excellent control for fine lines and detailed outlines, making them ideal for small touch-ups.
If you prefer to use standard acrylic paints, you must mix them with a high-quality textile medium. This medium thins the acrylic pigment and alters its chemical structure, preventing it from drying into a stiff, brittle plastic shell that will inevitably crack when the cap is worn.
Essential Tools and Materials for Cap Paint Restoration
Having the correct tools on hand ensures a smooth restoration process and prevents accidental damage to the surrounding fabric. Prepare your workspace with a complete set of supplies before opening any paint containers.

For the paint and mixing phase, obtain your chosen dedicated fabric paint or a high-quality textile medium to mix with standard acrylics. These materials are widely available in local arts and crafts shops across a broad price range, typically starting from a few hundred pesos (₱) for basic kits. If you are mixing your own, keep a small, clean plastic palette or cup nearby to achieve the correct ratio.
Your application tools should include a variety of fine-tip synthetic paintbrushes for detailed linework and small stippling sponges for filling in larger, textured areas. You will also need high-quality masking tape or painter’s tape to shield unpainted areas of the cap and establish clean, sharp design borders. To keep the front panel of the cap taut and prevent paint from bleeding through to the interior sweatband, prepare a rigid cardboard or plastic insert shaped to fit the inside of the crown.
For the cleaning and preparation phase, gather a mild laundry detergent or specialized fabric cleaner, a soft-bristled brush (such as an old toothbrush), and rubbing alcohol. The rubbing alcohol is exceptionally useful for spot-cleaning oily residues or grease deposits that may have accumulated on the painted design from handling.
Step-by-Step Guide to Restoring Faded Cap Paint
Restoring the design on your cap requires a systematic approach to prevent the fabric from stiffening or losing its shape. The restoration process is divided into three critical phases: preparing the fabric surface, applying the paint in thin, controlled layers, and managing the drying environment. Skipping or rushing any of these phases can result in poor paint adhesion, uneven color, or premature peeling.
Step 1: Surface Preparation and Cleaning
The foundation of any successful paint restoration is a clean, residue-free surface. Over time, caps accumulate sweat, body oils, dust, and environmental grime, all of which create a microscopic barrier that prevents paint from bonding to the fibers. Gently spot-clean the faded painted area using a soft-bristled brush and a small amount of mild detergent mixed with water. Strictly avoid using fabric softeners or heavy detergents, as these leave behind a slick chemical residue that actively repels fabric paint.
Once the spot-cleaning is complete, rinse the area thoroughly with a damp cloth to remove all soap residue. Allow the cap to dry completely in a well-ventilated space before applying any paint, as moisture trapped within the fibers will dilute the paint and cause it to bleed outside the design lines.
Before you begin painting, insert your pre-cut cardboard or plastic shield inside the cap’s crown. Push the insert firmly against the front panel to stretch the fabric slightly, creating a smooth, taut, and stable working surface. This insert also acts as a physical barrier, ensuring that no paint bleeds through the fabric to stain the inner sweatband or the opposite side of the cap.
Step 2: Paint Application Techniques
With the cap prepared and stabilized, you can begin the painting process. If your design requires sharp, clean edges or if you are restoring a specific geometric logo, apply masking tape carefully along the borders of the design. Press the edges of the tape down firmly using your fingernail to prevent paint from seeping underneath.
The golden rule of fabric painting is to apply the paint in multiple thin, even layers rather than one thick coat. Thick coats of paint sit on top of the fabric fibers instead of soaking in, which leads to a stiff, rubbery texture that will crack as soon as the cap flexes. Thin layers allow the paint to integrate with the weave, preserving the natural flexibility of the fabric.
Your brush technique should match the texture of the cap’s material. For heavily textured fabrics like canvas or coarse cotton, use a stippling or dabbing motion with a small sponge or a stiff brush to force the pigment into the crevices of the weave. For tight, smooth weaves like polyester blends, use light, directional strokes with a fine-tip synthetic brush to ensure even coverage.
Allow each thin layer to dry to the touch before applying the next. This layer-by-layer approach builds up the color’s opacity gradually, preventing the fabric from becoming oversaturated with moisture, which can distort the structured panels of the cap.
Step 3: Drying and Curing in Humid Conditions
Managing the drying environment is particularly important when working in tropical climates, such as in the Philippines, where high humidity can significantly delay drying times. Air-dry your cap in a well-ventilated, shaded indoor area or a covered outdoor space. Avoid placing the cap in direct sunlight during the drying phase, as intense UV rays can cause the wet paint to dry unevenly or cause the surrounding unpainted fabric to fade prematurely.
In highly humid conditions, the moisture in the air slows down the evaporation process required for the paint to cure. You must extend the initial air-drying time to at least 24 hours, or until the painted surface is completely dry and cool to the touch. Do not attempt to heat-set the design if the paint still feels tacky or damp.
To accelerate the drying process safely without exposing the cap to premature heat, place an electric fan nearby to improve air circulation around the workspace. The continuous airflow helps carry away evaporating moisture, ensuring the paint cures evenly across the entire surface of the design.
Heat-Setting the Paint for Long-Lasting Results
Heat-setting is the chemical process that permanently bonds the fabric paint polymers to the textile fibers, making the restored design resistant to water and wear. Before applying any heat, verify that the cap’s material can safely withstand elevated temperatures. Avoid high-heat methods on caps featuring synthetic brims, internal plastic structural elements, or heat-sensitive polyester fabrics, as these materials can melt, warp, or discolor under direct heat.
If your cap is made of heat-tolerant cotton or canvas, you can use a household dry iron to set the paint. Turn off the steam function completely, as moisture from steam will rehydrate the uncured paint and ruin the design. Set the iron to the temperature recommended on the cap’s care label. Place a thin, clean cotton cloth or a sheet of parchment paper directly over the painted design to act as a protective barrier. This barrier prevents the paint from transferring to the soleplate of your iron and protects the fabric from direct scorching.
Press the iron firmly over the protective cloth, holding it in place for the duration specified by the paint manufacturer’s instructions. Keep the iron moving slowly in small, continuous circles rather than leaving it stationary in one spot, which distributes the heat evenly and prevents localized scorching.
For caps with structural plastic inserts, synthetic blends, or curved crowns that make ironing difficult, use a hair dryer as an alternative heat-setting method. Set the hair dryer to its high-heat setting and hold it approximately six inches away from the painted design. Direct the hot air over the painted area for several minutes, monitoring the fabric’s temperature closely with your hand to ensure it does not become hot enough to melt or warp. This method requires a longer application time than an iron but offers a much safer alternative for delicate headwear.
Common Mistakes and When to Stop
Avoiding common pitfalls will save you from permanently ruining a cherished cap. The most frequent mistake is using standard acrylic paint directly from the tube without mixing it with a textile medium. Standard acrylic dries into a rigid, non-porous plastic layer that cannot stretch with the fabric, leading to rapid cracking and peeling after just a few wears.
Another common error is over-wetting the fabric during the cleaning or painting phases. Excess water causes the paint pigments to bleed past your masked boundaries, creating blurry, feather-like edges. Furthermore, oversaturating the stiff buckram panels that give structured caps their shape can cause them to collapse, permanently ruining the cap’s silhouette.
You must know when to stop and abandon the DIY approach to prevent total destruction of the item. If you notice the fabric beginning to shrink, warp, or emit a faint burning smell during the heat-setting phase, stop applying heat immediately. Additionally, if the paint continuously beads up on the surface during application and refuses to adhere despite thorough cleaning, the fabric may have been treated with a durable water-repellent coating. In such cases, consult a professional restorer or consider replacing the cap rather than risking further damage.
Frequently Asked Questions (FAQ)
Can I use regular acrylic paint on a cap?
Regular acrylic paint should not be used on a cap without a textile medium. Standard acrylic dries into a stiff, rigid plastic film that lacks flexibility. Because caps naturally bend and stretch when worn, un-modified acrylic paint will quickly crack, flake, and peel off. Mixing the acrylic paint with a dedicated textile medium in the ratio recommended by the manufacturer alters the paint’s chemistry, allowing it to remain flexible, durable, and washable once bonded to the fibers.
How do I wash a restored cap without ruining the new paint?
To preserve the restored paint, always hand-wash the cap in cold water using a mild laundry detergent. Avoid harsh scrubbing brushes or abrasive sponges directly on the painted design; instead, gently wipe the area with a soft microfiber cloth. Never place the restored cap in a washing machine or a mechanical tumble dryer, as the intense agitation and high heat can degrade the paint bond. Always allow the cap to air-dry completely in a shaded, well-ventilated area.
Community discussion
Share your experience or ask a question. Comments are reviewed before publication.