
Sewing a custom A5 notebook cover is a rewarding project that combines utility with personal style. Whether you want to protect a cherished journal, organize your daily planner, or create a thoughtful handmade gift, a fabric cover offers both physical protection and a comfortable grip. By crafting your own cover, you can select fabrics that match your aesthetic, add functional elements like pen loops, and ensure a tailored fit for your favorite stationery.
This beginner-friendly guide walks you through the entire process, from selecting the right materials to executing clean, durable seams. You do not need advanced sewing skills or specialized machinery to complete this project; a basic sewing machine or even a steady hand-sewing technique is entirely sufficient. With a few simple measurements and some careful cutting, you can transform basic fabric remnants into a beautiful, functional accessory that safeguards your thoughts and sketches.
Essential Tools and Materials for Your A5 Cover
Selecting the right fabric is the foundation of a durable notebook cover. For the outer shell, medium-weight woven fabrics such as cotton canvas, linen, or structured quilting cotton are excellent choices. In the warm and humid climate of the Philippines, natural fibers are highly recommended because they breathe well and do not trap moisture against your paper pages, preventing musty odors or warped sheets. For the inner lining, a lighter-weight quilting cotton is highly suitable, as it keeps the overall cover from becoming too bulky at the seams while still providing a clean, polished interior. You can easily find these materials at local craft stores, with basic cotton fabric scraps often costing under ₱100.
Products mentioned in this guide
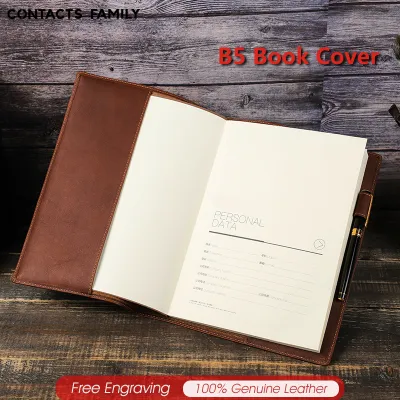
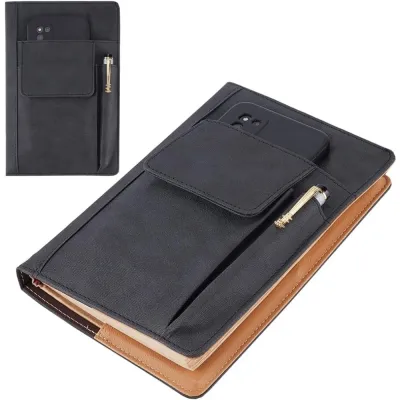
Prices are valid at publication and may change. Please refer to the product page for the latest price.
To give your cover a professional, crisp structure, you will need fusible interfacing. Interfacing acts as a stabilizing layer that is ironed onto the wrong side of your outer fabric, preventing the cover from sagging or losing its shape over time. A medium-weight fusible non-woven interfacing is generally ideal for this project. If you prefer a softer, more cushioned feel, you can opt for fusible fleece instead, which adds a slight loft and extra protection for your notebook.
Gathering the correct sewing tools before you begin will ensure a smooth crafting experience. You will need a pair of sharp fabric shears to make clean cuts without fraying the edges of your material. For assembly, keep a supply of sewing pins or fabric clips nearby to hold the layers in place. If you are using a sewing machine, a standard universal needle (size 80/12 or 90/14) is suitable for medium-weight fabrics, along with a spool of matching polyester or cotton thread. Always handle sharp pins, needles, and cutting tools with care, keeping them securely stored in a pincushion or safety case when not in use.
Taking Accurate Measurements for an A5 Notebook
While standard A5 notebooks share the same general footprint of 148 mm by 210 mm, their actual dimensions can vary significantly based on page count, paper thickness, and binding style. A thick, hardbound journal requires a much wider cover than a slim, staple-bound notebook. To ensure a snug fit that does not warp your notebook or strain the fabric seams, you must take custom measurements of the specific book you plan to cover.

To calculate the required fabric dimensions, start by measuring the height of your notebook from the top edge to the bottom edge. Add 2.5 centimeters to this measurement to account for a 1.25-centimeter seam allowance on both the top and bottom edges, plus a tiny bit of ease so the notebook can slide in easily. For example, if your notebook is 21 centimeters tall, your final fabric cutting height will be 23.5 centimeters.
Next, determine the total width of the fabric by wrapping a flexible measuring tape around the closed notebook. Measure from the outer edge of the front cover, across the spine, to the outer edge of the back cover. Note this total wrap-around measurement. To this number, you must add the depth of the two inner slip pockets, which hold the notebook covers in place. A secure pocket depth is typically about 2/3 of the width of a single cover, which translates to roughly 8 to 10 centimeters per pocket. Finally, add 2.5 centimeters for the seam allowances on the left and right outer edges. The formula for your total cutting width is: Total Wrap-Around Width + (2 x Pocket Depth) + 2.5 centimeters.
If your notebook features built-in accessories like an elastic closure band, a thick ribbon marker, or a pen loop, add an extra 5 millimeters of ease to the total width to accommodate the bulk. If you plan to sew your own elastic closure band into the cover, cut a piece of flat elastic slightly shorter than the height of your notebook and sandwich it into the seams during assembly.
Step-by-Step Sewing Instructions
Begin by preparing your fabric pieces according to your calculated measurements. Cut one main outer fabric piece, one main lining fabric piece, and one piece of fusible interfacing to the exact dimensions of your main body pattern. Next, cut two pieces for the inner pockets. The height of the pocket pieces should match the height of your main body pieces, while the width should be double your desired pocket depth plus seam allowances, allowing you to fold them in half for a clean, finished edge.
Once your pieces are cut, apply the fusible interfacing to the wrong side of your outer fabric. Place the adhesive side of the interfacing against the back of the outer fabric, and press with a hot iron. In humid environments, ensure your iron is set to the appropriate heat level for your fabric type to achieve a strong, permanent bond without scorching. This step is crucial, as the interfacing provides the structural integrity that keeps your cover looking crisp.
To construct the inner pockets, fold each pocket piece in half widthwise with the wrong sides together, and press the fold flat. This folded edge will be the opening of the pocket where the notebook cover slides in. For a clean, decorative finish, topstitch along this folded edge about 3 millimeters from the crease. If you wish to add a pen loop, fold a small strip of fabric or elastic into a loop, place it on the right side of the outer fabric piece facing inward, and baste it in place along the side edge.
Now, lay your interfaced outer fabric piece right side up on your work surface. Place the prepared pocket pieces on top of the outer fabric, aligning the raw outer edges of the pockets with the left and right raw edges of the outer fabric. The finished, folded edges of the pockets should face toward the center. Next, place the lining fabric piece right side down over the entire assembly, creating a sandwich where the pockets are enclosed between the outer and lining fabrics. Pin or clip all the layers securely.
Stitch around the entire outer edge of the fabric sandwich using a 1.25-centimeter seam allowance. Start along the bottom edge, sew around the corners, and stop a few centimeters before your starting point to leave an opening of about 5 to 8 centimeters. This gap is essential for turning the cover right side out. When sewing the corners, leave the needle down in the fabric, lift the presser foot, pivot the fabric 90 degrees, and continue sewing to ensure sharp corners. Once stitched, clip the corners diagonally close to the seam line to reduce bulk, making sure not to cut through your stitches.
Finishing Touches and Fit Verification
Carefully reach through the turning gap you left along the bottom edge and pull the entire cover right-side out. Gently push the corners out using a blunt tool, such as a wooden chopstick or a specialized point turner, to achieve sharp, square corners without puncturing the fabric. Once the cover is turned, roll the seams between your fingers to fully extend them, and press the entire cover flat with an iron. Fold the raw edges of the turning gap inward so they align neatly with the rest of the stitched seam.
To close the turning gap, you can hand-sew it using a ladder stitch for a nearly invisible finish. Alternatively, you can topstitch around the entire perimeter of the cover, about 3 millimeters from the edge. This topstitching not only closes the gap securely but also flattens the edges and gives the notebook cover a highly polished, professional appearance. Give the completed cover one final press with the iron to set all the seams.
Now it is time to verify the fit of your new cover. Gently bend the front cover of your A5 notebook backward and slide it into the front pocket, then repeat the process for the back cover. Close the notebook to check how the cover behaves. The notebook should close flat without bowing the pages or straining the fabric seams. The pockets should hold the notebook securely without allowing it to slide out when handled.
If the cover is too tight and prevents the notebook from closing properly, the ease allowed in your initial measurements was too small. You can remedy this on your next project by adding a few extra millimeters to the width. If the cover is slightly too loose, a quick line of stitching placed further inward along the outer edges can help tighten the fit.
Frequently Asked Questions (FAQ)
Can I adapt this method for other notebook sizes like B6 or A6?
Yes, this sewing method is highly adaptable for other sizes like B6 or A6. Simply apply the same measurement formulas using the dimensions of your target notebook. Measure the height and the total wrap-around width of the closed book, then add your seam allowances and pocket depths. Keep in mind that smaller notebooks like A6 require shallower pockets (around 5 to 6 centimeters) to remain functional, while larger formats like B5 benefit from deeper pockets to ensure the cover stays securely in place.
How do I clean a fabric notebook cover without ruining its shape?
Cleaning your fabric notebook cover requires care to preserve its structure and prevent the interfacing from warping. If you used fusible interfacing, machine washing or soaking the cover in hot water can dissolve the adhesive, leading to bubbling or wrinkling. For optimal results, spot-clean any dirt or stains using a damp cloth, cool water, and a mild detergent. If the cover requires a complete wash, gently hand-wash it in cool water without wringing. Reshape the cover while it is still damp, lay it flat on a clean towel, and air-dry it away from direct sunlight to prevent fading. Once dry, a quick press with a warm iron will restore its crisp shape.
Community discussion
Share your experience or ask a question. Comments are reviewed before publication.