
Incorporating three-dimensional paper quilling into your scrapbooks and journals is an excellent way to add texture, depth, and personalized artistry to your memory keeping. Unlike flat stickers or stamped designs, quilled paper elements raise off the page, catching the light and drawing attention to cherished photographs, hand-written entries, and creative layouts. To begin, you only need a few basic tools, some pre-cut paper strips, and a reliable adhesive. By mastering a handful of simple rolling and pinching techniques, you can create intricate floral borders, elegant monograms, and custom accents that elevate your paper crafts.
Because journals and scrapbooks are meant to be handled, turned, and closed, integrating 3D paper art requires a thoughtful approach to scale, paper weight, and preservation. In tropical climates like the Philippines, high humidity can soften paper fibers and prolong glue drying times, making material selection and proper technique even more critical. With the right preparation, your delicate paper coils will remain secure, vibrant, and beautifully intact for years to come.
Essential Tools and Materials for Paper Quilling
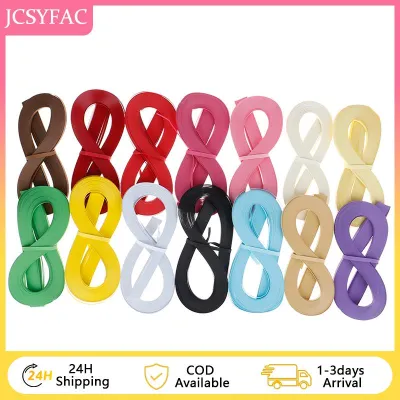
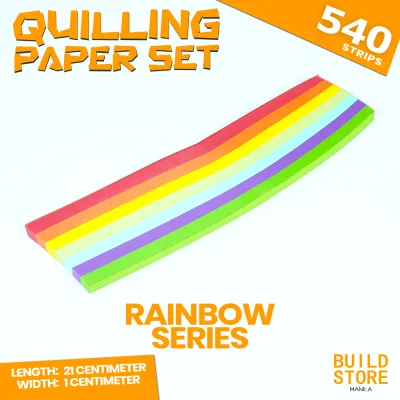
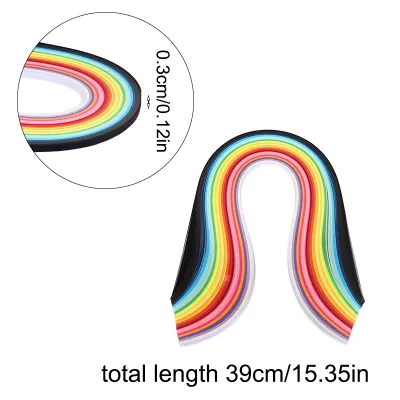
Selecting the right paper strip width is the first step in ensuring your quilled designs fit harmoniously within a closed book. For standard journal pages and scrapbook layouts, strips with a width of 3 millimeters are highly recommended. This size provides enough depth to create a noticeable three-dimensional effect without adding excessive bulk that would prevent your book from closing flat. While wider strips like 5 millimeters are excellent for scrapbook covers, they can easily crush or warp when placed inside a frequently handled journal.
Products mentioned in this guide

![[COD] WHPHous Ship within 24 hours 120Pcs/set Paper Quilling Strips Set 5mm 53cm Paper For Craft DIY Quilling Tool](https://img.lazcdn.com/g/p/f2d7140c6489a7965130b71424421ac9.jpg_400x400q80.jpg_.webp)

Prices are valid at publication and may change. Please refer to the product page for the latest price.
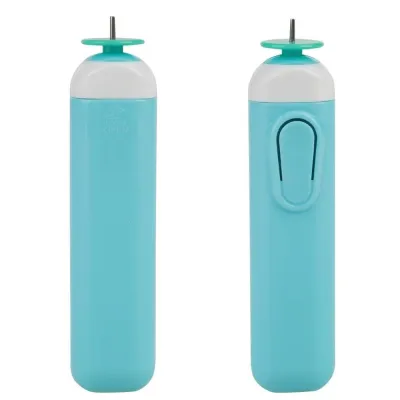
To roll these paper strips efficiently, you will need to choose between a slotted quilling tool and a needle tool. A slotted tool features a small metal tip with a fine slit down the center, which securely grips the end of the paper strip as you turn the handle. This tool is incredibly user-friendly and perfect for beginners who are still developing their finger dexterity. A needle tool consists of a smooth, solid metal rod. Rolling paper around a needle requires more practice, but it eliminates the tiny crimp that a slotted tool leaves in the center of the coil, resulting in a much tighter and cleaner finish.
The choice of adhesive is critical when working with delicate paper structures, especially in warm, humid environments. A high-quality white polyvinyl acetate (PVA) glue or a specialized papercraft glue that dries completely clear and matte is essential. The adhesive must have a low water content to prevent the paper strips from absorbing moisture, which causes them to soften, lose their tension, or warp. Using a fine-tip applicator bottle or applying the glue with a wooden toothpick allows you to place microscopic dots exactly where needed, keeping your work clean and free of shiny residue.
Before you begin gluing designs directly onto your pages, verify the weight of your journal paper to ensure compatibility. Standard notebook pages around 80 grams per square meter (gsm) are often too thin and flexible to support the weight and tension of quilled elements, which can cause the pages to sag or tear. For the best results, look for journals with paper weights of 120 gsm or higher, or create your quilled designs on sturdy cardstock sheets of 200 gsm or more. Once the quilled art is fully assembled and dry, you can safely paste the cardstock backing onto your scrapbook page.
Basic Quilling Techniques for Beginners
Mastering the foundational shapes of paper quilling starts with learning how to control paper tension while rolling tight and loose coils. To create a tight coil, insert the end of a paper strip into the slot of your tool and turn it steadily, keeping the edges of the strip perfectly aligned. Maintain a firm but gentle grip on the paper with your non-dominant hand to ensure the coil remains compact. Once you reach the end of the strip, apply a tiny dot of glue to the loose end and hold it in place for a few seconds. These dense, solid circles are excellent for making flower centers, berries, or structural anchors.

A loose coil begins exactly like a tight coil, but instead of gluing the end immediately, you gently slide the rolled paper off the tool and allow it to expand. Placing the coil inside a plastic circle template or onto a flat, smooth surface lets it unfurl naturally to a specific diameter. Once the coil has expanded to your desired size, use a toothpick to apply a small dab of glue to the outer tail and press it against the outer ring. Loose coils serve as the starting point for almost all pinched shapes, making consistent expansion crucial for uniform designs.
Transforming loose coils into expressive shapes requires precise pinching techniques using your fingertips. To create a classic teardrop shape, hold a loose coil between your thumb and index finger of one hand, and use your other hand to pinch one side of the coil to a sharp point. If you pinch the coil on two opposite sides simultaneously, you will produce an eye-shaped marquise, which is the standard shape for leaves and petals. For geometric layouts, you can pinch four equidistant points around the coil to form a neat square or diamond, adjusting the internal paper spirals to distribute the tension evenly.
Managing your glue application during the shaping process is vital to prevent messy edges and stiff, distorted joints. When securing the ends of your coils or joining multiple shapes together, always use the absolute minimum amount of adhesive. Excess liquid glue will seep out from under the paper edges, creating unsightly shiny patches on your scrapbook page and causing the delicate paper layers to stick to your fingers. If you accidentally apply too much glue, gently dab the area with a clean, dry cotton swab before the adhesive begins to set.
To achieve a professional look in your scrapbooks, practice shape uniformity and size matching before assembling larger composite motifs. When creating a five-petal flower, for example, all five teardrop shapes should be rolled from strips of identical length and allowed to expand to the exact same diameter in your circle template. Rolling and pinching a test batch of shapes on a separate crafting mat allows you to compare their sizes and adjust your tension. This preparation ensures that your final assembled designs look balanced, symmetrical, and neatly integrated into your journal layouts.
Simple Quilled Designs for Scrapbooks and Journals
Small floral motifs, leaves, and winding vines are among the most versatile and beginner-friendly designs to incorporate into your journal pages. You can easily construct a simple flower by arranging five or six teardrop-shaped petals in a circle, pointing the sharp tips inward toward a small, contrasting tight coil center. To frame a favorite photograph or accent a journal entry, arrange several marquise-shaped leaves along a gently curved paper strip to mimic a delicate vine. These organic shapes can be placed in the corners of your pages or run along the margins to create elegant, hand-crafted borders.
Designing monograms or initial letters is another highly effective way to personalize journal covers, title pages, or section dividers. Start by lightly tracing the outline of your chosen letter onto your page with a pencil. Next, cut a strip of quilling paper to the length of the letter’s outline, apply a thin line of glue along one edge of the strip, and carefully press it vertically onto the pencil line to create a raised border. Once this outline is dry and secure, you can fill the interior of the letter with a vibrant mix of tight coils, loose scrolls, and tiny pinched shapes to create a stunning mosaic effect.
When planning your layouts, always adapt the scale of your quilled elements to ensure they enhance the page without overwhelming your writing space. Because quilling is highly visual and tactile, a few well-placed accents often carry more aesthetic weight than a large, dense design. Keep your quilled clusters confined to the outer margins, headers, or footers of your pages, leaving the central areas flat and unobstructed for journaling, photos, or sketches. This balanced distribution of space keeps your book highly functional while still showcasing your paper artistry.
Color coordination plays a significant role in making your quilled designs feel like an organic part of your scrapbook themes. If you are working on a vintage-themed page with sepia photos and tea-stained paper, choose quilling strips in warm cream, soft kraft, and muted pastel tones. For modern, energetic layouts, opt for bright primary colors or gradient strips that transition smoothly from light to dark shades. Matching the colors of your paper coils to the existing ink palettes, patterned papers, and stamps on your page creates a cohesive, professionally designed appearance.
How to Attach and Preserve 3D Quilled Elements
Securing fragile 3D paper art to your journal pages requires a delicate touch and the correct adhesive technique to prevent page buckling. Instead of applying glue directly to the page, use a toothpick to dab tiny, precise dots of clear-drying PVA glue onto the underside edges of your quilled design. Carefully lower the assembled piece onto the page using tweezers, which give you better visibility and control than your fingers. Press down very gently on the top edges of the paper strips for a few seconds to ensure the adhesive makes full contact with the base page without flattening the coils.
Allowing adequate drying time is essential, especially in humid tropical climates where adhesives set more slowly. Once your quilled design is glued down, leave the journal open on a flat surface in a well-ventilated room for at least several hours, or ideally overnight. To ensure the elements dry perfectly flat and secure, you can place a sheet of non-stick wax paper or parchment paper directly over the design, then rest a lightweight book on top. The wax paper prevents any stray glue from sticking to the weight, while the gentle pressure keeps the paper edges flush with the page.
To adapt highly dimensional elements for a closed book, you must take steps to protect them from being crushed by the weight of adjacent pages. Stick to narrow 3mm paper strips for any designs placed deep within the pages of a journal, as this height is low enough to withstand moderate pressure. If you want to use wider strips or highly raised designs, consider placing them on the front cover of your journal or scrapbook instead. Alternatively, you can build a protective border around your quilled art using thick foam adhesive tape, which lifts the opposing page slightly and prevents it from pressing directly onto the paper coils.
Proper storage is the final key to preserving your delicate quilled structures over time. Always store your completed journals, scrapbooks, and photo albums flat on a shelf rather than standing them upright, as vertical storage can cause the pages to sag and put uneven pressure on the 3D elements. Avoid stacking multiple heavy books or storage boxes directly on top of your journals, as prolonged heavy compression will eventually flatten the paper coils and ruin their dimensional quality. Keeping your books in a cool, dry place away from direct sunlight will also prevent the paper colors from fading and preserve the strength of the adhesive.
Common Mistakes and How to Avoid Them
One of the most common challenges for beginners is preventing paper fraying and visible glue residue, which can look particularly messy on dark scrapbook paper. Fraying typically occurs when you use dull scissors to cut your strips or when you pull the paper too quickly off a slotted tool. Always use sharp, fine-tipped craft scissors and slide your completed coils off the tool with a gentle, twisting motion. To eliminate shiny glue smudges, switch to a matte-drying adhesive and use a micro-applicator or a pin to apply the glue, ensuring that no excess liquid squeezes out when the coil is pressed down.
Fixing uneven coil sizes and securing loose ends are essential skills for maintaining the structural integrity of your designs. If your coils are expanding unevenly, it is usually a sign of inconsistent tension during the rolling process; try to maintain a steady, even pressure from start to finish. If a loose end unrolls after you have glued it, the adhesive may have dried too quickly or you may not have held it in place long enough. Simply apply a tiny fresh dab of glue to the loose tail using a toothpick, press it firmly against the coil, and hold it for a full ten seconds to ensure a permanent bond.
Page buckling and wrinkling are almost always caused by applying too much liquid glue to thin journal pages. If you notice the paper beneath your quilled design beginning to ripple or wave, you are using far too much adhesive. To prevent this, always apply glue sparingly and consider upgrading to a heavier page weight or mounting your designs on cardstock first. If a page does begin to buckle, do not attempt to flatten it while the glue is wet, as this can smear the adhesive and ruin the design; instead, let it dry completely before placing it under a light weight.
Knowing when to restart a compromised shape rather than attempting to patch or hide imperfections will save you time and frustration. If a paper coil becomes completely saturated with glue, gets crushed during the pinching process, or unravels beyond repair, it is best to discard the strip and start fresh. Trying to salvage a damaged shape often results in a messy, distorted final product that detracts from the overall beauty of your layout. Since quilling paper is highly affordable and abundant, taking a moment to roll a clean, new shape will always yield a superior and more satisfying result.
Frequently Asked Questions (FAQ)
Can I use regular printer paper instead of pre-cut quilling paper?
Yes, you can use regular printer paper, but there are several structural differences to keep in mind. Standard printer paper is typically around 80 gsm, which is slightly thinner and less flexible than dedicated quilling paper, making it more prone to creasing and tearing when rolled tightly. To use it, you must cut the paper into perfectly uniform strips using a paper trimmer and a metal ruler, as any variation in width will make your coils look uneven. When rolling printer paper, use a slightly lighter tension to accommodate its stiffer grain, and be prepared for the finished shapes to have a slightly different texture and springiness compared to professional quilling strips.
How do I keep my quilled designs flat in a closed journal?
To keep your quilled designs from being crushed in a closed journal, focus on reducing their vertical height and protecting them from direct pressure. Use narrow 3mm paper strips for all internal page designs, and gently press down on your completed coils with a flat acrylic block before gluing them to ensure they are perfectly level. When storing your journal, place a sheet of smooth parchment paper or a thin piece of cardstock between the pages containing the quilled art to act as an interleaving protective barrier. This prevents the raised paper edges from catching on, indenting, or sticking to the opposite page when the book is closed and stored flat.
Community discussion
Share your experience or ask a question. Comments are reviewed before publication.