
Transforming a standard Bath & Body Works paper bag into an elegant, boutique-style gift presentation is an effortless way to show extra care. While these iconic bags—featuring their signature blue-and-white gingham or vibrant seasonal prints—are already eye-catching, adding coordinated ribbons and bows elevates them into a truly polished gift. By understanding how to work with the bag’s structure, selecting the right decorative materials, and applying clean styling techniques, you can create a memorable presentation that looks professionally wrapped.
Achieving this polished look requires a balance between aesthetics and structural support. Because paper bags can bend or tear under uneven tension, the styling process must be tailored to the bag’s specific dimensions and weight capacity. Whether you are gifting a single hand cream or a heavy three-wick candle, this guide will walk you through the essential steps to decorate your paper bag securely and beautifully.
Assessing Your Bag and Gift Dimensions
Before cutting your ribbons or applying adhesives, it is essential to evaluate the physical limits of your paper bag. Bath & Body Works bags generally come in three primary sizes: small (ideal for hand sanitizers and lip balms), medium (perfect for body lotions and fine fragrance mists), and large (designed for multiple items or heavy candles). Each size has a specific paper weight and handle construction that dictates how much extra decoration it can support.
Products mentioned in this guide
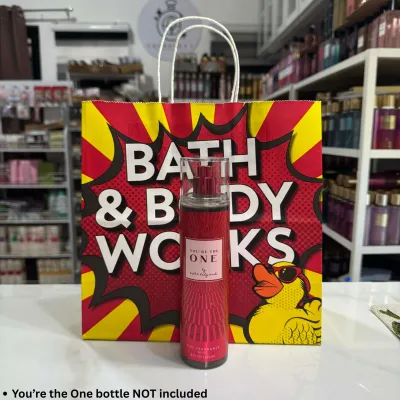
![Bath and Body Works Paperbag [4 pieces of paperbags] (XS for 1 to 2 bottles) 17.8cmx8.9cmx21.6cm](https://img.lazcdn.com/g/p/952c7daa5ae8ea276c879079d03a79ee.jpg_400x400q80.jpg_.webp)
![BATH & BODY WORKS GIFT PAPER BAG 100% ORIGINAL (Imported from the USA]](https://img.lazcdn.com/g/ff/kf/Sd5f831bea3f4476b967821d3edd88bbfg.jpg_400x400q80.jpg_.webp)

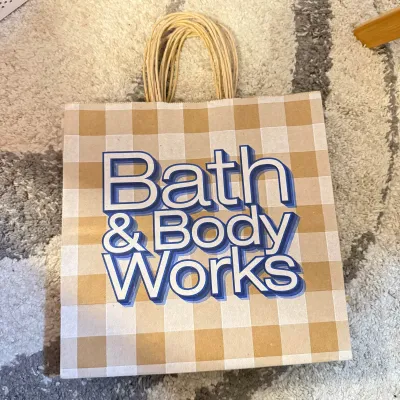
Prices are valid at publication and may change. Please refer to the product page for the latest price.
In tropical climates like the Philippines, environmental factors such as high humidity can soften paper fibers over time. This makes the bag more susceptible to creasing or tearing under tension. Inspect the twisted paper handles to ensure they are securely glued to the inside of the bag. If you plan to wrap or pull on these handles, verify that the paper around the attachment points is crisp and undamaged.
Next, measure the bag’s dimensions to calculate the exact amount of ribbon you will need. To wrap a ribbon band horizontally around the center of the bag, measure the width and depth, then use this simple formula: multiply the sum of the width and depth by two, and add 30 centimeters to allow for overlapping and securing. For handle wrapping, a good rule of thumb is to cut a ribbon length that is approximately four times the length of the handle itself to ensure complete coverage without running short.
Finally, consider the weight of the gift inside the bag. Heavy items, such as glass candle jars or multiple full-sized shower gels, change how the bag sits and moves. If the bottom of the bag sags, horizontal ribbons wrapped around the body may slip or buckle. Always place the gift inside the bag first to observe how the paper behaves under load before finalizing your ribbon placement.
Choosing the Right Ribbons and Bows
Selecting the right ribbon involves matching the material’s texture, color, and width to the design of the paper bag. Because Bath & Body Works bags often feature busy patterns, your ribbon choice should complement rather than compete with the existing artwork. Choosing high-quality materials ensures the final presentation looks intentional and refined.

Ribbon texture plays a significant role in both appearance and usability. Consider these common options:
- Satin Ribbon: Offers a smooth, glossy finish that reflects light beautifully. It adds an instant touch of luxury but can be slippery to tie, requiring tight knots or adhesive assistance.
- Grosgrain Ribbon: Features a distinct ribbed texture that provides excellent grip. This texture makes it highly resistant to slipping, which is particularly useful in humid conditions where satin might lose its tension.
- Organza Ribbon: A sheer, lightweight fabric that adds a delicate, airy layer. It works exceptionally well when layered over a solid ribbon or used on smaller, delicate bags.
- Wired Ribbon: Contains thin wires along the edges, allowing you to shape and sculpt voluminous bows that hold their form during transport.
Color coordination is key to a cohesive look. For the classic blue-and-white gingham bag, a solid white, navy blue, or contrasting red ribbon creates a clean, traditional aesthetic. If you are styling a seasonal holiday bag with multi-colored illustrations, select one dominant accent color from the print and match your ribbon to that specific shade. A monochromatic palette—using different shades of the same color—offers a modern, sophisticated alternative.
Ribbon width should always be proportional to the size of the bag. For small bags, stick to narrow ribbons between 1.2 and 2.5 centimeters wide to avoid overwhelming the presentation. Medium bags pair well with ribbons measuring 2.5 to 4 centimeters. For large candle bags, bold ribbons of 5 centimeters or wider create a striking visual balance and provide the necessary scale for a grand presentation.
Step-by-Step Styling Techniques
Once you have selected your materials, you can apply various styling techniques to secure the ribbons and bows to the paper bag. These methods range from simple handle enhancements to full-body wraps.
Handle Wrapping
Wrapping the twisted paper handles with ribbon adds a soft, premium texture and reinforces the grip. This technique works best with satin or grosgrain ribbons that are 1.5 to 2.5 centimeters wide.
- Apply a small piece of high-tack double-sided tape to the inner base of one handle, right where it meets the paper bag.
- Press the end of the ribbon firmly onto the tape at a slight angle.
- Begin wrapping the ribbon tightly around the handle in a spiral pattern, ensuring each turn overlaps the previous one by about one-third of the ribbon's width. Keep the tension consistent to prevent slipping.
- Once you reach the opposite end of the handle, apply another small piece of double-sided tape to the inner base, press the ribbon down, and trim the excess cleanly with sharp scissors.
- Repeat the process for the second handle.
Bag Body Banding
Creating a horizontal or vertical band around the body of the bag provides an excellent anchor for a central bow and breaks up the bag’s printed pattern with a clean block of color.
- Place the bag flat on a clean, dry surface with the gift removed to prevent uneven tension.
- Run a strip of high-quality double-sided tape horizontally across the front panel of the bag, keeping it perfectly parallel to the bottom edge. For a cleaner look that allows ribbon reuse, you can apply the tape only to the side creases and the back seam instead of the front panel.
- Press the center of your ribbon onto the tape on the front panel, smoothing it outward toward the sides to eliminate air bubbles or wrinkles.
- Wrap the ribbon ends around to the back of the bag. Pull the ribbon taut, overlap the ends by at least two centimeters, and secure them with another piece of tape. Fold the raw edge of the top overlapping ribbon under by half a centimeter before taping to create a seamless, professional finish.
Bow Attachment
An elegant bow serves as the focal point of your gift presentation. You can tie a bow directly onto the handles or attach a pre-made bow to the body band.
- The Handle Tie: Thread a length of ribbon through both handles and tie a classic bow at the center. This not only decorates the bag but also keeps the top closed, keeping the contents private.
- The Adhesive Bow: Tie a perfect bow separately using a structured multi-loop technique. Apply a strong glue dot or a piece of heavy-duty double-sided tape to the back of the bow's center knot, then press it firmly onto the intersection of your body band or at the base of one handle.
Adding Finishing Touches for a Polished Look
To elevate your styled bag from a simple DIY project to a professional-grade gift presentation, pay close attention to the final details. Small refinements can make a significant difference in how the recipient perceives the gift.
First, address the ribbon tails. Raw ribbon ends fray easily, which quickly ruins the polished look. Use a pair of sharp fabric scissors to cut the ends of your ribbon tails. You can make a clean diagonal cut at a 45-degree angle, or fold the ribbon tail in half vertically and cut upward at an angle toward the outer edge to create a classic V-notch (also known as a chevron cut). This simple step prevents fraying and adds a tailored finish.
Next, consider incorporating lightweight, natural accents to complement the ribbon. Tucking a small, personalized gift tag, a sprig of dried local flora, or a piece of preserved greenery into the knot of the bow adds organic texture and depth. Ensure these additions are lightweight so they do not weigh down the bow or cause the paper bag to sag.
Finally, perform a structural and visual check. Place the fully styled bag on a flat surface and step back to examine it from all angles. Ensure the bag stands upright without tipping forward or backward. Check that all adhesive points are completely hidden beneath the ribbon and that no sticky residue is exposed. If any part of the ribbon looks loose, gently adjust the tension or add a small glue dot to secure it in place, ensuring the presentation remains intact during transport.
Frequently Asked Questions (FAQ)
How do I prevent the ribbon from slipping off glossy paper bags?
Glossy or laminated paper bags have a smooth surface that offers very little friction, causing ribbons to slide out of place easily. To prevent this, use high-adhesion double-sided tape or specialized craft glue dots designed for non-porous surfaces. Before applying the adhesive to the front of the bag, always perform a quick test on an inconspicuous area, such as the inside fold of the bottom flap. This ensures the adhesive bonds securely without dissolving the printed ink or tearing the glossy coating if you need to reposition the ribbon.
Can I reuse the ribbons and bows after the gift is opened?
Yes, you can easily design your styling so that the ribbons and bows are reusable. To do this, avoid applying permanent adhesives directly to the ribbon fabric. Instead, use mechanical fastening methods, such as tying the ribbon directly around the handles or wrapping it around the bag body and securing the overlapping ends to each other rather than to the paper itself. Opting for high-quality wired ribbons or thick grosgrain ribbons is also beneficial, as these materials hold their shape well and can be easily smoothed out and stored for future gift-giving occasions.
Community discussion
Share your experience or ask a question. Comments are reviewed before publication.