
Starting your scrapbooking journey opens up a world of precise, beautiful designs that elevate any journal layout, card, or memory book. At the heart of modern paper crafting is the die-cutting process, which uses a metal template—known as a die—to press and shear paper into intricate shapes. If you are using scrapbooking dies for the first time, the process might seem intimidating with its talk of “sandwiches,” cutting plates, and high-pressure rollers. However, mastering this technique is straightforward once you understand how your machine applies pressure and how to layer your materials safely.
To achieve clean, crisp edges without damaging your delicate dies or your machine, you must learn the precise physical coordination of the die-cutting sandwich. In tropical environments like the Philippines, where seasonal humidity can soften paper fibers and affect how cleanly a die cuts, understanding these variables is even more critical. By learning how to configure your plates, secure your paper, and troubleshoot common pressure issues, you can confidently create professional-grade cutouts for your craft projects.
What You Need to Start Die-Cutting
Before you run your first piece of paper through a machine, you must gather the correct suite of tools. Having the right equipment ensures that you do not accidentally damage your materials or strain your machine’s internal gears. Here are the essential components you need to begin:
Products mentioned in this guide
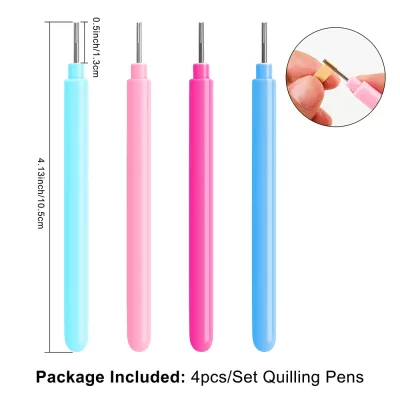
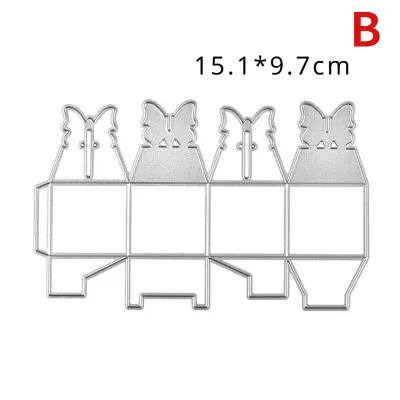

Prices are valid at publication and may change. Please refer to the product page for the latest price.
- A Die-Cutting Machine: This is the primary tool that provides the mechanical pressure needed to cut through paper. You can use either a manual hand-crank machine or an electronic model. Manual machines are highly popular for beginners due to their tactile feedback, allowing you to feel the resistance as the plates pass through the rollers.
- Thin Metal Scrapbooking Dies: Often called chemically etched dies, these are lightweight, flat metal shapes with a slightly raised cutting edge on one side. They come in thousands of designs, from basic geometric frames to highly intricate floral patterns and alphabets.
- Standard Cutting Pads: These are clear, thick acrylic plates that act as the outer layers of your cutting stack. The die's cutting edge will bite directly into one of these pads, which is normal and expected; over time, these pads will show deep scratches and cut marks.
- Cardstock or Patterned Paper: This is your medium. For beginners, a medium-weight cardstock (around 160 to 220 gsm) is highly recommended. It has enough structural integrity to release cleanly from the die without tearing easily.
- Low-Tack Adhesive: A roll of low-tack washi tape or painter's tape is indispensable. This is used to temporarily secure the metal die to your paper so it does not shift out of alignment under the pressure of the rollers.
Before assembling these tools, always locate and review your machine manufacturer’s official compatibility chart and instruction manual. Different brands design their rollers with varying clearance heights, meaning the thickness of the acrylic plates and platforms is highly brand-specific. Using incorrect plates, adding too many layers, or forcing an incompatible plate combination through the rollers can crack your cutting pads, strip the machine’s internal gears, or void your warranty.
Mastering the Die-Cutting "Sandwich" Layering
The term “sandwich” refers to the specific stack of plates, pads, paper, and dies that you feed through the die-cutting machine. Because the rollers inside the machine are fixed at a set height, you must build a stack that matches this height perfectly to generate the exact amount of pressure required to force the steel edge of the die through the paper fibers.

While the exact terminology and thickness of the plates vary by manufacturer, a standard manual die-cutting sandwich generally follows this sequence from bottom to top:
- The Base Platform: This is the thickest plastic foundation piece that comes with your machine. It provides the bulk of the height needed to reach the rollers.
- The Bottom Cutting Pad: This is one of your clear acrylic plates. It sits directly on top of the base platform to provide a smooth, rigid surface.
- The Paper or Cardstock: Place your chosen paper face-up on top of the bottom cutting pad.
- The Metal Die: Position the die on top of the paper with the sharp, raised cutting edge facing downward against the paper.
- The Top Cutting Pad: Place the second clear acrylic plate over the back of the die to complete the stack.
When you run this sandwich through the machine, the rollers press down on the top and bottom cutting pads. This forces the downward-facing metal edge of the die through the paper, pressing it into the bottom cutting pad.
It is vital to recognize that plate systems are not universal. Some manufacturers label their plates with letters (such as Plate A, Plate B, and Plate C), while others use numbers or color-coded systems. For example, cutting a thin metal die might require a different combination of adapters than cutting a thick steel-rule die or using an embossing folder. Never guess the order of your sandwich. Always verify your specific machine’s manual to ensure your stack height matches the requirements of your specific die type.
Step-by-Step Guide to Your First Clean Cut
Once you have gathered your tools and understood the theory behind the sandwich, you are ready to perform your first cut. Follow this systematic, step-by-step guide to ensure a clean result and protect your equipment.
Step 1: Prep the Machine and Paper
Begin by preparing a clean, flat, and stable workspace. Place your manual or electronic die-cutting machine on a level surface where it will not slip or rock during operation. Clear the feed path entirely, ensuring there are no stray pens, embellishments, or tools behind or in front of the rollers that could obstruct the plates as they exit.
Next, select your paper. If you are crafting in a highly humid environment, such as during the wet season in the Philippines, you may notice that paper absorbs ambient moisture, making it slightly soft and limp. To counteract this, store your cardstock in airtight plastic bins before use, or select a crisp, medium-weight cardstock that resists tearing. Cut your paper so that it is slightly larger than the outer dimensions of your metal die. This border provides a buffer zone, making it easier to handle the paper and preventing the sharp outer edges of the metal die from making direct, unbuffered contact with the edges of your acrylic cutting pads.
Step 2: Assemble the Sandwich
Lay your base platform down on your work surface. Place the first clear cutting pad on top of the platform. Next, lay your paper down on the pad, ensuring it is flat and free of wrinkles. Position your thin metal die on top of the paper with the cutting side facing down.
To prevent the die from shifting as it enters the high-pressure rollers, tear off a small piece of low-tack washi tape. Gently press the tape across the back of the metal die and onto the surrounding paper. This step is particularly important when you are trying to align a die over a specific printed image or sentiment on your paper. Once the die is secured, place the second clear cutting pad directly over the top. Double-check the edges of your sandwich to make sure no loose paper scraps, stray tape, or fingers are trapped between the plates.
Step 3: Run the Sandwich Through the Machine
Align the assembled sandwich with the opening of the die-cutting machine. Gently push the stack forward until it meets the internal rollers. If you are using a manual machine, begin turning the hand crank slowly and smoothly in a forward direction. The rollers should grab the plates and draw the sandwich through the machine.
As you operate the machine, safety must be your primary focus. Keep your fingers, loose clothing, and hair well clear of the intake rollers at all times. You will feel a natural resistance as the die passes under the rollers; this is the pressure required to cut the paper. However, if you encounter extreme physical resistance, hear loud cracking sounds (beyond the normal light popping of acrylic plates), or notice unusual grinding noises, stop turning the crank immediately. Do not force the plates through. Reverse the crank to back the sandwich out of the machine. Forcing an overly thick sandwich can permanently warp your plates, bend the metal die, or strip the internal plastic or metal gears of your machine.
Step 4: Reveal and Inspect the Cut
Once the sandwich has passed completely through the other side of the machine, place the stack on your flat work table. Carefully lift off the top cutting pad. Gently peel back the low-tack washi tape, taking care not to tear the surface of your freshly cut paper.
Slowly lift the metal die away from the paper. Be mindful of the edges of the die, as some thin metal dies can have sharp points or corners. Inspect the cut shape. If the die-cut shape does not immediately fall away or release cleanly from the sheet, do not pull or force it, as this can tear delicate, intricate details. Instead, check if the paper fibers have been cut all the way through. If some sections are still attached, you may need to place the die back in position and run it through the machine a second time, or apply a troubleshooting technique to increase the pressure slightly.
Troubleshooting Incomplete Cuts and Jams
Even with careful preparation, beginners frequently encounter minor cutting issues. Understanding how to diagnose and fix these problems will save you from wasting expensive specialty papers and protect your equipment from mechanical failure.
The most common issue is an incomplete cut, where certain areas of the design—usually in the center of the die—fail to cut through the paper completely. This occurs because cutting pads naturally bow or warp slightly over time, leading to uneven pressure distribution across the plate. To resolve this, you can add a “shim.” A shim is simply a thin sheet of standard copy paper or cardstock placed underneath your bottom cutting pad or between the base platform and the bottom pad to add a fraction of a millimeter of height. This extra layer increases the overall pressure just enough to push the die through the paper. However, you must exercise extreme caution: never add multiple thick shims at once. Over-shimming creates excessive pressure that can easily crack your acrylic cutting pads, bend your metal dies, or snap the internal drive shaft of your machine. If the sandwich feels too tight to roll through with moderate hand pressure, remove the shim immediately.
If you experience paper tearing or fuzzy, frayed edges on your cutouts, the culprit is often a combination of factors. Dull dies that have lost their sharpness over many uses, using paper with an unsuitable grain direction, or using deeply grooved, worn-out cutting pads can all cause tearing. In highly humid conditions, paper fibers absorb moisture, making them less brittle and harder to shear cleanly. If you suspect humidity is the issue, try using a drier, high-density cardstock, or run a sheet of wax paper between your die and your cardstock. The wax coating acts as a dry lubricant, helping the intricate paper pieces release cleanly from the metal crevices.
To prevent your clear acrylic cutting pads from warping prematurely, establish a habit of rotating and flipping them. Do not always place your dies in the exact center of the pads, and do not always run the pads through in the same direction. Flip the pads over like a pancake after every few passes, and alternate which pad sits on the bottom and which sits on the top. This simple rotation ensures even wear and significantly extends the lifespan of your plates. For persistent mechanical issues, such as a slipping crank or uneven roller pressure, always consult your machine’s official troubleshooting guide or contact the manufacturer’s customer service rather than attempting to dismantle the gear housing yourself.
How to Clean and Store Your Dies for Longevity
High-quality metal scrapbooking dies are an investment, and proper maintenance is key to ensuring they continue to deliver crisp, precise cuts for years to come. Every time you cut an intricate design, tiny paper fibers, dust, and negative paper scraps can become tightly wedged inside the small crevices of the die. If left uncleaned, these compacted fibers will prevent the die from cutting deeply enough on subsequent passes.
To clean your dies safely, use a specialized die-cleaning brush or a clean, soft-bristled toothbrush. Gently brush the back and front of the die over a trash bin to dislodge any stuck paper pieces. Many intricate dies feature small release holes on the back; you can use a paper piercer, a fine needle, or a weeding tool to gently poke through these holes and push out stubborn paper scraps.
When it comes to storage, keep your dies flat to prevent bending or warping. Excellent storage options include:
- Magnetic Sheets: Store your dies on flexible magnetic sheets kept inside clear plastic envelopes or three-ring binders. This keeps the dies flat, organized, and easily visible.
- Original Packaging: Keeping dies in their original plastic pockets with the cardboard backing sheet is a reliable way to preserve product information and keep them flat.
- Specialized Storage Binders: Many craft brands offer zippered binders equipped with magnetic pages designed specifically for die organization.
Never use harsh chemical cleaners, liquid solvents, or water to clean your metal dies. Exposing these tools to moisture can quickly lead to rust, which ruins the sharp cutting edges and can stain your expensive craft papers. Additionally, moisture can degrade the adhesive backing on any magnetic storage sheets or foam inserts attached to your dies. Always store your dies in a cool, dry place away from direct sunlight and high humidity to preserve their structural integrity.
Frequently Asked Questions (FAQ)
Can I use thin metal scrapbooking dies without a machine?
No, thin metal scrapbooking dies cannot be used effectively or safely without a compatible die-cutting machine or a specialized manual press tool. These dies are chemically etched with a very low profile and do not have handles or built-in blades. They rely entirely on the immense, perfectly even, and flat mechanical pressure of machine rollers to shear through paper fibers. Attempting to press them by hand, strike them with a mallet, or roll over them with a household rolling pin will not produce a clean cut and can easily bend the die or cause injury.
How do I know when it is time to replace my cutting pads?
You should replace your clear acrylic cutting pads when they exhibit deep, rough grooves that transfer texture onto your clean paper, or when they develop severe warping that prevents the sandwich from feeding smoothly into the machine’s rollers. Additionally, if you find that you must consistently use multiple thick shims to achieve a complete cut—even after verifying your sandwich order and flipping your plates—it indicates that the pads have worn down or bowed past their useful limit and no longer provide the flat, rigid surface necessary for even pressure.
Community discussion
Share your experience or ask a question. Comments are reviewed before publication.