
Choosing between Miracle Works acrylic markers and other brands in the Philippines depends on matching your specific project surfaces, budget, and required nib sizes to the physical specifications of each set. Because performance can vary across different production batches and product lines, the most reliable way to find the right marker is to compare observable specifications—such as ink volume, tip material, and valve mechanisms—and perform physical swatch tests.
The tropical climate of the Philippines, characterized by high humidity and warm temperatures, plays a significant role in how acrylic paint behaves. High humidity can slow down drying times on non-porous surfaces, while intense heat can cause poorly sealed markers to leak or dry out prematurely in storage. Consequently, selecting a marker brand requires looking beyond brand names and focusing on how the ink formulation and pen construction handle local environmental conditions.
Rather than declaring a single brand as a universal winner, this guide provides a structured framework to help you evaluate Miracle Works against alternative options. By understanding your specific project needs, analyzing product labels, calculating true cost-effectiveness, and conducting simple home tests, you can confidently choose the markers that will deliver the best results for your creative work.
Products mentioned in this guide
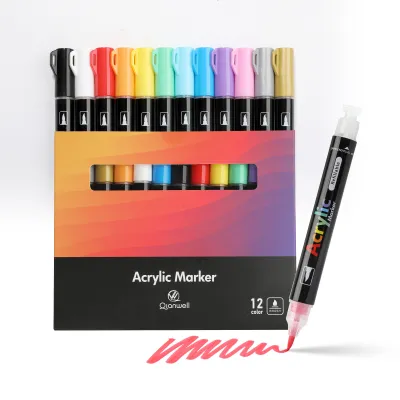
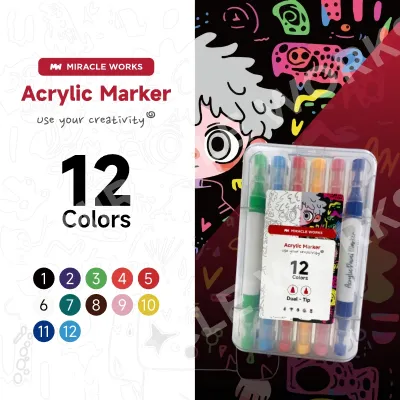
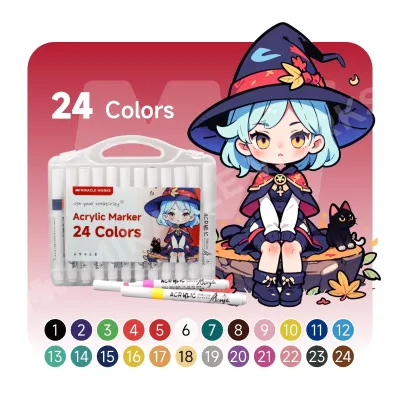
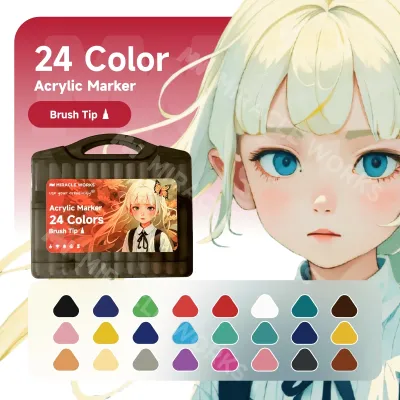
Prices are valid at publication and may change. Please refer to the product page for the latest price.
Identifying Your Art and Craft Requirements
Before comparing brands, define the surfaces you plan to decorate, as surface texture and porosity dictate how acrylic ink adheres and cures. Porous materials like watercolor paper, canvas, raw wood, and terracotta readily absorb the liquid binder in acrylic paint. This absorption creates a strong mechanical bond, but it also means the surface draws in more ink, potentially requiring markers with a higher ink capacity or a more fluid flow.
In contrast, non-porous surfaces such as glass, glazed ceramics, plastics, and polished metals do not absorb ink. On these materials, the paint must rely entirely on its chemical binder to cling to the surface as it dries. If you are working on a customized mug, a glass window display, or a plastic phone case, you need an acrylic marker with a highly cohesive binder that resists scratching and peeling once cured.
The scale of your project also determines the ideal nib size and shape. Fine bullet nibs (typically 0.7mm to 1mm) are essential for detailed line work, outlining, and intricate patterns on small crafts. Medium bullet nibs (around 2mm to 3mm) are highly versatile for general coloring and lettering, while broad chisel or block nibs (5mm and above) are necessary for covering large background areas efficiently without leaving visible streak marks.
Finally, consider your workflow regarding layering and blending. Acrylic paint dries to a water-resistant, plastic-like film, allowing you to layer light colors over dark colors once the base layer is completely dry. If your project requires smooth color transitions or wet-on-wet blending directly on the surface, you will need to evaluate how quickly the ink dries under local humidity levels, as faster-drying formulations leave a much narrower window for blending.
Core Specifications to Check on Product Labels
When comparing Miracle Works with other brands, the product packaging and manufacturer specifications provide critical clues about performance. Start by checking the ink opacity and pigment load. High-quality acrylic markers use finely ground pigments suspended in an acrylic polymer emulsion, which should provide dense, opaque coverage. Look for labels indicating “high opacity” or “excellent coverage,” and check if the manufacturer notes whether the ink is water-based or solvent-based, as water-based formulas are generally preferred for indoor use due to their low odor.

The physical construction of the nib and the ink delivery system are equally important. Most professional-grade acrylic markers utilize a valve-action (or pump-action) mechanism. This design features an internal valve that keeps the ink sealed inside the reservoir until you press down on the nib to prime the pen. This prevents the ink from drying out during storage but requires careful handling to avoid over-priming, which can lead to messy ink floods. Check if the nibs are made of durable polyester or nylon fibers, and verify if the brand sells replacement nibs separately, which is highly beneficial when working on rough surfaces that wear down tips quickly.
Lightfastness is another crucial specification, especially if your artwork will be exposed to sunlight. Lightfastness refers to a pigment’s resistance to fading under UV light. Look for ASTM D-4236 certification on the label, which ensures the materials have been evaluated for chronic toxicity, and check for lightfastness ratings (often indicated by asterisks or ASTM classifications like LF-I or LF-II). If a brand does not provide lightfastness information, the markers are best reserved for sketchbooks, indoor crafts, or temporary displays rather than fine art intended for long-term exhibition.
Lastly, examine the mixing mechanism inside the marker barrel. A quality acrylic marker should contain one or more metal or plastic mixing balls. Because acrylic pigments are heavy, they naturally settle to the bottom of the reservoir over time. A robust mixing ball allows you to thoroughly redistribute the pigment by shaking the marker before each use, ensuring consistent color density and preventing the ink from running watery or translucent.
Evaluating Price, Availability, and Bundle Value
To determine the true value of Miracle Works compared to other brands in the Philippines, you must look beyond the initial retail price of a set. A practical method is to calculate the cost per milliliter (₱/ml) of ink. To do this, locate the ink volume per marker (usually printed on the barrel or packaging, typically ranging from 2ml to 5ml) and multiply it by the number of markers in the set. Divide the total price of the set by this total volume to see exactly how much you are paying for the actual paint, as a cheaper set with less ink can often be more expensive in the long run.
Availability of individual replacement markers is another major factor in long-term cost-effectiveness. In almost every art project, certain colors—especially white, black, and popular background shades—will run out long before others. If a brand only sells its markers in pre-packaged sets, you will be forced to purchase an entire new set just to replace a single empty pen. Brands that offer individual open-stock replacements allow you to replenish only what you use, saving money and reducing waste.
Evaluate the overall bundle value by looking at the accessories included in the set. Some manufacturers package their markers with useful extras, such as spare replacement nibs, blending tools, carrying cases, or swatching sheets. While these additions should not overshadow ink quality, they can add significant convenience and value, particularly for beginners who do not yet own dedicated storage or maintenance tools.
Finally, factor in local shipping costs and delivery times. When purchasing from online marketplaces or local stationery suppliers in the Philippines, shipping fees can vary widely depending on your location. A slightly lower base price on an online platform might be offset by high shipping rates or long delivery times, especially if the items are shipped from overseas. Consider whether local physical art shops stock the brand, as immediate availability can be crucial when you need to finish a time-sensitive project.
Practical Testing and Swatching Protocols
Because manufacturer claims can sometimes be difficult to verify on paper, conducting your own standardized testing is the most reliable way to compare Miracle Works with other brands. Begin by creating a dedicated swatch card on a heavy, non-absorbent paper or cardstock. Draw a thick black line across the paper using a permanent waterproof marker, then paint over it with your acrylic markers to observe their true opacity; a high-quality marker should cover the black line in one or two coats without showing streaks.
Use this swatch card to measure drying times and test for reactivation. Note how many minutes it takes for the ink to become completely dry to the touch under your typical working conditions. Once dry, run a damp brush or a clear blending marker over the swatch to check if the dried ink reactivates and smears, or if it remains completely stable and water-resistant.
Next, perform an adhesion and scratch test on a scrap piece of your actual target material, such as a piece of wood, a plastic sheet, or a ceramic tile. Apply the ink, let it dry, and allow it to cure fully for at least 24 to 48 hours. Once cured, gently scrape the surface of the paint with the edge of a coin or your fingernail to evaluate how firmly the binder has bonded to the substrate, noting whether the paint flakes off easily or resists abrasion.
During these tests, pay close attention to the consistency of the ink flow. Watch for common issues such as streaking, where the pigment separates from the binder, or bubbling, which can occur if the ink formula contains too much surfactant or if the pen was over-shaken. A reliable marker should deliver a smooth, continuous flow of consistent color without requiring constant pumping or causing unexpected splatters on your work.
Decision Framework: Choosing the Right Marker for Your Project
To simplify your final purchasing decision, you can use a structured, condition-based framework to match the strengths of each brand to your specific creative and practical needs.
Choose Miracle Works if:
- The specific set offers the exact color palette and shade variations required for your project without needing extensive custom blending.
- Your calculated cost-per-milliliter analysis shows that the set fits comfortably within your budget, especially for high-volume base coating or large-scale craft projects.
- Your personal swatch tests confirm that the ink opacity and adhesion are fully adequate for your chosen surface material.
Choose Competing Brands if:
- Your project demands specialized nib sizes, such as ultra-fine brush tips for detailed illustration or extra-broad chisel tips for large signage, which may not be available in the Miracle Works range.
- You are creating professional fine art for sale and require certified archival lightfastness ratings to guarantee the longevity of the colors under UV exposure.
- You prefer the convenience of being able to purchase individual replacement colors quickly from local physical stationery stores in the Philippines.
Verify First if:
- You are working on a high-value commission, outdoor installation, or permanent home decor item where ink failure, peeling, or fading would result in significant financial or time loss. In these scenarios, always perform a complete test batch on a sample substrate and apply a compatible protective sealant to verify long-term durability before starting the final piece.
Frequently Asked Questions (FAQ)
Can I mix Miracle Works acrylic markers with other brands on the same project?
Yes, you can generally layer different brands of acrylic markers on the same project, provided that each layer is completely dry before you apply the next one. However, attempting to blend different brands while the ink is still wet directly on the surface can sometimes lead to issues. Because different manufacturers use varying chemical formulations for their binders and solvents, wet mixing can cause the paint to clump, crack, or dry unevenly. To avoid ruining your artwork, always test a small mixed swatch on a scrap piece of material to check for compatibility before applying it to your final project.
How do I prevent acrylic markers from drying out or clogging?
To extend the lifespan of your acrylic markers, always store them horizontally when not in use, as this keeps the pigment and binder evenly distributed throughout the barrel and prevents the nib from either drying out or becoming flooded with ink. Ensure that you press the cap on tightly immediately after each use until you hear a distinct click, which prevents air from entering and drying out the tip. If a nib does become clogged or dry, carefully pull it out of the marker if the design allows, soak it in warm water for a few minutes to dissolve the dried acrylic paint, dry it thoroughly with a paper towel, and reinsert it before priming the pen again.
Are acrylic markers waterproof once they dry?
Once fully cured, acrylic marker ink is highly water-resistant because the acrylic binder dries to form a durable, plastic-like film. However, on non-porous surfaces like glass, glazed ceramics, or polished metals, the ink does not penetrate the material and can still be scratched off or degraded by frequent handling, washing, or exposure to heavy moisture. For items that will be handled regularly, washed by hand, or placed outdoors, it is highly recommended to apply a compatible clear acrylic sealer or varnish to protect the design and ensure long-term durability.
Community discussion
Share your experience or ask a question. Comments are reviewed before publication.