
Choosing the right modeling putty can transform a project from a fragile craft into a durable, professional-grade masterpiece. Whether you are filling seam lines on a scale model aircraft, sculpting miniature fantasy figures, or building expansive diorama terrains, the physical properties of your putty dictate your workflow and final results. Modeling putties generally fall into three main categories: air-dry or water-based formulas, two-part chemical-cure epoxies, and solvent- or polymer-based detailing compounds. Understanding how these materials cure, adhere, and finish is the key to selecting the perfect medium for your specific creative task.
Understanding How Modeling Putty Cures and Sets
Modeling putties differ fundamentally from traditional modeling clays in their purpose, texture, and adhesive properties. While traditional clays are designed primarily for sculpting standalone three-dimensional forms—often remaining permanently pliable or requiring high-temperature kiln firing—modeling putties are engineered to bond, fill, and cure into hard, workable solids. They possess excellent adhesive qualities that allow them to cling to diverse substrates like plastics, metals, resins, and wood, making them indispensable for modification, repair, and detail work.
How a putty behaves during application and after it sets depends entirely on its curing mechanism. The three primary curing processes are water evaporation, chemical reaction, and solvent evaporation or polymer cross-linking. Each mechanism alters the physical state of the putty through a distinct pathway, directly influencing how long you can work with the material before it hardens, how much it will shrink as it sets, and how tough the finished piece will be.
Products mentioned in this guide
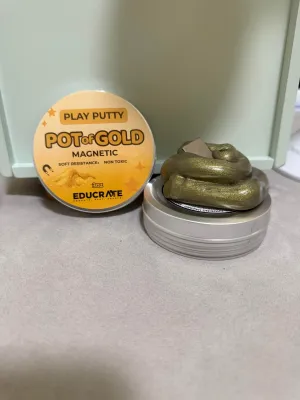
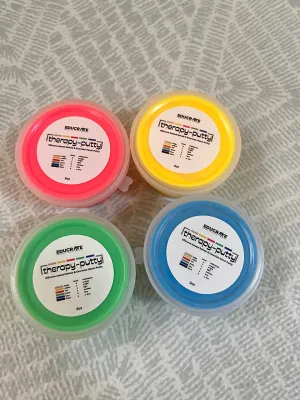
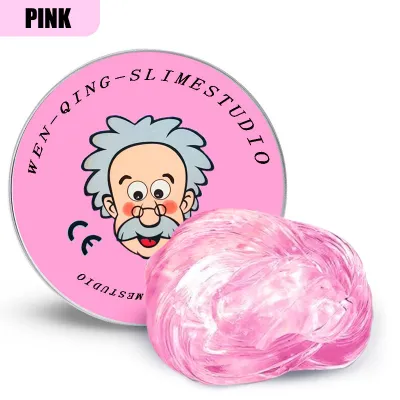
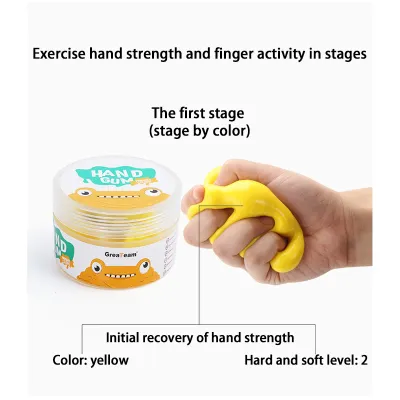
Prices are valid at publication and may change. Please refer to the product page for the latest price.
Water-based and solvent-based putties cure through evaporation, meaning they lose volume and shrink as their liquid components escape into the air. In contrast, two-part chemical-cure epoxies undergo a molecular rearrangement that creates virtually zero shrinkage, as no material is lost to the atmosphere during the process. These curing dynamics are highly sensitive to your environment; for instance, high ambient humidity can slow down water evaporation, while warm tropical temperatures can accelerate chemical cross-linking, making environmental awareness an essential part of your crafting workflow.
Air-Dry and Water-Based Putties for Lightweight Sculpting
Air-dry and water-based putties are formulated using lightweight binders, organic or inorganic fillers, and water as the primary carrier. As the water content evaporates into the surrounding air, the filler particles compress and lock together, gradually hardening into a solid, clay-like state. Because they do not rely on harsh chemicals or volatile solvents, these putties are virtually odorless and highly accessible for hobbyists of all skill levels.

Handling these putties is exceptionally straightforward because they can be easily smoothed, thinned, and shaped using water. A damp finger, brush, or sculpting tool is often all that is needed to blend seam lines or smooth out rough textures, drastically reducing the amount of sanding required after the material dries. They generally offer a generous working time, allowing you to refine your sculpt at a leisurely pace without worrying about the material setting prematurely.
These characteristics make air-dry putties ideal for large-scale, lightweight applications where structural weight must be kept to a minimum. They are highly favored for building diorama terrain, shaping hills and rock faces over foam bases, filling non-structural gaps in wood or plaster crafts, and creating lightweight cosplay props. Their user-friendly nature also makes them the preferred choice for school projects and beginner craft activities.
However, water-based putties have distinct limitations that you must consider before starting your project. Because they cure via water evaporation, they are prone to minor shrinkage and can develop hairline cracks if applied in excessively thick layers; to prevent this, apply the putty in thin, successive layers, allowing each to dry completely. Furthermore, cured water-based putty is not waterproof and can soften or degrade if exposed to moisture, meaning you must protect the finished surface with a high-quality primer or sealant. They also lack the structural strength required to support weight or resist bending under mechanical stress.
Two-Part Epoxy Putties for Structural Strength and Armatures
Two-Part epoxy putties are high-strength compounds consisting of two separate elements: a base resin and a curing agent or hardener. When these two components are kneaded together in equal parts, they initiate an exothermic chemical reaction. This reaction causes the molecules to cross-link and form a highly durable, rigid polymer network. Because this process is entirely chemical, the putty cures uniformly throughout its entire mass, regardless of exposure to air or the thickness of the application.
Working with epoxy putty requires careful attention to its specific handling traits. Once the resin and hardener are mixed, a strict working window—known as the pot life—begins, during which the putty remains pliable and sticky. Thorough kneading is absolutely critical; if the two parts are not completely blended into a uniform color, the chemical reaction will be incomplete, leaving you with soft, uncured spots that will never harden. Once fully cured, epoxy putty becomes incredibly tough, allowing you to sand, carve, drill, or even tap threads into it without any risk of the material crumbling or cracking.
These robust physical properties make epoxy putties the ultimate choice for structural modifications and heavy-duty crafting. They are ideal for building strong internal armatures for large sculptures, anchoring heavy metal or resin miniature parts, executing structural repairs on household items, and reinforcing high-stress joints. Their exceptional adhesive qualities allow them to bond securely to challenging surfaces, including metals, ceramics, glass, polyurethane resins, and various plastics.
Despite their strength, epoxy putties present several practical trade-offs. Once the curing process is complete, the material is highly rigid and difficult to carve with simple hand tools, often requiring heavy-duty files or rotary tools for shaping. The working window is absolute; as the putty nears the end of its pot life, it becomes rubbery and loses its adhesive tack, making fine detail work extremely difficult. Additionally, repeated skin contact with uncured epoxy resins can cause skin sensitization or allergic contact dermatitis, making the use of protective gloves highly recommended.
Solvent and Polymer Putties for Fine Details and Scale Models
Solvent-based putties, often referred to as plastic putties or model fillers, consist of acrylic or nitrocellulose resins dissolved in a mixture of volatile organic solvents. They cure as these solvents rapidly evaporate into the atmosphere, leaving behind a dense, hard plastic residue. Polymer-based putties, on the other hand, may rely on specific chemical formulations or mild heat application to trigger cross-linking, resulting in an ultra-fine, stable finish that holds sharp edges.
These putties are engineered specifically for precision work and high-fidelity detailing. They possess a very fine grain structure that allows them to be feathered out to microscopic edges, seamlessly blending into surrounding surfaces. Many solvent-based putties can be thinned using compatible solvents, such as acetone or lacquer thinner, allowing you to brush the liquefied putty directly into micro-cracks or surface imperfections. They exhibit excellent adhesion to polystyrene plastics and resins, slightly melting the substrate’s surface to create an incredibly strong, fused bond.
These traits make solvent and polymer putties indispensable for scale model kit building, where they are used to fill unsightly seam lines, sink marks, and ejector pin marks on plastic parts. They are also highly effective for detailing miniature figures, smoothing out layer lines on 3D-printed resin parts, and performing precise surface repairs where structural bulk is not required. Their ability to hold crisp, clean lines makes them perfect for scribing panel lines or replicating fine textures like fabric or leather.
However, the volatile nature of solvent putties introduces several limitations and safety considerations. They emit strong chemical fumes that require robust ventilation to ensure safe working conditions. Because they cure through solvent evaporation, they experience noticeable shrinkage, meaning deep cavities must be filled in multiple thin applications rather than a single thick layer. If applied too thickly, the trapped solvent can attack and permanently deform the underlying plastic of your model, or the putty itself may remain soft and doughy beneath a hardened outer skin. Furthermore, cured solvent putties can be relatively brittle, making them unsuitable for areas subjected to bending, flexing, or structural loads.
Matching Putty Characteristics to Your Project Requirements
Selecting the right modeling putty requires balancing the physical demands of your project against the unique characteristics of each material. Before choosing a putty, evaluate your task across four key decision dimensions:
- Structural Strength: Does the area need to support weight, resist bending, or hold a joint under tension? (Choose two-part epoxy putty).
- Detail Level: Are you filling microscopic seams on a plastic model or sculpting fine hair and fabric folds? (Choose solvent-based or high-grade polymer putty).
- Working Time: Do you need hours to sculpt complex shapes, or do you want a fast-drying filler for quick repairs? (Air-dry provides long working times; solvent-based dries quickly in thin layers).
- Finishing Requirements: Will you need to drill, tap, or aggressively sand the cured surface? (Epoxy putty offers the highest machinability).
To help guide your choice, consider how these materials map to common project scenarios:
- Plastic Scale Modeling: For eliminating seam lines on aircraft, tanks, or Gundam kits, use solvent-based putties. Their ability to fuse with polystyrene plastic ensures a seamless finish after sanding.
- Miniature Customization: When converting gaming miniatures or sculpting custom armor and weapons, use two-part epoxy putties. They hold their shape without shrinking and bond securely to plastic, resin, and metal parts.
- Dioramas and Terrain: For building up hills, rock faces, or ground textures over foam or wire mesh, use water-based air-dry putties. They are cost-effective, lightweight, and easy to smooth over large surface areas.
Before applying any putty to your main project, always check the manufacturer instructions of both the putty and the substrate to ensure compatibility. Some solvent-based putties can dissolve soft plastics or expand polystyrene foams, ruining hours of work. Performing a small test on a scrap piece or a hidden area is an excellent way to verify adhesion, curing behavior, and material compatibility.
For complex projects, you can maximize your results by layering different putties to utilize the strengths of each. For example, when sculpting a large figure, build the strong, rigid core armature using a robust two-part epoxy putty. Once that structural base is fully cured, apply a thin layer of solvent-based or fine-detail polymer putty over the surface to capture intricate textures and skin details. This hybrid approach ensures structural integrity while achieving a high-quality surface finish.
Safe Handling, Storage, and Surface Preparation
Working safely with modeling putties protects your health and ensures your materials perform as intended. When using solvent-based putties or mixing two-part epoxies that emit chemical fumes, always work in a well-ventilated area. If you are working indoors, open windows and use a fan to direct air outward, or use a dedicated hobby extraction booth to prevent the accumulation of volatile organic compounds (VOCs).
Skin protection is equally important, especially when handling two-part epoxies and solvent-based compounds. Wear protective gloves, such as nitrile gloves, during mixing and application to prevent direct contact with uncured resins, hardeners, or harsh thinning solvents. Avoid using your bare fingers to smooth solvent-based putties, as the solvents can penetrate the skin and cause irritation or long-term sensitization.
Proper storage is essential to prevent your putties from drying out or curing prematurely in their packaging. Keep all modeling putties in a cool, dry environment away from direct sunlight and extreme temperature fluctuations. For water-based putties, ensure the container is sealed tightly; you can add a damp paper towel inside the outer storage container (not directly touching the putty) to maintain moisture levels. For two-part epoxies, keep the resin and hardener strictly separated in their original packaging, ensuring the caps are tightly sealed to prevent exposure to ambient moisture and air.
To achieve maximum adhesion, always prepare the surface of your project before applying any putty. Thoroughly clean the target area to remove dust, grease, mold release agents, or finger oils. Lightly scuffing the surface with fine-grit sandpaper (such as 400-grit to 800-grit) creates a microscopic texture, or “tooth,” that helps the putty grip the material securely. If the manufacturer’s instructions for your specific putty conflict with these general steps, always prioritize the product label’s guidelines.
Frequently Asked Questions (FAQ)
Can you mix different types of modeling putty together?
Mixing putties with different chemical bases—such as blending a water-based air-dry putty with a chemical-cure epoxy—is not recommended. Because their curing mechanisms are fundamentally incompatible, mixing them will disrupt the chemical cross-linking or evaporation process, resulting in a crumbly, weak material that fails to cure or adhere properly.
However, you can safely blend different colors or formulations of the exact same brand and type of two-part epoxy putty to adjust the color, working time, or cured hardness. Always consult the manufacturer’s guidelines before attempting to mix different product lines to ensure they are chemically compatible.
How do you fix modeling putty that has started to dry out?
Reviving dried-out putty depends entirely on its base formulation. For water-based air-dry putties, you can often restore pliability by kneading in a few drops of clean water or using a manufacturer-approved clay conditioner. For solvent-based putties that have thickened in the tube, adding a very small amount of a compatible solvent, such as acetone or lacquer thinner, can restore a workable consistency.
Two-part epoxy putties, however, have a strict point of no return. If either the resin or the hardener has completely hardened, crystallized, or lost its pliability in storage, it cannot be revived. Attempting to use compromised epoxy components will result in an incomplete chemical cure, leaving your project with weak, sticky, or brittle joints. In this scenario, the damaged material must be safely discarded.
Community discussion
Share your experience or ask a question. Comments are reviewed before publication.