
Selecting the right monthly planner layout is the single most important factor in determining whether you will actually use your planner or abandon it by February. The ideal format is not a matter of aesthetic preference; it is a direct reflection of how your brain processes time, tasks, and visual information. Finding the right match requires balancing your daily schedule density with your physical writing habits, paper preferences, and organizational goals.
For visual thinkers who need a broad overview of their month, the traditional horizontal grid layout provides an intuitive, calendar-style map of upcoming events. Schedulers who manage dense, hour-by-hour agendas or long lists of daily tasks will find the vertical weeks layout far more accommodating. Meanwhile, goal-oriented trackers who prioritize habit building and project milestones over strict daily timelines will benefit most from a sidebar dashboard format. Aligning your layout choice with your cognitive workflow reduces daily planning friction and helps you maintain a consistent, productive routine.
Identify Your Planning Style and Information Density Needs
Before purchasing a new monthly planner, you must diagnose your existing organizational habits and understand your natural information density needs. A common mistake is buying a planner based on its cover design or popularity, only to find that the internal structure conflicts with how you naturally write and think. To identify your planning style, ask yourself whether you need to see your entire month at a single glance to feel organized, or if you require dedicated, structured spaces for daily task breakdowns and hourly commitments.
Products mentioned in this guide
![[COD] SHPYHT TOY 2026-2028 Highland Cow Monthly Planner 3 Year Calendar Monthly Weekly Planner 50 Pages Spiral Binding Notebook Journal](https://img.lazcdn.com/g/p/e18790cc7c844d4261adbf3abdd19495.jpg_400x400q80.jpg_.webp)
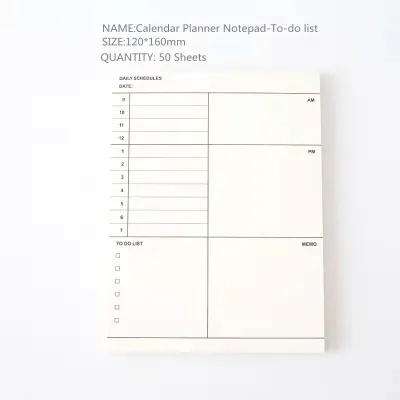
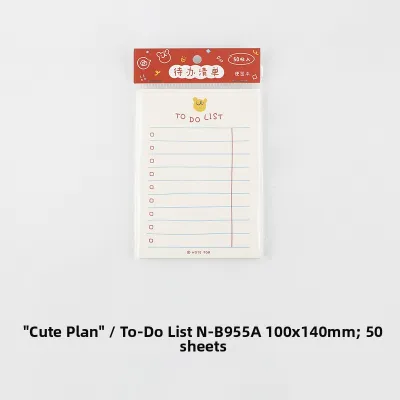
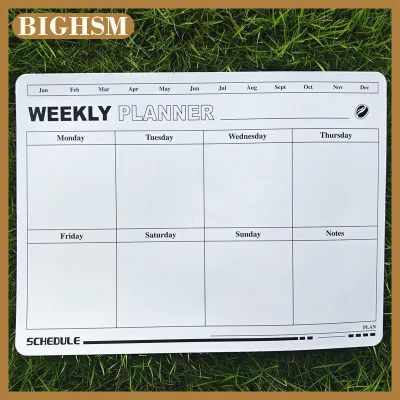
Prices are valid at publication and may change. Please refer to the product page for the latest price.
Information density refers to the volume of data you need to record on any given day. High-density planning involves managing multiple daily appointments, strict project deadlines, and detailed to-do lists. If your days are packed with back-to-back meetings or shifting academic schedules, a layout with minimal writing space will quickly become cluttered and unreadable. Conversely, low-density planning is ideal for those who only need to track broad monthly goals, major deadlines, or a few key daily tasks. For these users, an overly detailed layout with hourly slots can feel intimidating and leave discouraging empty space.
Your physical writing habits and environmental conditions also play a critical role in layout selection. Consider your handwriting size, your preferred writing instruments, and where you plan to use your book. In the tropical climate of the Philippines, high indoor humidity can cause paper fibers to expand and absorb moisture. This environmental factor makes low-quality or thin paper highly susceptible to ink feathering and bleed-through, especially when using wet gel pens or liquid ink fountain pens. If you prefer fine-tip pens (such as 0.38mm or 0.5mm gel pens) to cram detailed notes into small spaces, you must verify that the planner’s paper weight (preferably 80 to 100+ GSM) can handle your ink without smudging or bleeding.
To help categorize your primary planning style, review the following self-assessment checklist:
- The Visual Thinker: You think in terms of weeks and months rather than hours. You prefer color-coding, mapping out multi-day events, and seeing how your time blocks connect visually across a standard calendar grid.
- The Detailed Scheduler: You have a high volume of daily tasks, time-sensitive appointments, or hourly meetings. You need structured, vertical lines to list items chronologically and keep your handwriting neat.
- The Goal-Oriented Tracker: You prioritize tracking habits, monitoring long-term project milestones, and writing down monthly reflections over managing a rigid, hour-by-hour daily schedule.
Horizontal Grid Layout: Best for Visual Thinkers and Broad Overviews
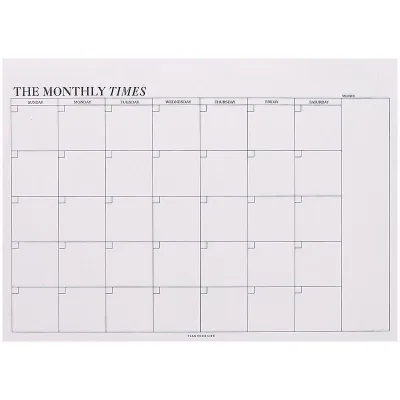
The horizontal grid is the classic monthly planner format, featuring a traditional calendar view with horizontal rows representing weeks and vertical columns representing the days of the week. This layout is highly intuitive because it mimics the standard wall calendars and digital monthly views most people are already familiar with. It provides an immediate, comprehensive snapshot of your entire month across a single or double-page spread.

This format is ideal for visual thinkers, project managers, and anyone with a moderate volume of daily tasks. It serves as an excellent master control center for tracking major events, birthdays, travel dates, and broad project deadlines. If you rely heavily on visual cues, the horizontal grid allows you to use color-coded highlighters or small stickers to categorize different areas of your life—such as work, personal errands, and family events—so you can assess your monthly balance at a single glance.
The primary strength of the horizontal grid layout is its ability to show the flow of time and help you spot scheduling conflicts before they happen. It is incredibly easy to track multi-day events, such as a week-long business trip or a holiday, by drawing a continuous horizontal line across the grid. This visual continuity helps you understand your availability and prevents you from overcommitting during busy weeks.
However, the horizontal grid has distinct physical limitations. Because the monthly view must fit onto a limited paper size (typically A5 or B6 for portable planners), the individual daily boxes are relatively small. A standard A5 double-page monthly grid usually offers daily boxes measuring roughly 3cm by 3cm. This restricted space makes the horizontal grid entirely unsuitable for detailed daily task lists, hourly time-blocking, or extensive journaling. Attempting to write multiple long tasks in a tiny box will quickly result in an illegible, cramped mess.
Actionable Tip for Horizontal Grids: To maximize the utility of a horizontal grid, adopt a shorthand system using minimal symbols and abbreviations. Use a small dot for tasks, a circle for events, and an exclamation point for urgent deadlines. If you run out of space for a specific day, place a small, colorful sticky note directly over the box to hold your overflow task list. This keeps the underlying calendar clean while allowing you to expand your writing space when necessary.
Vertical Weeks Layout: Ideal for Detailed Schedulers and Task Lists
The vertical weeks layout arranges the days of the week in vertical columns or a vertical list format across a two-page spread. This structure prioritizes vertical space, providing longer columns with horizontal lines for each day. It is a highly structured format designed to accommodate chronological planning and high-density task management.
This layout is the premier choice for detailed schedulers, busy professionals, and students managing complex daily routines. If your day is dictated by hourly appointments, back-to-back classes, or a long list of specific chores, the vertical column format gives you the physical room required to list these items in order of occurrence. It is also highly compatible with time-blocking, a productivity method where you dedicate specific hours of the day to distinct tasks or projects.
The main advantage of a vertical layout is its linear clarity. Because the layout flows from top to bottom, your eyes can easily scan down a column to understand your daily trajectory. The horizontal lines within each column keep your handwriting neat and aligned, which is particularly beneficial for those with larger handwriting or those who prefer using medium-point pens (such as 0.7mm gel pens). It also allows you to separate your day into distinct blocks, such as morning, afternoon, and evening, without crowding your pages.
The trade-off of this high-density layout is that it sacrifices the broad, cohesive monthly overview. Because the days are stretched vertically, it is much harder to visualize the entire month’s progress at a single glance. Multi-day events can become visually fragmented, as you must write the event repeatedly across multiple separate columns rather than drawing a single, continuous line. Additionally, if you have a quiet day with no appointments, the vertical column can look glaringly empty, which some users find visually unappealing.
Actionable Tip for Vertical Layouts: Use a dual-color system to manage your vertical columns effectively. Write fixed appointments and time-bound meetings in a dark, permanent ink (like black or navy blue), and write flexible to-do lists in a lighter color or pencil. Use a mild highlighter to block out chunks of time for focused work. To prevent ink smearing as you write down the column, verify that your pen uses a fast-drying ink formula, which is especially important if you are left-handed.
Sidebar Format: Perfect for Goal Trackers and Dedicated Note-Takers
The sidebar format, often referred to as a dashboard layout, combines a standard monthly calendar grid with dedicated, structured side sections. Typically, the calendar grid is shifted slightly to one side of the page, leaving a generous vertical column or horizontal block along the margin. This extra space is specifically designed for lists, goal tracking, habit grids, and freeform brainstorming.
This format is tailor-made for goal-oriented planners, habit trackers, and individuals who prefer to separate their “calendar appointments” from their “action lists.” If you practice monthly reflections, track fitness milestones, or manage ongoing side projects, the sidebar provides a dedicated space to keep these high-level objectives visible alongside your daily schedule. It acts as a bridge between a traditional calendar and a personal development journal.
The primary benefit of the sidebar format is that it keeps the main calendar grid clean and uncluttered. Instead of crowding your daily boxes with repetitive reminders like “drink water,” “go to the gym,” or “pay electricity bill,” you can relegate these recurring tasks and habit trackers to the sidebar. This separation ensures that when you look at your monthly grid, you only see critical, date-specific appointments, while your ongoing lifestyle goals remain organized on the periphery.
However, the inclusion of a sidebar means that the actual calendar grid must be scaled down to fit on the page. The daily boxes in a sidebar planner are often significantly smaller than those in a standard horizontal grid. If you choose this format, you must be comfortable with minimal writing space on individual days and have the discipline to regularly update and maintain the sidebar tracking sections. If left unused, the empty sidebar columns can make the planner feel underutilized and disorganized.
Actionable Tip for Sidebar Formats: Divide your sidebar vertically into three distinct functional zones to prevent it from becoming a disorganized brain dump. Allocate the top third for your top three monthly goals, the middle third for a running, prioritized master task list, and the bottom third for a simple habit tracking grid. Use a fine-tip gel pen to keep the tracking neat, and verify that the paper is thick enough to prevent highlighter ink from ghosting through to the next month’s page.
How to Test a Layout and Transition When Your Needs Change
Investing in a premium, leather-bound monthly planner can be expensive, with high-quality options ranging from ₱500 to over ₱1,500. To avoid buyer’s remorse, you should practically test a layout before committing to a purchase. The most reliable way to do this is the “print-and-test” method. Search online for free, downloadable PDF templates of horizontal grids, vertical columns, and sidebar layouts. Print these templates on standard paper and use them to manage your schedule for a full week or two. This trial period will quickly reveal whether a layout supports your natural writing speed, handwriting size, and daily planning flow.
As your life circumstances change, your planning needs will likely evolve as well. For example, transitioning from a structured university schedule to a project-based corporate job often requires a shift in how you track your time. It is important to recognize the signs that your current planner layout is no longer serving you:
- You constantly run out of writing space and have to squeeze text into margins.
- You find yourself ignoring the planner for days because looking at the cluttered pages causes anxiety.
- You are consistently failing to track your goals or habits because the layout lacks dedicated space for them.
- The paper feels rough, or your favorite pens constantly bleed and feather due to high humidity levels.
When transitioning layouts mid-year, do not attempt to copy every single historical detail into your new book. Instead, focus on migrating active information. Begin by transferring all fixed future appointments, birthdays, and major deadlines onto the new monthly grid. Next, compile your ongoing projects and outstanding tasks into a master list, and distribute them logically across the new layout. Finally, establish a clear routine for updating your new planner, such as spending ten minutes every Sunday evening setting up the upcoming week.
Ultimately, remember that there is no single “perfect” planner layout that works for everyone forever. Your planning style is a dynamic tool that should adapt to your current lifestyle, career, and cognitive needs. The best layout is simply the one that reduces friction, brings clarity to your schedule, and supports your daily life.
Frequently Asked Questions (FAQ)
Can I combine different layouts in one planner?
Yes, many manufacturers offer hybrid planners that combine multiple layouts to capture the benefits of each. A highly effective and common configuration is a planner that features a horizontal monthly grid at the beginning of each month, followed by vertical weekly spreads for daily planning. This setup allows you to use the horizontal monthly grid as a broad, bird’s-eye overview for major deadlines and travel, while utilizing the vertical weekly pages for detailed, hour-by-hour scheduling and daily task execution. To make this hybrid system work without duplicating your effort, establish a rule: write only fixed, unmovable appointments on the monthly grid, and reserve the weekly spreads for flexible daily to-do lists and detailed notes.
What is the best layout for students with heavy course loads?
For students managing multiple classes, assignments, exam dates, and extracurricular activities, a vertical weeks layout or a sidebar format is highly recommended. The vertical column structure is exceptionally well-suited for blocking out class times chronologically, allowing you to see exactly when you are in lectures and when you have free study blocks. If you choose a sidebar format, you can use the monthly grid to mark exam dates and major project deadlines, while using the sidebar column to track weekly study hours, reading assignments, and homework checklists. Look for planners with durable spiral or discbound binding, which allows the book to fold back on itself and lay completely flat on cramped lecture hall desks.
How do I handle overflow when my daily box is too small?
If you find that your daily calendar box is too small to accommodate a sudden influx of tasks, you do not need to buy a new planner immediately. A simple and elegant solution is to use small, removable sticky notes that fit precisely inside your daily box; this allows you to write down temporary tasks and discard the note once they are completed. Alternatively, you can pair your monthly planner with a cheap, blank pocket notebook or a dedicated bullet journal. Use your monthly planner strictly for fixed appointments and deadlines, and use the separate notebook for daily brain dumps, meeting notes, and extensive shopping lists. This hybrid approach keeps your primary planner clean and legible while providing unlimited space for daily writing overflows.
Community discussion
Share your experience or ask a question. Comments are reviewed before publication.