
To choose the best Sharpie marker tip size for your project, you must match the scale of your writing surface with the level of detail your task requires. For intricate labeling, tight spaces, and detailed illustrations, the ultra-fine point offers the necessary precision. Standard tasks like labeling storage boxes, writing on shipping labels, or general marking are best handled by the versatile fine point. If you need to switch between fine lines and broad strokes constantly, the twin-tip design provides dual-ended flexibility. For large-scale signage, bold lettering, or heavy-duty industrial marking, the chisel tip delivers maximum coverage and visibility. Understanding these physical differences ensures your markings remain legible, clean, and suited to your specific medium.
When looking for a reliable permanent marker, many people search for a classic “sharpee marker” to handle everything from school projects to industrial labeling. However, selecting the wrong tip size can lead to messy, illegible results or premature wear on the marker itself. By evaluating your project’s physical constraints, surface texture, and environmental conditions, you can select a tool that delivers crisp lines and long-lasting ink adhesion.
Understanding Sharpie Tip Sizes and Their Best Uses
Every marker tip size is engineered to deliver a specific volume of ink and line width, making each one suited to distinct tasks. Choosing the correct tip size prevents ink from spreading too wide on porous surfaces or appearing too faint on large objects. Understanding the physical characteristics of each tip option is the first step in selecting the right tool for your project.
Products mentioned in this guide
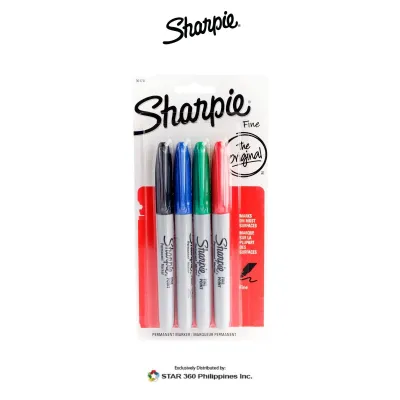
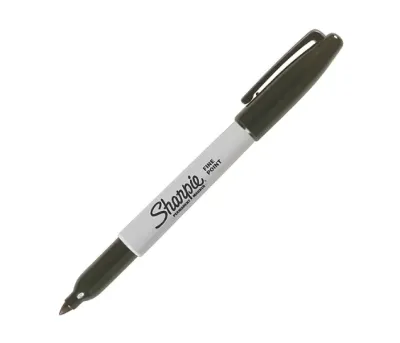
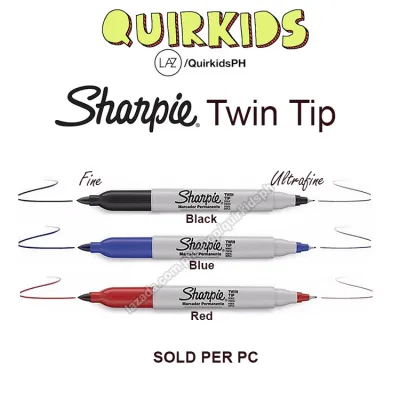
Prices are valid at publication and may change. Please refer to the product page for the latest price.
Ultra-Fine Point
The ultra-fine point features a slim, plastic-collared tip that behaves much like a technical pen or a fine-liner. It typically produces a line width of approximately 0.5mm, allowing for extreme precision and control. The metal or plastic shroud surrounding the tip prevents the delicate fibers from bending or splitting under normal writing pressure. This design is ideal for writing in tight spaces, such as the margins of books, small planner grids, or compact adhesive labels.
Because the ink flow is highly controlled, the ultra-fine point minimizes the risk of bleeding on standard paper. It is the preferred choice for detailed sketching, cross-hatching in illustrations, and labeling small items like electronic cables, test tubes, or keys. However, because the tip is so fine, it can easily clog if used on dusty, rough, or highly textured surfaces.
Fine Point
The fine point is the classic, globally recognized bullet tip that serves as the standard for everyday permanent markers. It features a durable, rounded polyester fiber tip that produces a line width of approximately 1.0mm. This tip is resilient enough to withstand moderate writing pressure without losing its shape, making it highly versatile for general-purpose tasks.
The ink flow from a fine point is generous but controlled, allowing for bold, highly visible lines on a wide variety of materials. It is the go-to option for signing documents, labeling cardboard boxes, marking plastic storage bins, and creating basic posters. While it is excellent for standard handwriting, it may prove too thick for small-format labeling or highly detailed artwork where lines must remain strictly separated.
Twin-Tip
The twin-tip marker offers dual functionality by incorporating two distinct tips on opposite ends of a single marker body. Typically, one end features a standard 1.0mm fine point, while the other end features a 0.5mm ultra-fine point. Both tips share a single internal ink reservoir, ensuring that both ends receive a consistent supply of ink throughout the marker’s lifespan.
This dual-ended design is highly convenient for students, field workers, and organizers who must switch between bold headings and fine details quickly. Instead of carrying multiple markers, you can simply flip the pen to change your line weight. It is particularly useful for dynamic projects like mind mapping, complex labeling systems, and mixed-media art where line variation is essential.
Chisel Tip
The chisel tip features an angled, wedge-shaped felt tip that allows you to produce multiple line widths depending on how you hold the marker. By using the flat, broad edge, you can create wide strokes of approximately 5.0mm, which are perfect for filling in large areas or creating bold block lettering. Using the sharp corner of the wedge allows you to write with a medium or fine line, offering surprising versatility from a single tip.
This tip is constructed from dense, heavy-duty fibers designed to withstand rough surfaces and heavy pressure. It is the ideal choice for creating large-scale signage, marking industrial equipment, and labeling oversized shipping crates. The generous ink flow ensures maximum coverage and high visibility from a distance, though it is entirely unsuitable for standard handwriting or detailed tasks.
Matching Tip Sizes to Specific Applications
Selecting the right marker tip is not just about personal preference; it is about matching the tool to the physical environment and the specific requirements of your task. Different applications demand different levels of visibility, durability, and precision.

Labeling and Organization
When organizing household items, office supplies, or storage spaces, your choice of tip size should depend on the size of the container, the label material, and the distance from which the label must be read. For small items like spice jars, medicine bottles, or pantry containers, an ultra-fine tip is essential. It allows you to write detailed information, such as expiration dates or specific ingredients, in a very small space without the ink bleeding into an illegible blob.
For larger storage bins, moving boxes, or garage shelving, a fine point is much more appropriate. The bolder line ensures that you can read the label from several feet away without having to approach the container closely. In tropical climates like the Philippines, where high humidity can cause ink to spread slightly on porous paper labels, choosing a fine tip over a chisel tip for standard boxes prevents the text from becoming blurry over time. If you are labeling plastic containers that will be stored in a damp refrigerator or freezer, a fine point provides enough ink volume to bond securely with the plastic surface, resisting condensation and smudging.
Art and Crafting
Creative projects rely heavily on line variation, blending, and detail layering to achieve depth and texture. Fine-line detailing, outlining, and intricate patterns are best executed with an ultra-fine point, which allows for clean, sharp lines that do not bleed into adjacent colors. Artists often use these fine tips for mandalas, zentangles, and comic book outlines where precision is paramount.
For filling in larger shapes, creating bold hand-lettering, or designing posters, the chisel tip is indispensable. Its angled edge allows for dynamic calligraphy strokes and rapid color coverage. When working on mixed-media projects, using a combination of tip sizes—such as those found on a twin-tip marker—allows you to layer fine details over broad background washes without disrupting the flow of your creative process. Always consider the weight of your paper; heavy cardstock or canvas can handle the heavy ink flow of a chisel tip, whereas standard printer paper will experience significant bleed-through.
Industrial and Heavy-Duty Marking
In workshops, construction sites, and manufacturing environments, markers must perform on rough, dirty, or uneven surfaces. Marking PVC pipes, metal sheets, wooden beams, or heavy-duty electrical tape requires a tip that can withstand abrasion without fraying. The chisel tip is highly favored in these scenarios because its robust construction can handle rough textures, and the broad, dark lines remain highly visible even under poor lighting or dusty conditions.
For electrical work, such as labeling individual wires or circuit breakers, the ultra-fine or fine point is necessary to ensure the small numbers and letters remain perfectly legible. When working outdoors or in high-heat environments, the volume of ink deposited by a fine or chisel tip ensures that the marking remains durable and resistant to fading from UV exposure or moisture. Matching the tip size to the surface texture ensures that you do not ruin a delicate ultra-fine tip on rough concrete or waste a broad chisel tip on a tiny electrical component.
Key Factors to Check Before Buying
Before purchasing a permanent marker, it is important to evaluate several physical and chemical characteristics to ensure the tool is compatible with your project’s specific demands.
Ink Type and Surface Compatibility
Not all permanent markers use the same ink formulation. Standard permanent markers utilize an alcohol-based solvent ink that is quick-drying, water-resistant, and capable of adhering to most non-porous surfaces like plastic, glass, and metal. However, if your project involves specialty materials, you must verify that the ink is compatible. For example, writing on highly acidic paper may require an acid-free, archival-quality marker to prevent yellowing over time.
If you are marking items that will be exposed to harsh outdoor elements, direct sunlight, or industrial solvents, look for specialized formulations such as extreme fade-resistant or oil-based paint markers. Standard ink may fade rapidly under intense tropical sunlight, so verifying the ink’s environmental resistance on the product label is crucial for long-term durability.
Drying Time and Smudge Resistance
In humid environments, ink drying times can vary significantly. Non-porous surfaces like plastic, metal, and glossy paper do not absorb ink, meaning the solvent must evaporate entirely for the mark to become permanent. Check the product packaging for quick-drying claims, which indicate that the solvent evaporates rapidly upon contact with the air.
To prevent smudging, especially if you are left-handed or working quickly, it is wise to perform a practical test on a scrap piece of your project material. Apply a small stroke of ink and wait a few seconds before gently rubbing it. This simple check helps you determine the actual drying time under your local environmental conditions before you begin marking your final piece.
Ergonomics and Grip
For projects that require extended writing or drawing sessions, the physical design of the marker barrel plays a significant role in hand comfort and control. Fine and ultra-fine markers typically feature slim, pen-like barrels that fit comfortably in the hand for precise, detailed work. These slim designs are easy to maneuver and store in standard pencil cases or pockets.
Chisel tip markers, on the other hand, often feature thicker, oval, or textured barrels. This larger profile provides a more secure grip, allowing you to apply even pressure when marking vertical surfaces, overhead beams, or rough materials. If you plan to use the marker for hours at a time, look for designs with rubberized grip zones or ergonomic shapes to minimize hand fatigue.
How to Test and Maintain Your Markers
Proper testing and maintenance are essential for extending the lifespan of your permanent markers and ensuring they deliver consistent, high-quality results throughout their use.
Surface Testing
Before applying a permanent marker to your final project, always perform a test in an inconspicuous area of the material. This test allows you to evaluate three critical factors: ink adhesion, bleed-through, and drying time. On porous materials like fabric or thin paper, check the reverse side to see how far the ink bleeds. If the bleed-through is severe, you may need to place a protective backing sheet underneath or switch to a finer tip size that deposits less ink.
On non-porous materials like plastic or metal, check if the ink adheres smoothly without pooling or scratching off easily once dry. If the ink beads up or wipes away easily, the surface may have an oily coating or wax finish that needs to be cleaned with rubbing alcohol before marking.
Storage Best Practices
To prevent your markers from drying out prematurely, always store them horizontally. Storing markers vertically—either tip-up or tip-down—can cause the ink to pool at one end of the marker. If stored tip-up, the gravity-driven ink flow moves away from the tip, causing it to dry out and write faintly. If stored tip-down, the ink can oversaturate the tip, leading to leaks, blobs, or excessive bleeding when you first touch the paper.
Horizontal storage keeps the ink distributed evenly throughout the internal reservoir, ensuring that the tip remains perfectly saturated and ready for immediate use. This is especially critical for twin-tip markers, where vertical storage would inevitably leave one of the two tips dry and unusable.
Reviving or Replacing
If a marker tip begins to write faintly or appears dry, first ensure that the cap is clicked tightly in place. Many modern permanent markers feature a vapor-seal cap that prevents solvent evaporation, so a loose cap is the most common cause of premature drying. To revive a slightly dry alcohol-based marker, you can try capping it tightly and leaving it tip-down for a few hours to allow gravity to pull the remaining ink back into the tip.
For markers that are severely dried out but still contain ink in the reservoir, you can briefly dip the very tip into a small capful of rubbing alcohol for a few seconds. Cap the marker tightly and let it sit horizontally for a few hours to allow the solvent to redistribute. If the tip is physically frayed, split, or completely dry despite these recovery steps, the marker has reached the end of its usable life and should be replaced to maintain clean, professional lines.
Frequently Asked Questions (FAQ)
Can I use standard Sharpies on fabric?
While standard permanent markers will write on fabric, they are not specifically formulated to withstand repeated washing. Over time, standard ink will fade, bleed, or turn a dull color when exposed to laundry detergents and hot water. For permanent fabric projects, it is best to use specialized fabric markers that contain pigmented inks designed to bond with textile fibers. If you must use a standard marker on fabric, heat-setting the ink with an iron before washing can help improve its durability, though results will vary depending on the fabric type.
What is the practical difference between Twin-Tip and regular Fine Point?
The practical difference lies in versatility and convenience. A regular fine point marker features a single 1.0mm bullet tip, making it a dedicated tool for standard writing and labeling. A twin-tip marker features a 1.0mm fine point on one end and a 0.5mm ultra-fine point on the other, sharing a single ink reservoir. The twin-tip design saves space in your pencil case or tool belt and allows you to switch between bold lines and fine details instantly, though it may carry slightly less total ink per tip compared to two separate, dedicated markers.
How do I safely remove permanent marker from non-porous surfaces?
To safely remove permanent marker from non-porous surfaces like plastic, glass, or metal, you can use a solvent that dissolves the ink’s dry binder. Rubbing alcohol (isopropyl alcohol), hand sanitizer, or acetone-free nail polish remover are highly effective. Simply apply a small amount to a soft cloth or cotton swab and gently wipe the marking away. Alternatively, scribbling over the permanent ink with a dry-erase marker and immediately wiping it off with a dry cloth often removes the permanent mark. Always test your chosen removal method on a small, hidden spot first to ensure it does not damage or discolor the underlying surface.
Community discussion
Share your experience or ask a question. Comments are reviewed before publication.