
When choosing a sketch board for colored pencil work, there is no single “best” surface. The optimal choice depends entirely on your specific drawing technique, layering style, and artistic goals.
For most artists, a medium (vellum) surface offers the most versatile starting point, balancing layering capacity with decent detail retention. If your style focuses on hyper-realistic, fine-detail work with minimal layering, a smooth (hot press) surface is ideal. Conversely, if you prefer expressive, painterly styles that require heavy layering or solvent blending, a textured (cold press or rough) surface provides the necessary grip. Matching your artistic intent to the physical characteristics of the board ensures a smoother creative process and prevents common issues like wax bloom or surface tearing.
Understanding Sketch Board Surface Textures
To select the right sketch board, you must first understand the concept of “tooth”—the microscopic peaks and valleys on the board’s surface. This texture is primarily determined during manufacturing, often categorized by how the paper fibers are pressed. Hot-pressed boards are passed through heated rollers under high pressure, resulting in a flat, dense surface with minimal tooth. Cold-pressed or rough boards are pressed with less pressure or textured blankets, leaving the natural fiber patterns intact to create pronounced peaks and valleys.
Products mentioned in this guide
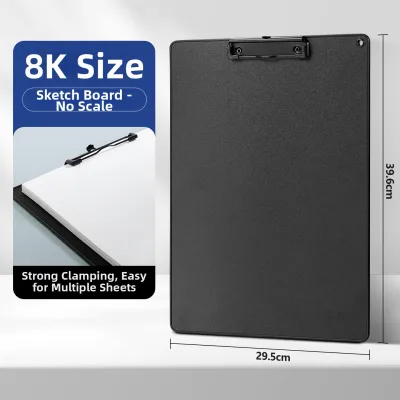
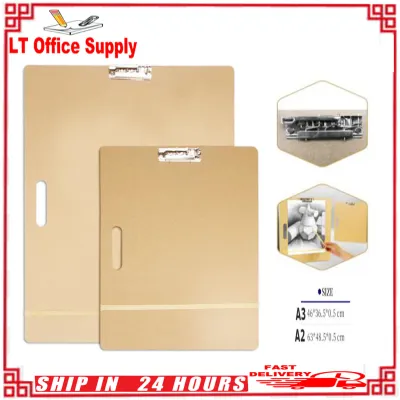
Prices are valid at publication and may change. Please refer to the product page for the latest price.
A smooth sketch board feels almost slick to the touch. Under a colored pencil, it offers very little resistance, allowing the lead to glide effortlessly. This surface is typically found on hot-press illustration boards or high-weight bristol boards.
A medium board, often labeled as vellum or semi-smooth, has a balanced, visible texture. It provides a noticeable grip that catches the pencil core without feeling overly rough, making it a popular all-rounder for dry media.
A textured board, such as cold-press or rough illustration board, features highly pronounced peaks and valleys. This surface feels distinctly grainy and behaves almost like fine sandpaper under your hand.
In the tropical climate of the Philippines, where seasonal relative humidity can frequently exceed 80%, these fibers absorb moisture from the air. This environmental factor can subtly alter how the tooth behaves, softening the sizing of the board and the binders of your pencils. Choosing the right surface texture becomes even more critical for maintaining control over your medium in these humid conditions.
Key Comparison Dimensions for Colored Pencil Art
To evaluate how these textures perform, we must look at how they interact with the physical properties of colored pencils. Colored pencils consist of pigment held together by a wax- or oil-based binder. Unlike wet media that sink deep into the fibers, colored pencil pigment sits on top of the surface, held in place by the physical structure of the board. We can compare smooth, medium, and textured boards across three essential dimensions: pigment grip, layering capacity, and fine detail control.

Tooth and Pigment Grip
The mechanics of pigment grip rely on friction. As you draw, the peaks of the board’s tooth act like a grater, scraping pigment from the pencil core and holding it in the valleys. A smooth sketch board has very few valleys to store this pigment. When you apply pressure, the pencil may glide or slip across the surface, leading to uneven pigment deposition or a phenomenon known as “skipping,” where the pencil slides without leaving a mark.
A medium surface provides consistent, predictable resistance. The tooth is deep enough to shave off a steady amount of pigment, resulting in uniform color coverage. This balance makes it highly compatible with both soft, wax-based pencils and harder, oil-based pencils.
Textured boards grab the pencil core aggressively. The pronounced peaks scrape off large amounts of pigment quickly, which can wear down your pencil tips rapidly and require frequent sharpening.
To observe how a board grips pigment, perform a simple swatch test. Apply a single, light-pressure stroke across the surface. On a smooth board, the line will be solid and sharp but may look faint. On a textured board, the line will look speckled or broken, as the pencil only touches the high peaks, leaving the valleys white. A medium board will show a balanced, slightly textured line that is easy to control.
Blending and Layering Capacity
The ability to layer colors is fundamental to colored pencil art, allowing you to create depth, value, and custom hues. This capacity is directly tied to the depth of the board’s valleys. Textured boards have deep valleys that can accommodate multiple layers of pigment before the surface becomes saturated. This depth also makes them highly compatible with blending solvents, such as odorless mineral spirits or rubbing alcohol, which dissolve the binders and push the pigment deep into the fibers.
Smooth boards, having almost no valleys, fill up with pigment very quickly. Once the shallow tooth is filled, the surface undergoes “burnishing”—a state where the wax or oil binder becomes compressed, slick, and completely non-receptive to further layers. Any additional pencil strokes will simply slide over the top or scrape away the existing color.
Medium boards offer a reliable middle ground. They support a moderate number of layers (typically four to six) before burnishing occurs, which is usually sufficient for general illustration and portraiture.
You can verify a board’s layering capacity by applying consecutive layers of different colors on a scrap piece. Watch closely to see when the surface stops accepting new pigment and begins to look shiny or slick. If you work in a humid environment, keep in mind that moisture can accelerate the softening of wax binders, making smooth boards burnish even faster.
Fine Detail and Line Control
Rendering sharp lines, micro-details, and smooth gradients requires precise control over where the pencil pigment lands. Textured surfaces are notoriously difficult for fine detail work. Because of the deep valleys, a sharp pencil point will jump from peak to peak, causing fine lines to look broken, fuzzy, or speckled. Achieving a solid, solid-color gradient on a textured board requires high pressure or solvent blending, which can destroy delicate details.
Smooth surfaces are the undisputed choice for photorealism, botanical illustrations, and intricate line work. Without peaks and valleys to disrupt the pencil’s path, you can render hair-thin lines, crisp edges, and perfectly smooth transitions.
Medium surfaces provide a functional compromise. While they do not allow for the absolute precision of a smooth board, they offer enough stability for decent detail rendering while maintaining the tooth needed for initial color laydown. This makes them highly popular for portrait artists who need to balance skin-texture details with soft, blended gradients.
Surface Texture Comparison Matrix
The following matrix summarizes how each surface texture performs across these core dimensions, helping you quickly identify the best option for your workflow.
| Surface Texture | Tooth/Grip Level | Layering Capacity | Detail Rendering | Best Suited For |
|---|---|---|---|---|
| Smooth (Hot Press) | Low (Minimal friction) | Low (Quick to burnish) | Excellent (Crisp, sharp lines) | Hyper-realism, botanical art, fine lines |
| Medium (Vellum) | Moderate (Balanced resistance) | Moderate (4–6 layers) | Good (Versatile control) | General illustration, portraits, sketches |
| Textured (Cold Press/Rough) | High (Aggressive grip) | High (Supports heavy layering) | Poor (Lines appear broken) | Expressive styles, landscapes, solvent blending |
How to Choose the Right Sketch Board for Your Style
Selecting the ideal sketch board requires mapping your personal artistic style and project requirements to the physical characteristics of the board. Use this decision framework to guide your choice:
- Choose Smooth if… your work relies on extreme precision, sharp edges, and highly realistic textures. If you draw botanical subjects, technical illustrations, or high-contrast portraits where every hair and pore must be rendered with absolute clarity, a smooth board is your best option. However, you must be comfortable working with a limited layering system, relying on precise color selection and light pressure to avoid premature burnishing.
- Choose Medium if… you want an all-purpose, highly versatile board. If your style ranges from stylized character design to realistic portraits, a medium board provides the flexibility to layer colors smoothly while retaining enough control for fine details. This is the ideal starting point for students and hobbyists who are still developing their personal style.
- Choose Textured if… you prefer a painterly, expressive, or loose aesthetic. If you enjoy building up dozens of rich, saturated layers, or if you frequently use blending solvents to create smooth, paint-like washes of color, a textured board is essential. The deep tooth will hold the heavy pigment loads without complaining, though you will need to accept that fine, sharp lines are difficult to achieve.
- Verify first if… you plan to combine colored pencils with other media. For example, if you want to apply a watercolor or gouache underpainting before working with colored pencils, a standard smooth or medium paper board may warp or pill. You must verify that the board is specifically rated for wet media, checking its weight and sizing.
Beyond texture, always check the board’s weight and thickness. In the Philippines, where seasonal humidity can exceed 80%, lightweight boards are highly prone to warping and buckling, especially when solvents are applied. Look for heavy-duty boards (such as 2-ply, 3-ply, or boards weighing over 300 GSM) to ensure structural integrity. Premium archival boards can range from ₱300 to over ₱1,200 per sheet depending on size and thickness, but they offer the rigidity needed to withstand heavy pressure and blending techniques without denting or bending.
Practical Tips for Testing and Preparing Your Board
Before committing hours of work to a major project, take the time to run low-risk tests on your chosen sketch board to understand how it behaves with your specific tools.
- Swatching: Always create a test swatch on the back of the board or on a cut-off scrap from the same batch. Different colored pencil brands use different binders—some are wax-heavy (which burnish quickly), while others are oil-based (which are harder and layer differently). Swatching allows you to observe how your specific pencils interact with the board's tooth, helping you find the exact point where the surface stops accepting pigment.
- Surface Modification (Low-Risk): If you find that a smooth board is slightly too slick, or a textured board is too rough, you can perform minor modifications. Some artists use a very fine-grit sandpaper (400-grit or higher) to lightly buff a smooth board, creating a subtle, custom tooth. Alternatively, applying a thin, even coat of clear matte gesso or clear pastel primer can add tooth to a smooth surface.
- Safety & Verification Boundary: Be aware that altering the surface of a board is irreversible and can permanently damage the paper's built-in sizing (the chemical treatment that controls liquid absorption). Always test these modifications on small scrap pieces first. Read the manufacturer's guidelines for both the board and any primers or solvents you plan to use. If the instructions conflict, or if you are unsure how the board will react to a specific solvent, contact the manufacturer or test on a sacrificial scrap to avoid ruining expensive materials.
Frequently Asked Questions (FAQ)
Can I use a smooth sketch board for colored pencils if I prefer fine details?
Yes, smooth sketch boards are excellent for fine-detail work because they allow your pencil to glide without being disrupted by surface texture. However, you must manage the trade-off of limited layering capacity. To make the most of a smooth board, use light pressure during your initial layers, and consider using pencils with harder cores (which contain less wax binder) to delay burnishing.
How does board thickness affect colored pencil blending and pressure?
While surface texture dictates how the pigment clings to the board, thickness (measured in ply or GSM) determines how the board handles physical stress. Heavy burnishing requires significant downward pressure, which can easily dent or warp thin boards. Furthermore, if you use liquid solvents for blending, a thin board will buckle and warp as it dries—a risk magnified by high humidity. Opting for a thicker, multi-ply sketch board ensures the surface remains flat and structurally sound throughout your creative process.
Community discussion
Share your experience or ask a question. Comments are reviewed before publication.