
Choosing the right string binder—commonly referred to as a cord lock, toggle, or stopper—is a critical decision that directly impacts the functionality, durability, and appearance of your sewn projects. Whether you are tailoring a lightweight windbreaker for sudden tropical downpours, assembling a heavy-duty canvas backpack, or finishing a delicate satin pouch, the hardware you select must harmonize with both your fabric and your drawstring cord. The wrong choice can lead to slipping cords, torn fabric casings, or bulky, awkward closures that detract from your craftsmanship.
To make an informed decision, you must evaluate the structural design of the binder, the physical properties of your textile, and the mechanical demands of the project. By understanding how different clamping mechanisms interact with various cord materials, you can ensure your closures remain secure under tension while operating smoothly. This guide will walk you through the essential factors of selection, sizing, and installation to help you choose the perfect string binder for your next sewing venture.
Identifying the Right String Binder Mechanism
Before purchasing hardware, it is essential to understand the distinct mechanical designs of string binders, as each serves a specific functional purpose. The most common variety is the spring-loaded cord lock, which features an internal metal spring housed within a plastic or metal casing. When you press the plunger down, the holes in the casing and the plunger align, allowing the cord to slide freely. Releasing the plunger engages the spring, clamping the cord firmly in place. These are available in single-hole configurations, which route both ends of a drawstring through a single opening, and double-hole configurations, which keep the cord ends separate to prevent twisting.
Products mentioned in this guide
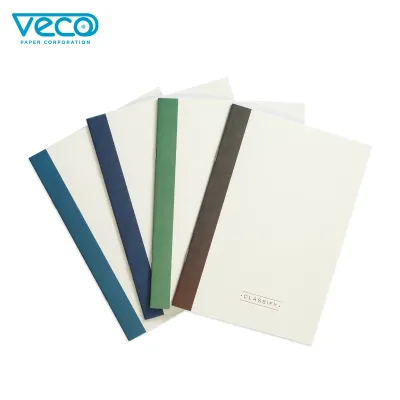
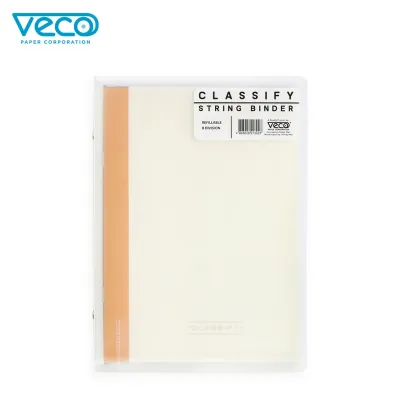
![[EAs Corner] A7 Jumbo Colored PP Matte 2-Rings Binder with String](https://img.lazcdn.com/g/p/b3bd682cdc240ac883a9e99fffe967ca.jpg_400x400q80.jpg_.webp)
Prices are valid at publication and may change. Please refer to the product page for the latest price.
Toggles and toggle bolts offer a different approach to tension control, often favored for heavy-duty applications and outdoor gear. Traditional toggles are solid, elongated pieces made of wood, plastic, or metal that slip through a fabric loop or cord eyelet to secure a closure. Modern mechanical toggles, however, utilize robust lever-lock or screw-down mechanisms to provide an exceptionally tight grip on thick cords. These are ideal for situations where the closure will be subjected to constant movement, high wind loads, or heavy weight, as they do not rely solely on spring tension to maintain their hold.
Cord ends and stoppers serve a primarily protective and aesthetic role rather than an active clamping function. These small, bell-shaped or cylindrical caps are installed at the very tips of your drawstrings. By enclosing the raw, cut edges of the cord, they prevent fraying and unraveling over time. Additionally, they act as physical barriers that prevent the drawstring from accidentally slipping back into the fabric casing during washing or active use. Choosing the right combination of these mechanisms ensures your project is both highly functional and visually polished.
Matching Binders to Your Fabric Weight and Cord Thickness
A successful sewing project requires a careful balance between the weight of your fabric, the thickness of your drawstring, and the physical mass of your string binder. When working with lightweight fabrics such as ripstop nylon, thin polyester, or delicate silks, heavy hardware is your enemy. A bulky metal cord lock will weigh down a lightweight garment, causing the fabric to sag, bunch awkwardly, and eventually tear at the exit point. For these delicate applications, opt for small, smooth-bore plastic cord locks and fine, braided cords. The lightweight plastic minimizes strain on the fabric, while the smooth interior of the lock prevents the fine cord fibers from fraying.

Conversely, medium to heavy-duty fabrics like canvas, denim, heavy fleece, and rugged outdoor synthetics demand substantial hardware. These materials are typically paired with thick cords, such as 550 paracord or heavy cotton rope, which require larger binders to accommodate their diameter. For these projects, reinforced plastic or metal toggles are the preferred choice. The robust construction of these binders provides the necessary clamping force to hold thick cords secure under heavy tension, ensuring that your bags, jackets, or utility gear remain tightly closed even when packed to capacity.
When evaluating potential string binders, pay close attention to the design of the internal grip teeth. Some cord locks feature aggressive, sharp teeth designed to bite deeply into the cord for maximum slip resistance. While highly effective for rugged utility gear, these sharp teeth can quickly degrade and shred softer cord fibers, such as cotton or loosely braided polyester, over time. For everyday apparel and softer materials, look for binders with flat, ribbed, or textured clamping surfaces. These designs distribute the clamping pressure over a wider area, securing the cord firmly without cutting or wearing down the fibers.
Verifying Sizing and Installation Compatibility
To avoid project delays and installation failures, you must verify the physical dimensions of your hardware before beginning your project. Start by measuring the exact diameter of your drawstring cord. It is important to measure the cord in its natural, uncompressed state, as well as when it is slightly compressed, as it will be squeezed inside the binder mechanism. Compare this measurement against the manufacturer’s specified hole size for the cord lock. If the hole is too small, threading the cord will be incredibly frustrating, and the binder will not slide smoothly. If the hole is too large, the spring mechanism will not be able to compress the cord sufficiently, leading to constant slipping.
Next, consider how the string binder will interact with the fabric exit point of your project. Drawstrings typically emerge from a sewn casing through either a stitched buttonhole or a metal grommet. The base of your selected cord lock should sit flush against this exit point when the cord is pulled tight. If you are using a large, wide binder on a narrow casing, the hardware may twist or pull unevenly, causing premature wear on the fabric. Ensure that the scale of your hardware matches the dimensions of your casing and grommets to maintain a clean, professional appearance.
Finally, evaluate the spring tension and overall clearance of the binder to ensure ease of operation. A high-tension spring is excellent for securing heavy loads, but it can be difficult to compress if the button or plunger is too small or awkwardly shaped. This is particularly important for garments like hoods or activewear, where you need to be able to adjust the tension quickly with one hand. Test the hardware by pressing the plunger several times; it should compress smoothly without requiring excessive force, and the clearance space should allow your fingers to grip the body of the lock securely.
Quick Selection Matrix for Common Sewing Projects
To help you quickly narrow down your options, the following matrix outlines the most suitable string binder configurations for common sewing applications, balancing weight, durability, and ease of use.
| Sewing Project | Recommended Binder Type | Ideal Cord Material | Key Consideration |
|---|---|---|---|
| Hoodies & Activewear | Single-hole plastic cord lock | Braided polyester or cotton cord | Lightweight, skin-friendly, and fully machine-washable |
| Windbreakers & Raincoats | Double-hole mini plastic lock | Thin nylon utility cord | Low profile, weather-resistant, and easy to adjust with one hand |
| Backpacks & Duffel Bags | Heavy-duty double-hole toggle | 550 Paracord or thick nylon cord | High tension resistance, impact-proof, and secure under heavy loads |
| Tents, Tarps & Dry Bags | Reinforced plastic or metal toggle | Heavy-duty braided polypropylene | UV-resistant, rust-proof, and capable of withstanding wind loads |
| Tote Bags & Pouches | Decorative metal cord ends | Cotton rope or waxed cord | Aesthetic appeal, preventing fraying, and adding a premium weight |
When selecting from this matrix, keep in mind the critical trade-offs between different materials. While metal binders offer a premium look and exceptional durability, they add significant weight and can feel cold against the skin when used on apparel. Plastic binders, on the other hand, are incredibly lightweight, cost-effective, and rust-proof, making them highly versatile for everyday wear and wet-weather gear, though they may degrade faster under prolonged exposure to direct sunlight.
Installing and Maintaining Your String Binders
Proper installation is key to ensuring that your string binders and the surrounding fabric withstand the test of time. The point where a drawstring exits a fabric casing is subjected to concentrated stress every time the cord is pulled or adjusted. To prevent the fabric from tearing or fraying under this tension, always reinforce the exit point. Apply a small square of fusible interfacing to the backside of the fabric before sewing a buttonhole or installing a metal grommet. For high-stress utility gear, adding a tight bar tack stitch adjacent to the exit point will distribute the pulling force more evenly across the textile fibers.
Routine maintenance is especially important in warm, humid tropical climates, where moisture can accelerate the degradation of both plastic and metal hardware. Periodically inspect your string binders for signs of wear, such as spring fatigue, plastic cracking, or metal corrosion. If you notice a white, powdery residue on metal binders or a loss of spring tension, it is time to take action. When washing garments or gear with plastic cord locks, secure the drawstrings and place the items in a mesh laundry bag to prevent the hardware from slamming against the washing machine drum, which can crack the plastic casings.
Recognizing when a binder has reached the end of its lifespan will save you from the frustration of a failed closure in the field. If a cord lock no longer holds its grip under moderate tension, or if the internal spring feels gritty and stiff, replace it immediately. Replacing a worn binder is a simple, low-cost maintenance task that instantly restores the functionality and security of your favorite sewn items.
Frequently Asked Questions (FAQ)
Can I use a metal cord lock on a delicate silk or satin drawstring?
Using a metal cord lock on delicate fabrics like silk or satin is highly discouraged due to the physical characteristics of the materials. Metal locks often feature aggressive internal grip teeth or sharp edges that can easily snag, fray, or cut through fine, delicate fibers under tension. Additionally, the weight of a metal binder can cause lightweight fabrics to sag and drape poorly. For delicate drawstrings, it is much safer to use smooth-bore plastic stoppers, soft silicone cord locks, or traditional self-fabric ties, which secure the closure without risking structural damage to the textile.
How do I replace a broken spring inside a plastic cord lock?
Attempting to repair a broken spring inside a plastic cord lock is generally unfeasible and unsafe, as these small mechanisms are permanently sealed during manufacturing. Instead, the best course of action is to replace the entire hardware piece. To do this safely, cut the old lock away if it cannot be unthreaded, taking care not to damage the drawstring. Attach a safety pin or a sewing bodkin to one end of the cord to keep it from slipping back into the casing, then thread the cord through the holes of your new spring-loaded binder. Once threaded, tie a secure knot at the end of the cord to keep the new lock in place.

Community discussion
Share your experience or ask a question. Comments are reviewed before publication.