
Correcting a mistake written in ink can feel like a high-stakes gamble, as a single aggressive stroke with a ballpen eraser can easily shred your notebook page or leave a messy, gray smudge. To safely remove ballpen ink without tearing or damaging the paper, you must use light, single-directional strokes on a completely dry, hard surface while monitoring the paper fibers for signs of thinning. By understanding the physical limits of both the ink and the paper, you can successfully lift or fade mistakes using a specialized ballpen eraser without ruining your document.
Writing by hand remains a cornerstone of daily productivity, academic study, and creative expression. However, the permanence of ink introduces a layer of anxiety that doesn’t exist when working with pencils. While digital tools offer an instant undo button, physical paper requires a physical solution. The ballpen eraser is a highly effective tool when used correctly, but it is often misunderstood. Many users treat it like a standard pencil eraser, applying heavy pressure and rapid friction, which inevitably leads to a ruined page.
To master the art of ink removal, one must approach the task with patience and precision. This guide will walk you through the science of ink adhesion, the essential preparation steps for your workspace, the exact physical techniques required to lift ink safely, and how to adapt your approach to various paper types. With the right methodology, you can maintain pristine, professional-looking documents even when mistakes happen.
Products mentioned in this guide
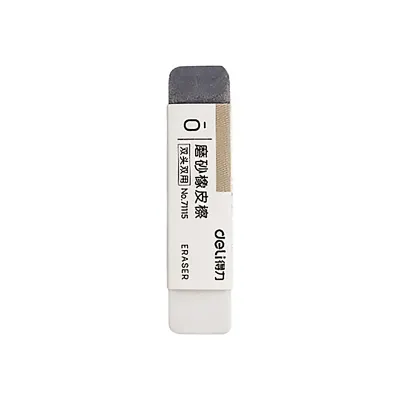
10 Lazada user ratings
The quality was great and it came as advertipsed, though small and the size of a regular finger. Still this might become my go to eraser. 8/…Read full reviewShow less
The quality was great and it came as advertipsed, though small and the size of a regular finger. Still this might become my go to eraser. 8/10 Should be bigger
💰Price:10/10 🎨Design:10/10 ✅Quality:10/10 Okay naman. So far nakakabura naman ng pen marks. Satisfied naman ako sa item. Legit siya. Hehe. T…Read full reviewShow less
💰Price:10/10 🎨Design:10/10 ✅Quality:10/10 Okay naman. So far nakakabura naman ng pen marks. Satisfied naman ako sa item. Legit siya. Hehe. Thanks seller. 👍
High-quality eraser, Perfect for erasing pencil marks, and also good for erasing ballpen ink too. Thanks Seller at kay Kuya Rider.
Great for precision erasing, Durable and long-lasting,
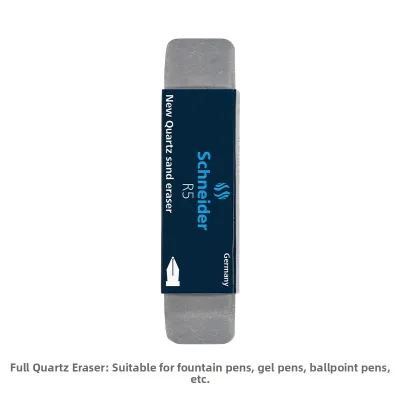
7 Lazada user ratings
It's pretty useful, but feels a bit rough. I personally prefer Pentel.
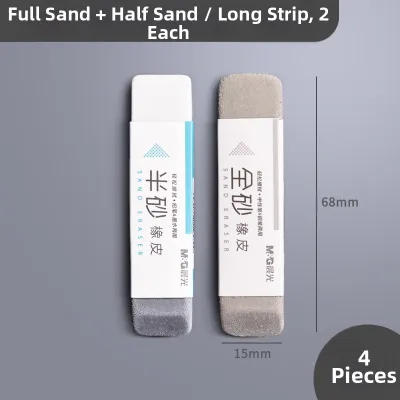
291 Lazada user ratings
The product is good, and the customer service is nice. Totally worth buying!
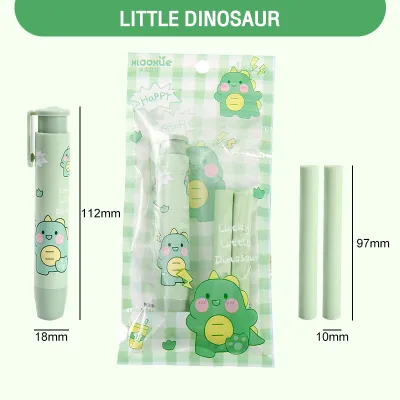
295 Lazada user ratings
The press eraser feature is very convenient., The retractable eraser is so cute!, The pencil eraser is of high quality., The pencil eraser i…Read full reviewShow less
The press eraser feature is very convenient., The retractable eraser is so cute!, The pencil eraser is of high quality., The pencil eraser is of high quality., The eraser pen is easy to use.,
The press eraser feature is very convenient., The eraser pen is easy to use., The retractable eraser is so cute!, The pencil eraser is of hi…Read full reviewShow less
The press eraser feature is very convenient., The eraser pen is easy to use., The retractable eraser is so cute!, The pencil eraser is of high quality.,
The retractable eraser is so cute!, The eraser pen is easy to use., The press eraser feature is very convenient.,
The pencil eraser is of high quality., The eraser pen is easy to use., The retractable eraser is so cute!,
The eraser pen is easy to use., The pencil eraser is of high quality., The retractable eraser is so cute!,
Prices are valid at publication and may change. Please refer to the product page for the latest price.
What makes ballpen ink harder to erase than pencil marks?
Ballpen ink is exceptionally difficult to erase because it chemically bonds with and penetrates deep into the paper fibers, unlike pencil graphite which merely sits on the surface. While a standard pencil eraser only needs to lift loose carbon particles, a ballpen eraser must physically abrade or chemically lift ink that has soaked into the cellulose structure of the page.
Paper is a dense web of interwoven plant fibers. When you write with a pencil, the graphite core wears down, leaving tiny solid carbon particles on top of these fibers. Because the graphite does not sink into the paper, a soft rubber or vinyl eraser can easily attract and lift these particles away using simple adhesion.
In contrast, ballpoint pen ink is a paste composed of synthetic dyes or pigments dissolved in a solvent. When the pen’s rotating ball transfers this ink to the page, the solvent draws the colorants deep into the porous gaps between the paper fibers, where it dries and cures. To remove the ink, you must physically remove the microscopic layers of paper fibers that have absorbed the pigment.
Because of this deep penetration, standard soft erasers are completely ineffective against ballpen ink. Attempting to use a pink school eraser on ink will only result in the eraser wearing down rapidly while smearing the surface. Specialized ballpen erasers, often referred to as sand or silica erasers, contain tiny abrasive particles designed to gently scrape away the ultra-thin top layer of paper fibers where the ink resides. Because this process is inherently destructive, achieving a clean erasure requires extreme care to avoid wearing a hole straight through the page.
How should you prepare your paper and workspace before erasing?
To prevent paper damage, you must prepare a rock-solid, flat workspace and ensure both the paper and your eraser are completely free of moisture and debris. Erasing on a soft or uneven surface allows the paper to bend under pressure, which is the primary cause of sudden tears and deep creases.

The surface directly beneath your paper plays a critical role in how pressure is distributed. If you attempt to erase a mistake while your notebook is resting on your lap or a soft couch, the paper will flex downward. This flexing creates localized stress points, making it incredibly easy for the eraser to catch and rip the page. Always place your document on a hard, flat surface, such as a glass desk or a polished wooden table.
Moisture is another major enemy of paper integrity. Cellulose fibers are held together by hydrogen bonds, which weaken significantly when exposed to water, humidity, or skin oils. Before you begin erasing, ensure that your hands are clean and dry. If your palms are warm or damp, wash and dry them thoroughly. You can also place a clean sheet of scrap paper under your non-dominant hand to act as a barrier, preventing sweat or oils from transferring to the page.
Finally, inspect the tool itself. A dirty ballpen eraser is a common culprit behind messy smudges. If the eraser has been sitting in a pencil case, it may have gathered graphite dust or ink residue from previous uses. To clean your eraser, rub it vigorously against a clean piece of scrap paper until the working edge is clean and free of discoloration. Ensure that the eraser has not worn down to its plastic casing or metal holder, as these hard materials will instantly gouge and tear your document.
What is the correct step-by-step technique for erasing ballpen ink?
The correct technique for erasing ballpen ink involves holding the eraser at a shallow angle and applying light, short, single-directional strokes across the mistake. Never rub back and forth or in circular motions, as this rapidly shreds the delicate paper fibers.
To begin, position your non-dominant hand to secure the paper. Use your thumb and index finger to form a tight “V” or “U” shape directly around the mistake. Press down firmly to stretch the paper taut against the hard surface underneath. If the paper is allowed to shift or bunch up even slightly as the eraser moves, the friction will cause it to fold and tear instantly. Keeping the paper perfectly flat and immobile distributes the erasing force evenly across the surface.
Next, hold the ballpen eraser close to its tip at a shallow angle, roughly 30 to 45 degrees relative to the page. This grip gives you maximum control over the amount of pressure you apply. Apply very light downward pressure and move the eraser in short, straight strokes in a single direction, sweeping away from your body. Each stroke should be no longer than 5 to 10 millimeters. Lift the eraser completely off the page at the end of each stroke before repeating. This single-directional approach prevents the paper fibers from being pulled back and forth, which is what causes them to fray and break.
As you erase, the abrasive particles in the eraser will generate fine debris mixed with tiny fragments of paper fiber and lifted ink. Clear this debris frequently using a clean, soft-bristled drafting brush, a dry microfiber cloth, or a gentle puff of air. Do not use your bare hand, as skin oils can smudge the loose ink back into the paper. Pause after every ten to fifteen strokes to evaluate the condition of the paper. Look at the page from a shallow angle against a light source; if you notice the surface starting to look fuzzy or if tiny rolls of paper fiber (pilling) begin to form, stop immediately.
How do you adjust your technique for different paper thicknesses?
You must calibrate your erasing pressure and stroke frequency to match the specific weight and texture of the paper you are using. Thin, delicate papers require extreme patience and minimal friction, while thicker premium sheets can withstand slightly more focused abrasion.
Standard school notebooks (50 to 70 gsm) feature thin, loosely bound fibers that tear easily. When working with thin paper, use the absolute lightest pressure possible and accept that you may only fade the ink to a light grey. Standard office printer paper (80 to 100 gsm) offers moderate structural integrity and can handle slightly more consistent erasing, but you must still monitor the surface closely for pilling or a loss of the paper’s original finish. If the paper has a coated or glossy surface, erasing will strip away this coating, leaving a dull, textured spot.
Thicker premium papers, such as heavy cardstock or mixed-media journals (120+ gsm), are much more resilient but often feature a distinct texture or “tooth.” Aggressive erasing can flatten this texture, leaving a noticeably smooth, shiny patch. To preserve the paper’s natural texture, use a light touch and rotate the eraser slightly between strokes. Regardless of the paper type, always perform a scrap test first on an inconspicuous corner or a scrap piece of the exact same paper stock to gauge how much pressure the fibers can handle before they begin to degrade.
What are the common mistakes that cause paper tearing or smudging?
The most common mistakes that ruin documents during erasing are applying excessive downward force and attempting to erase ink that is still wet. These actions instantly compromise the structural integrity of the paper and spread the pigment across a wider area.
The most frequent error is the instinctive urge to press down harder when the ink does not fade immediately. However, excessive force pushes the abrasive elements of the eraser deep into the paper, shearing the delicate cellulose fibers and leaving a hole. Another critical mistake is erasing over wet or freshly written ink. Gel pens, rollerball pens, and even some heavy oil-based ballpoints deposit liquid ink that requires time to dry. Erasing immediately will act as a squeegee, smearing the wet pigment across a wide area and creating a large, dark smudge.
Using a dirty or worn-out eraser is another common pitfall. Erasers naturally accumulate graphite, colored pigments, and oils from previous tasks; if not cleaned, these contaminants will transfer directly onto your clean document. Furthermore, rubbing in multiple random directions—such as rapid back-and-forth or circular motions—is highly destructive. When you rub paper in multiple directions, you stress the cellulose fibers from every angle simultaneously, causing the paper to pill, thin, and tear much faster.
When should you stop erasing and consider alternative correction methods?
You should stop erasing immediately the moment you notice the paper surface becoming fuzzy, pilling, or showing a slight indentation when viewed against the light. These physical changes indicate that the paper fibers have reached their structural limit and any further friction will result in a tear.
Knowing when to walk away is the most important skill in document correction. A ballpen eraser is designed for minor adjustments, not for erasing entire sentences or heavy, deeply saturated ink blots. If you wrote the original text with heavy hand pressure, leaving a deep physical groove, the ink is embedded too deeply to be safely erased. When you reach the physical limits of the paper, transition to alternative correction methods like correction tape, which lays down a dry, white film that completely covers the mistake and allows you to write over it immediately.
For non-standard shapes, correction fluid can be applied with a fine brush, provided you let it dry completely before rewriting. In many professional or academic contexts, a simple, neat strikethrough using a ruler is actually the cleanest solution. Drawing a single, straight horizontal line looks far more professional than a messy, half-erased smudge or a page with a visible hole. Accepting a faint ‘ghost’ mark of the original ink is always preferable to destroying the structural integrity of the document.
Community discussion
Share your experience or ask a question. Comments are reviewed before publication.