
A comprehensive beginner keychain making set should provide a balanced mix of base materials, durable hardware, and ergonomic assembly tools to ensure a smooth crafting experience. When evaluating options like the Guka keychain making set or similar DIY craft kits, it is crucial to look beyond the total piece count. Many kits advertise hundreds of pieces, but a closer inspection often reveals that the majority of these items are tiny jump rings or repetitive stickers rather than substantial crafting tools or bases. To make an informed purchase, you must understand what essential components are required to complete a project, how to assess the quality of the included tools, and how to verify that the materials will withstand daily wear and tear.
Essential Components Every Beginner Keychain Kit Needs
Every successful DIY keychain project relies on a reliable foundation of hardware, tools, and decorative bases. Without the correct combination of these elements, you may find yourself unable to complete your designs or forced to make separate purchases to fill the gaps.
Core hardware is the structural backbone of any keychain. A high-quality beginner kit must include a variety of attachment options to suit different styles and uses. Look for standard-sized key rings, which serve as the primary attachment point for keys. Lobster clasps are equally important, offering a quick-release mechanism that allows users to clip their keychains onto bag straps, belt loops, or backpacks. Split rings and jump rings act as the connectors between the decorative base and the main key ring. Extension chains are also highly useful, providing the necessary length to let your decorative elements hang freely without bunching up against the keys.
Products mentioned in this guide
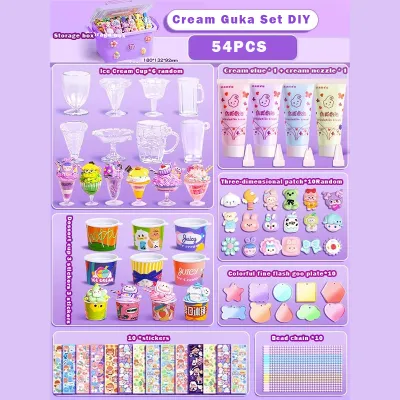
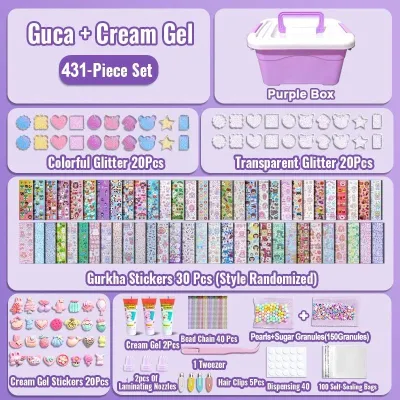
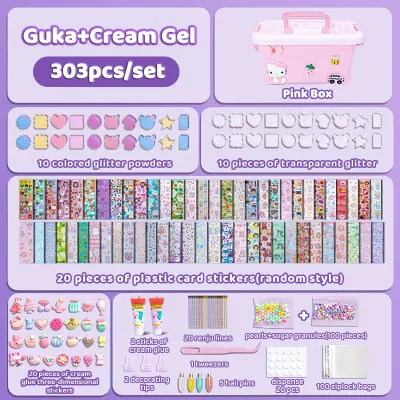
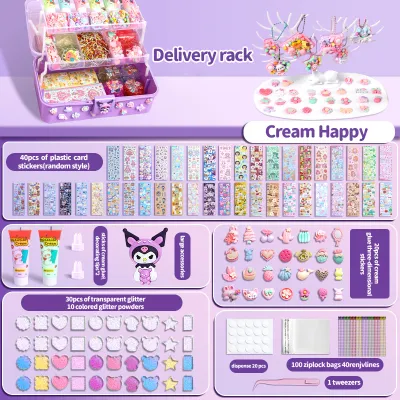
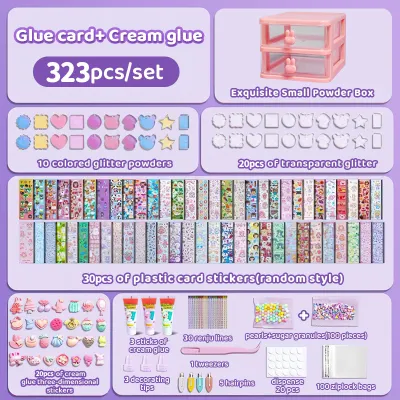
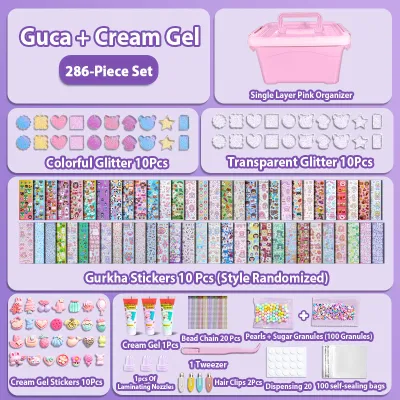
Prices are valid at publication and may change. Please refer to the product page for the latest price.
Assembling metal hardware with your bare hands or improper household tools can lead to frustration, damaged fingernails, and scratched metal. A proper beginner kit should include dedicated jewelry-making pliers. Split ring pliers are particularly valuable, as they feature a specialized tooth designed to easily spread split rings apart without warping the metal. Flat-nose pliers are essential for holding components securely and closing jump rings flush, while round-nose pliers help you create neat, professional-looking wire loops if you decide to add custom beads or charms to your designs.
The base material is the canvas of your keychain, and its type determines the entire crafting process. Acrylic blanks are incredibly popular for beginners due to their smooth, rigid surface, which is perfect for stickers, vinyl decals, or paint pens. Other kits might focus on leather scraps, which introduce beginners to basic leather stamping, cutting, and edge-burnishing techniques. Shrink plastic is another engaging option, allowing crafters to draw designs that shrink and harden when heated. Some kits may feature silicone molds and resin, though these require a more involved curing process.
To ensure your finished keychain looks professional and lasts, appropriate finishing supplies are necessary. For acrylic blanks, this begins with protective films on both sides of the blank to prevent scratching during transit and handling; these must be peeled off before decorating. If the kit involves stickers or paint, a clear sealant or a small bottle of UV resin can be used to coat the surface, locking the design in place and protecting it from scratches, moisture, and daily friction.
Evaluating the Guka Keychain Making Set for Beginners
The Guka keychain making set has gained immense popularity, particularly among younger crafters and students who enjoy the vibrant, sticker-based customization of acrylic plates. Originating from a style of decorating small acrylic pieces with colorful stickers, cream glue, and charms, these kits offer a highly visual and accessible entry point into crafting. However, when shopping for a Guka kit on online marketplaces, you must carefully evaluate the contents to ensure you are getting a practical set rather than a box of filler items.

One of the most common pitfalls when purchasing a Guka kit is falling for high piece counts. A product listing might proudly advertise a “300-piece set,” but a detailed breakdown often reveals that 200 of those pieces are tiny, identical jump rings, and another 50 are basic sticker sheets. When evaluating a kit, calculate the ratio of usable bases (the acrylic Guka plates) to the hardware and decorative elements. A well-balanced kit should provide a reasonable number of acrylic blanks in various shapes—such as circles, hearts, and stars—along with an equivalent number of colorful ball chains or lobster clasps so that every decorated plate can actually be turned into a functional keychain.
While many Guka kits rely on simple plastic tweezers for sticker placement, some comprehensive sets include metal tools for assembly. If the kit includes pliers or tweezers, check the product specifications for their material composition. Look for tools made from carbon steel or stainless steel, which offer the structural integrity needed to bend metal rings without bending the tool itself. Rust-resistant coatings are highly beneficial, especially in humid tropical environments where moisture can quickly degrade unprotected metal. Additionally, ensure the handles feature comfortable, non-slip rubber or silicone grips to prevent hand fatigue during long crafting sessions.
A great beginner kit should not lock you into a proprietary ecosystem. Verify whether the included acrylic blanks are compatible with standard crafting tools you might already own or plan to acquire. For instance, standard-thickness acrylic blanks (usually around 2mm to 3mm) should be flat and smooth enough to accept vinyl decals cut from home vinyl cutters or manual die-cutting machines. If you prefer hand-decorating, ensure the surface is compatible with acrylic paint pens, permanent markers, and standard adhesive stickers without causing the ink to bead up or smear.
For a beginner, clear guidance is the difference between a fun afternoon project and a frustrating mess. Evaluate what kind of instructional support the kit provides. A high-quality set should include a printed step-by-step manual with clear diagrams showing how to open and close jump rings, how to peel the protective film from the acrylic, and how to layer stickers for a balanced design. Some modern kits also provide QR codes linking to video tutorials, which are incredibly helpful for visual learners who want to see the assembly process in real-time.
Quality and Compatibility Checks Before You Buy
Before finalizing your purchase of a keychain making set, it is essential to perform a few quality and compatibility checks. This ensures that your crafting experience is safe, enjoyable, and yields durable results that can withstand the rigors of daily use.
Keychains are subjected to constant friction, tossing, and exposure to environmental elements. In a humid tropical climate like the Philippines, cheap metal hardware can tarnish, turn green, or rust within weeks. When browsing product descriptions, look for details regarding the metal’s finish. Look for terms like “electroplated” or “nickel-free plating,” which indicate a protective layer has been applied to the iron or alloy base. High-quality kits often use stainless steel or brass hardware, which naturally resist corrosion much better than cheap zinc alloys.
The physical design of the tools included in your kit plays a significant role in your crafting comfort. If the kit includes pliers, check if they feature a double-leaf spring mechanism. This mechanism automatically pushes the handles open after each squeeze, reducing the strain on your hand muscles. Furthermore, pay attention to the size of the tools; mini-pliers (around 4.5 to 5 inches in length) are ideal for the delicate work of keychain assembly and fit comfortably in smaller hands, whereas full-sized household pliers are often too bulky and can easily scratch delicate acrylic or metal parts.
As you complete the projects in your initial kit, you will inevitably run out of certain components while having others left over. Before buying a kit, consider how easy it will be to restock individual parts. Standard-sized hardware—such as 25mm key rings, 12mm lobster clasps, and 8mm jump rings—can be easily sourced from local stationery stores, school supply shops, or online craft retailers in the Philippines. Avoid kits that use highly unusual or proprietary attachment systems that force you to buy expensive brand-specific refills.
Safety should always be a priority, especially if the keychain making set is intended for children or teenagers. If the kit includes chemical components like UV resin, cream glue (decoden), or solvent-based sealants, check for non-toxic certifications such as ASTM D-4236 or EN71. Ensure the product listing specifies age recommendations. For younger crafters, sticker-based Guka kits that do not require liquid adhesives or sharp metal tools are the safest choice, while resin-based kits should only be used by older teens or adults in well-ventilated spaces with appropriate protective gloves.
Planning Your First Projects and Future Upgrades
Starting with a structured plan will help you get the most out of your beginner keychain making set. By starting with simple designs, you can build your confidence and technical skills before moving on to more complex creations.
For your very first project, start with a simple sticker-decorated acrylic tag. First, peel the protective film off both sides of an acrylic blank. Wipe the surface with a clean cloth to remove any dust or fingerprints. Select a few coordinating stickers from your kit, placing the larger background elements down first, followed by smaller accent stickers and character designs. Once you are happy with the layout, use your tweezers to press the stickers down firmly, smoothing out any air bubbles. Finally, use your split ring pliers to attach a colorful ball chain or a jump ring and lobster clasp through the pre-drilled hole. This project requires zero drying time and provides instant gratification.
While a beginner kit is an excellent starting point, it is important to recognize its boundaries. Standard Guka and acrylic kits are designed for surface decoration and basic assembly; they are not equipped for advanced techniques. For example, if you want to try complex resin casting, you will need specialized silicone molds, measuring cups, mixing sticks, and a UV curing lamp, which are rarely included in basic starter sets. Similarly, heavy metal stamping—which involves physically indenting metal blanks with steel stamps and a heavy hammer—requires specialized high-carbon steel stamps and a solid brass mallet that fall outside the scope of a standard beginner kit.
As your skills develop, you will naturally reach the limits of your starter kit. You will know it is time to upgrade when you find yourself wanting to create more durable, professional-grade items for gifts or small-scale sales. Key triggers for upgrading include wanting to work with premium hardware (such as solid brass or sterling silver-plated clasps), needing a self-healing cutting mat to protect your workspace, or wanting to invest in specialized tools like a vinyl cutting machine for custom lettering. Transitioning to these specialized tools allows you to expand your creative possibilities far beyond the pre-made designs included in your initial kit.
Frequently Asked Questions (FAQ)
Do I need a special printer to use the acrylic blanks in these kits?
No, you do not need a special printer to customize the acrylic blanks included in beginner kits. While professional crafters sometimes use expensive UV printers to print designs directly onto acrylic, beginners have many accessible, budget-friendly alternatives. You can use standard adhesive vinyl sheets cut with scissors or a craft punch, or use pre-printed stickers which are often included in Guka kits. Another excellent option is using acrylic paint pens or permanent metallic markers to hand-draw designs directly onto the plastic. If you want to use a standard home inkjet or laser printer, you can print your designs onto printable vinyl sticker paper or water-slide decal paper, cut them out, and apply them to the blanks.
How can I prevent the metal keychain parts from tarnishing over time?
To prevent the metal parts of your keychains from tarnishing, you must protect them from moisture, oils, and friction. Most beginner kits contain electroplated metal parts, which have a thin layer of decorative metal over a base alloy. In humid tropical climates, this plating can wear off quickly. To extend their lifespan, avoid exposing your keychains to water, rain, or heavy sweat. You can apply a thin, clear protective coating over the metal hardware before assembly. A specialized metal sealer or even a thin coat of clear, non-yellowing nail polish can act as a barrier against moisture and skin oils. Additionally, storing your unused hardware in airtight plastic zip bags with a small silica gel packet will keep them dry and rust-free until you are ready to use them.
Community discussion
Share your experience or ask a question. Comments are reviewed before publication.