
To get the perfect custom sticker labels for your bullet journal, you must verify five key technical specifications before placing an order: the base material’s writability, the surface finish’s ink compatibility, the dimensions relative to your journal’s grid system, the adhesive’s impact on delicate paper, and the file setup requirements (bleed and color profiles).
Bullet journaling is a highly tactile, personalized planning method. Unlike standard commercial stickers used for general decoration, functional planning stickers must withstand daily handling, high-humidity environments, and various pen inks without smudging, bleeding, or warping the pages. Selecting the wrong material or adhesive can ruin a carefully planned layout or even damage the delicate paper of your notebook.
By understanding how digital designs translate to physical adhesive sheets, you can avoid common printing errors and create stickers that perfectly complement your planning routine. This guide breaks down the essential technical checks, material properties, and layout considerations you need to review before submitting your custom order.
Products mentioned in this guide
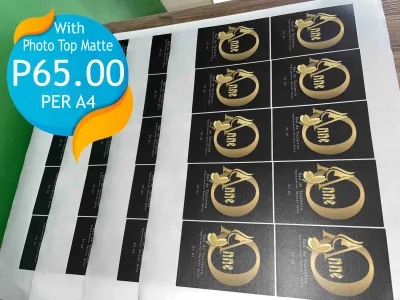
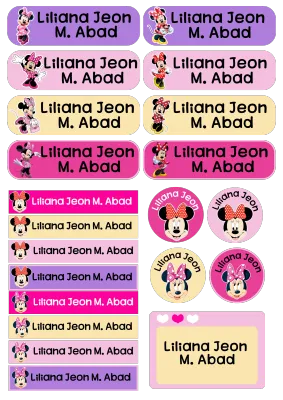
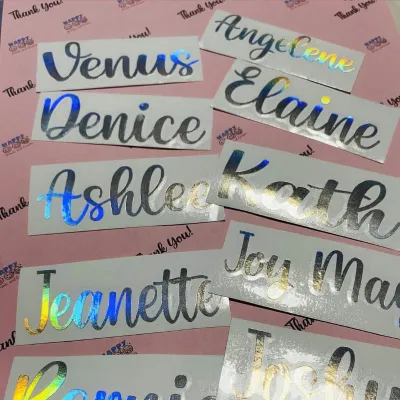
Prices are valid at publication and may change. Please refer to the product page for the latest price.
The Essential Pre-Order Checklist for Custom Stickers
Before finalizing any custom sticker order, running through a systematic checklist ensures your designs print clearly and function perfectly on your journal pages. Planning stickers serve a dual purpose: they must look clean and remain highly functional under daily writing. A single mismatched specification can result in a batch of stickers that repel ink, tear your pages, or fail to fit your journal’s layout.
Keep this quick-reference checklist in mind when configuring your order with a printing vendor:
- Base Material: Select porous paper for writing or durable synthetic vinyl for decorative borders.
- Surface Finish: Choose uncoated or matte finishes for writing; select glossy or transparent finishes solely for non-written decorative elements.
- Cutting Style: Choose kiss-cut sheets for organized icon kits; choose individual die-cut stickers for single, large decorative layouts.
- Adhesive Strength: Select removable or repositionable adhesives for flexible planning; use permanent adhesives only for fixed, structural layouts like index pages.
- File Format & Setup: Ensure your files are exported in high-resolution vector formats (PDF or AI) with a minimum 300 DPI, including correct bleed lines and CMYK color profiles.
Matching these specifications to your specific journaling style is crucial. If your journaling involves heavy daily writing, tracking habits, and logging tasks, your priority must be writability and low-profile paper thickness. If your style leans toward decorative scrapbooking, you can prioritize vibrant color reproduction and unique finishes like holographic or transparent vinyl. Verifying these details beforehand prevents costly misprints and ensures every sticker sheet you receive is fully usable.
Choosing the Right Material and Finish for Journaling
The foundation of a great journal sticker is the material on which it is printed. The choice between paper and synthetic bases determines not only how the sticker looks, but also how it interacts with your favorite writing instruments.

Paper vs. Vinyl and PVC
Paper stickers are the traditional choice for bullet journaling. Because paper is porous, it naturally absorbs water-based inks, making it highly compatible with gel pens, fineliners, and fountain pens. Uncoated paper stickers blend almost seamlessly with the texture of your journal pages, maintaining a low profile that does not make your notebook bulky.
Vinyl and PVC stickers, on the other hand, are synthetic, non-porous materials. They offer excellent durability, tear resistance, and water resistance, which is ideal if you carry your journal everywhere or live in a humid tropical climate. However, because synthetic surfaces do not absorb liquids, standard water-based inks will pool and smear instantly on them. Vinyl is best reserved for purely decorative cover stickers or layouts where you do not plan to write.
Matte vs. Glossy vs. Transparent
The surface finish of your sticker alters both its visual appeal and its utility. Matte finishes are highly popular for journaling because they reduce glare under study lamps and mimic the texture of book pages. Matte surfaces accept ink much better than other finishes, allowing for clean, sharp lines without smudging.
Glossy finishes offer vibrant color reproduction and deep contrast, making illustrations pop. However, they reflect light intensely and are highly prone to fingerprint smudges. Writing on glossy stickers requires specialized permanent markers, as standard planning pens will not dry on them.
Transparent stickers offer a beautiful “printed-on-the-page” aesthetic, allowing your journal’s grid lines to show through the design. When ordering transparent customized sticker labels, verify if your printer uses a white ink underlay. Without a white ink backing, the colors in your design will appear semi-translucent and may get lost when applied to off-white or cream-colored journal pages.
Writable Coatings
If you plan to print custom headers, date covers, or habit trackers that you will write on daily, look specifically for “writable matte” or “uncoated paper” options. Some printers apply a protective plastic laminate over their matte stickers to increase durability. While this laminate protects the print, it turns the surface non-porous, rendering it unwritable for standard gel pens. Always ask your vendor if their matte finish is laminated or uncoated.
To ensure complete compatibility, request a material sample sheet from your printer before placing a bulk order. Once received, perform a simple pen test using your preferred journaling tools. Write a few words, observe the drying speed, check for ink feathering or smudging, and test how smoothly the pen tip glides across the surface.
Sizing, Cutting Styles, and Layout Specifications
Sizing your stickers correctly ensures they fit neatly within your journal’s layout without overlapping adjacent sections or covering critical notes. Proper layout planning also makes the stickers easier to peel and organize.
Grid Alignment
Most high-quality bullet journals utilize a standard 5mm dot grid pattern. To make your custom stickers look integrated and professional, design their dimensions to align with this grid. For example, if you are creating a weekly habit tracker, measure how many grid units wide your journal columns are.
- A standard 5-dot wide column measures exactly 25mm.
- A 3-dot high header measures exactly 15mm.
Always measure your specific notebook’s margins and column widths with a physical ruler before designing, as page sizes can vary slightly between different notebook brands.
Die-Cut vs. Kiss-Cut
Understanding the difference between die-cutting and kiss-cutting is essential for organizing your sticker collection:
- Die-Cut: The cutting blade slices completely through both the sticker material and the plastic-coated backing paper. This results in individual, loose stickers. Die-cuts are excellent for large, single decorative designs, but they can be difficult to peel quickly and are easily misplaced in a pencil case.
- Kiss-Cut: The blade cuts only through the top sticker layer, leaving the backing sheet completely intact. This allows you to host dozens of small icons, headers, or date dots on a single, organized sheet. Kiss-cut sheets are highly recommended for functional journaling kits, as they keep your stickers neat, flat, and easy to peel in rapid succession.
Sheet Layout Optimization
When designing customized sticker labels on a kiss-cut sheet, maximize your space by nesting different sizes together. Group small icon stickers (like weather symbols or water drops) into the empty spaces around larger weekly headers.
Maintain a minimum clearance of 2mm to 3mm between individual cut paths. If your designs are placed too close together, the physical cutting blade can tear the delicate sticker material or lift adjacent stickers off the backing sheet during production. Always verify your printer’s maximum sheet size and minimum cut dimensions to ensure your layout can be manufactured without issues.
Adhesive Types and Notebook Paper Compatibility
The adhesive backing of your sticker determines how well it bonds to your journal pages and whether it can be adjusted if you make a mistake during placement.
Permanent vs. Repositionable Adhesives
Permanent adhesives form a strong, immediate bond with the paper fibers. They are excellent for static layouts, monthly cover pages, or decorative elements that will remain in place permanently. However, once applied, attempting to peel a permanent sticker will tear the underlying page.
Repositionable or removable adhesives allow you to peel and adjust the sticker within a certain timeframe without damaging the paper. This flexibility is incredibly useful for functional planning, where task lists, dates, or weekly trackers might need to be shifted as your schedule changes. Removable stickers peel away cleanly, leaving no sticky residue behind.
Paper Weight Considerations
Bullet journal papers range from ultra-thin 52gsm sheets to thick 160gsm cardstock-like pages. Lightweight papers, such as 52gsm to 80gsm woodfree papers, have delicate surface fibers. Aggressive permanent adhesives can easily warp these thin pages or cause them to curl.
If you use a journal with lightweight paper, opt for low-tack, removable adhesives or thin paper sticker bases. Thick, heavy vinyl stickers with strong adhesives can cause thin pages to sag under the weight, making the notebook difficult to flip through and write in.
Residue and Ghosting
In warm, humid climates, low-quality adhesives can degrade rapidly. Over time, the adhesive can liquefy slightly, seeping through the porous fibers of your journal pages. This causes “ghosting” (a greasy shadow visible on the reverse side of the page) or leaves a sticky residue that glues adjacent pages together when the journal is closed.
To protect your notebook, look for acid-free, archival-safe adhesives. These formulations are designed not to yellow, degrade, or damage paper over long periods.
Always establish a safe testing protocol when working with a new sticker vendor. Apply a small test sticker to an inconspicuous back page or a scrap piece of your journal paper. Leave it in place for 24 hours under normal storage conditions. Gently peel it off to observe how the adhesive behaves, checking for fiber lifting, sticky residue, or page warping.
Navigating Minimum Order Quantities and Vendor Options
Finding the right printer involves balancing your budget, the volume of stickers you need, and the ease of the ordering process. Different vendors cater to different scales of production.
Print-on-Demand (POD) Online Platforms
Print-on-demand services are ideal for individual planners who only need a few sheets of custom designs. These platforms typically feature zero or very low minimum order quantities (MOQs), allowing you to order a single custom sheet to test your designs. They offer user-friendly online creators where you can drag and drop your artwork directly onto a template.
The primary trade-off with POD platforms is the cost per sheet. Because they print in single units, the unit price is relatively high. Additionally, shipping fees can sometimes exceed the cost of the stickers themselves if the production facility is located overseas.
Local Commercial Print Shops
For larger volumes, community group buys, or small business ventures, local commercial print shops in the Philippines offer a highly cost-effective alternative. These shops usually quote prices in Philippine Pesos (₱) and provide substantial volume discounts. Ordering in bulk from a local printer significantly reduces the per-sheet cost compared to international POD services.
Local commercial printers typically enforce an MOQ, which can range from 10 to 50 sheets per design. However, they often provide physical material proofs, allowing you to touch and test the paper and adhesive quality before the full production run begins. This direct communication helps ensure the final product matches your expectations.
Group Buys and Split Orders
If you want the cost benefits of commercial printing but do not need dozens of identical sheets, consider organizing a group buy. Coordinate with local bullet journal communities or online planning groups to split a large order.
You can design a shared sheet containing common functional icons, headers, and trackers that multiple planners can use. By pooling your needs, you can easily meet the printer’s MOQ, split the setup fees, and secure a much lower price per sheet for everyone involved.
| Vendor Type | Minimum Order Quantity (MOQ) | Average Cost Per Sheet | Best Suited For | Key Advantage |
|---|---|---|---|---|
| Print-on-Demand (POD) | Very Low (1–5 sheets) | High (₱150–₱300+) | Individual hobbyists, testing new designs | No upfront commitment, easy online setup |
| Local Commercial Printers | Moderate to High (10–50+ sheets) | Low (₱30–₱80) | Bulk orders, group buys, small businesses | High cost-efficiency, physical material proofing |
Preparing Your Design Files for a Flawless Print
Even the highest-quality materials cannot save a poorly prepared design file. To ensure your custom stickers print sharply and cut accurately, you must prepare your artwork according to professional printing standards.
Bleed Areas and Safe Zones
When sticker sheets are fed through a cutting machine, slight mechanical shifts can occur. If your design background ends exactly at the cut line, a tiny shift of even 0.5mm can result in an unsightly white sliver along the edge of your finished sticker.
To prevent this, always include a bleed area. Extend your background colors, patterns, or illustrations at least 1.5mm to 2mm beyond the intended cut line. Conversely, keep all critical elements—such as text, dates, or central icons—inside the “safe zone,” which sits at least 1.5mm inside the cut line. This ensures that even if the cutting blade shifts slightly, your design remains perfectly centered and fully colored.
Cut Lines and Stroke Weights
Professional printing software requires a clear guide to determine where the cutting blade should travel. You must create a dedicated vector path, often called a die-line or cut path, to indicate this boundary.
Set up your cut lines on a separate, clearly labeled layer in your design software. Use a highly visible, distinct spot color (such as 100% Magenta) and set the stroke weight to a fine line, typically 0.25pt or 0.5pt. Check with your chosen printer for their specific cut-line color and naming conventions, as some automated systems require specific layer names to register the cut paths.
Color Profiles: RGB vs. CMYK
Digital screens display colors using the RGB (Red, Green, Blue) spectrum, which relies on light to create vibrant, glowing hues. Physical printers, however, use CMYK (Cyan, Magenta, Yellow, Black) inks to deposit color onto paper.
Because the CMYK color space is narrower than RGB, highly saturated neon colors, bright blues, and intense purples can appear dull, muddy, or shifted when printed. To avoid surprises, set your design software’s color profile to CMYK before you begin creating your artwork. This ensures the colors you see on your screen closely match the physical ink that will be deposited onto your sticker sheets.
Final File Export Checklist
Before exporting your final files for submission, perform these final technical checks to ensure a flawless print:
- Outline All Fonts: Convert all text elements to vector paths (curves or outlines). This prevents font substitution errors if the printer does not have your specific fonts installed.
- Embed High-Resolution Images: If your design includes raster illustrations, ensure they are embedded in the file at a minimum resolution of 300 DPI. Linked files can easily break during transfer, resulting in pixelated or missing artwork.
- Export to Print-Ready Formats: Save your final file as a high-resolution PDF, Adobe Illustrator (AI), or EPS file. These vector-friendly formats preserve the mathematical precision of your cut lines and text, ensuring a crisp, professional finish.
Frequently Asked Questions (FAQ)
What is the best file format for uploading custom sticker designs?
Vector formats such as PDF, AI, or SVG are the best choices for custom sticker designs. These formats use mathematical formulas to define lines and shapes, ensuring your designs remain perfectly crisp and scalable at any size without pixelation. Furthermore, vector files allow the printer’s software to read your cut lines directly. If you must use a raster format like PNG, ensure the file is exported at a minimum of 300 DPI at its final print size, and keep in mind that the printer may need to manually trace your design to create the cut path.
Can I use standard gel pens on vinyl customized sticker labels?
Standard water-based gel pens and water-based brush markers will smear or bead up on uncoated vinyl because the synthetic surface is completely non-porous. The ink cannot penetrate the material and will remain wet indefinitely. To write on vinyl stickers, you must use oil-based paint pens, permanent fine-tip markers, or ballpoint pens. Alternatively, when ordering your stickers, specifically request a matte, writable paper-like laminate coating from your printer, which is designed to accept standard water-based inks.
How do I prevent white borders on my die-cut stickers?
To prevent unwanted white borders on your die-cut stickers, you must include a bleed area of 1.5mm to 3mm around your design. Ensure your background colors and patterns extend fully into this bleed zone. The cutting line should sit inside this colored area, so that if the cutting blade shifts slightly during production, it will cut through your intended background color rather than the white backing paper. Keep all text and critical design elements safely within the inner safe zone to avoid having them accidentally cut off.
Community discussion
Share your experience or ask a question. Comments are reviewed before publication.