
Starting your scrapbooking journey is an exciting way to preserve memories, but walking into a craft store can quickly become overwhelming. A beginner’s scrapbooking materials set must establish a balance between structural durability, clean cutting tools, and archival-safe preservation materials. To start the hobby successfully without missing critical items, your foundational toolkit should focus on acid-free adhesives, archival-safe journaling pens, a balanced selection of cardstock and patterned papers, precision cutting instruments, and protective storage. By prioritizing these essentials, you ensure your creative projects remain beautiful and intact for decades.
Rather than purchasing every decorative item available, a smart beginner focuses on the science of preservation. In tropical environments, factors like ambient heat and high humidity can accelerate the degradation of paper and photos. Selecting the right tools from the start protects your photographs from chemical damage and physical warping. Let us break down the exact components your starter set needs to deliver professional-looking layouts that stand the test of time.
Core Adhesives and Journaling Tools
Adhesives are the literal backbone of any scrapbooking project, and choosing the wrong type can ruin your hard work. Beginners must understand the difference between permanent and repositionable adhesives. Permanent adhesives, such as double-sided tape runners and glue dots, provide an instant, strong bond that is ideal for securing heavy photo prints and cardstock layers. Repositionable adhesives, on the other hand, allow you to lift and move elements if you make a mistake during layout alignment, curing into a permanent bond only after several hours.
Products mentioned in this guide
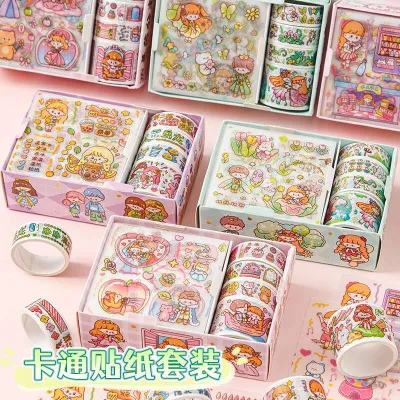
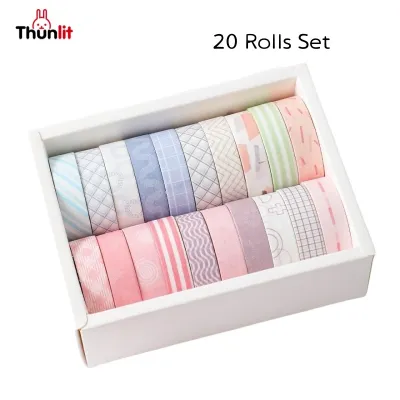
![ENWEI 52 Pcs [English Alphabet Series] Vintage Journal Stickers Washi Paper Sticker Paper Scrapbooking Material Scrapbook Kit](https://img.lazcdn.com/g/p/be17faf11df226b0a05f9927bff90e50.jpg_400x400q80.jpg_.webp)
![ENWEI 40 Pcs [Hanano Canto Series] Vintage Base Journal Material Paper Multiple materials Deco Paper Scrapbooking Sticker Scrapbook Kit](https://img.lazcdn.com/g/p/b78f87430640aff19e6cdfc3e8292bc2.jpg_400x400q80.jpg_.webp)
![ENWEI 16 Pcs [Hollow Mesh Series] Lovely Journal Material Paper Multiple Materials Deco Paper Scrapbooking Sticker Scrapbook Kit](https://img.lazcdn.com/g/p/c193be6d375bd502f47a1be935289cb8.jpg_400x400q80.jpg_.webp)
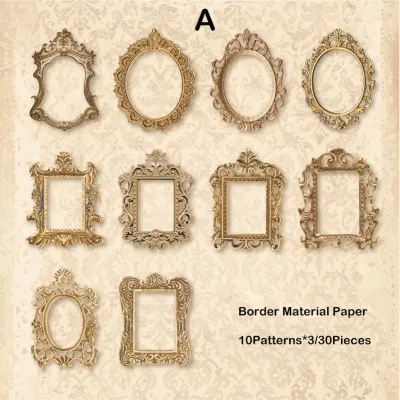
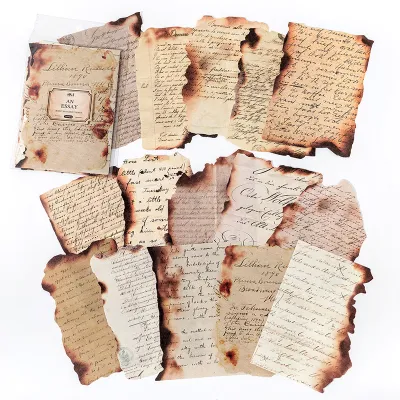
Prices are valid at publication and may change. Please refer to the product page for the latest price.
When selecting any adhesive, it must be explicitly labeled as acid-free and photo-safe. Standard school glues and household tapes contain acidic compounds that yellow paper over time and can chemically eat away at the delicate emulsion layer of your photographs. Using archival-grade adhesives ensures your images will not fade, discolor, or detach from the page as the years pass.
In the humid climate of the Philippines, moisture control is a constant challenge for paper crafters. Traditional water-based liquid glues introduce excessive moisture to your pages, which often leads to severe paper warping, buckling, and long drying times. To combat this, look for quick-dry or low-moisture liquid glues for intricate die-cuts, or rely primarily on dry adhesives like double-sided tape runners, which eliminate moisture risks entirely.
Alongside adhesives, your journaling pens must feature archival-safe, pigment-based, and acid-free inks. Pigment-based inks are highly resistant to water, fading from sunlight, and chemical bleeding. For practical application, a beginner’s set should include at least two tip sizes: a fine tip (such as 0.3mm or 0.5mm) for writing detailed captions and dates, and a medium tip (around 0.8mm or a flexible brush tip) for drawing bold titles and decorative borders.
Because ink smoothness, drying speed, and bleed resistance depend heavily on the exact paper-and-ink combination, always perform an observable trial. Before writing on your final layout, take a scrap piece of your background paper, write a few test strokes, wait five seconds, and rub the ink gently to verify its drying speed. Flip the paper over to check if the ink bleeds through the fibers, ensuring a clean and legible result on your finished pages.
Selecting the Right Paper and Embellishments
Paper is the canvas of your scrapbook, and understanding its weight and composition is key to building balanced layouts. Your materials set should include a mix of sturdy cardstock and lighter patterned paper. Cardstock, typically weighing between 200 and 250 gsm (grams per square meter), provides the structural base required to support heavy photos, interactive flaps, and multiple layers of embellishments without sagging. Patterned paper, usually ranging from 80 to 120 gsm, is used primarily for decorative layering, photo matting, and visual texture.

Just like your adhesives, all paper used in scrapbooking must be acid-free and lignin-free. Lignin is a natural organic polymer found in wood pulp; if left in paper, it breaks down over time, releasing acids that turn the paper yellow, brittle, and highly destructive to adjacent photographs. Verifying these two specifications on the packaging is the single most important step in protecting your memories from environmental decay.
For beginners, purchasing coordinated paper pads (often sold in 6×6 inch or 12×12 inch sizes) is highly recommended over buying individual loose sheets. Coordinated pads are curated by designers to ensure that all patterns, color palettes, and themes complement one another perfectly. This cohesive design approach eliminates decision fatigue, saves money, and ensures your pages look harmonious even if you are still developing your eye for layout design.
When it comes to embellishments, it is easy to over-purchase highly specific themed stickers that you may only use once. Instead, curate a versatile starter set of basic embellishments, such as neutral washi tapes, generic botanical or geometric die-cuts, and simple label stickers. Washi tape is especially forgiving for beginners because it is easy to tear by hand and reposition, making it perfect for creating quick borders, securing temporary elements, or adding subtle pops of color without cluttering your page.
Cutting and Measuring Instruments for Clean Layouts
Achieving straight lines and clean edges is what separates a polished scrapbook from a messy craft project. A beginner’s set requires two primary cutting tools: a paper trimmer and a pair of craft scissors. A paper trimmer, whether rotary or guillotine style, is indispensable for making rapid, perfectly straight, and repetitive cuts on large sheets of paper or when squaring up photo prints. Craft scissors, particularly those with a non-stick Teflon coating to resist adhesive buildup, are necessary for detailed, curved, or “fussy” cutting around intricate designs and stickers.
To protect your household surfaces and maintain cutting accuracy, a self-healing cutting mat and a heavy metal ruler are essential. Self-healing mats are designed to absorb blade cuts without leaving deep grooves that can derail future cuts. A metal ruler with a non-slip backing is superior to plastic or wooden rulers because a sharp craft blade will not shave or nick its edge, ensuring your straight cuts remain perfectly true every single time.
For detailed interior cut-outs, stencils, and window effects, a sharp craft knife is a valuable addition to your toolkit. However, safety must be prioritized when handling sharp blades. Always pull the craft knife toward you rather than pushing it away, keep your non-dominant hand well behind the cutting path, and store the knife with its protective cap securely in place. Dull blades require you to exert more physical pressure, which increases the risk of the blade slipping and tearing your paper; replace the blade immediately as soon as you experience resistance.
Finally, a scoring tool or a bone folder is highly recommended for creating clean, professional folds on heavy cardstock. Attempting to fold thick paper by hand often cracks the paper fibers, leaving a ragged and uneven edge. Running a bone folder along your metal ruler compresses the paper fibers along a precise line, allowing you to fold cards, pockets, and interactive flaps smoothly and without structural damage.
Storing and Protecting Your Supplies in Humid Climates
Organizing your materials is not just about keeping your workspace tidy; in tropical climates, proper storage is a matter of preservation. High relative humidity, intense heat, and seasonal rains can quickly damage paper and adhesives if they are left exposed. Utilizing clear, stackable plastic storage bins or drawer organizers allows you to sort your small embellishments, stamps, and paper scraps by color or theme while keeping them highly visible, which prevents you from accidentally buying duplicate items.
To protect your paper pads and completed albums from curling, warping, or developing mold, store them in a cool, dry area away from direct sunlight. Direct sunlight contains UV rays that rapidly fade inks and yellow even acid-free papers. Avoid storing your supplies directly on concrete floors or against exterior walls, as these areas tend to trap moisture and promote fungal growth in humid environments.
An excellent, low-cost moisture control strategy is to save and reuse silica gel packets, placing several of them inside your airtight plastic storage containers. These packets actively absorb ambient moisture from the air, maintaining a dry microclimate that keeps your cardstock crisp and prevents your stickers from prematurely sticking together in their packaging.
Additionally, pay close attention to how you store your liquid and ink-based supplies. Dual-tipped markers and journaling pens should always be stored horizontally to ensure the ink remains evenly distributed between both tips, preventing one end from drying out or leaking. Liquid adhesives, on the other hand, should be stored upright with their caps tightly sealed, kept in a dark cupboard where temperatures remain relatively stable to prevent the chemical formula from separating.
Pre-Made Kits vs. Building Your Own Custom Set
When starting out, you must decide whether to buy a pre-packaged scrapbooking materials set or curate your own custom kit from scratch. Pre-made kits offer excellent convenience and immediate design coordination, typically bundling a selection of papers, stickers, and basic embellishments at an attractive price point. However, these kits often include “filler” items—such as themes or patterns you may never use—and they frequently skimp on the quality of essential tools like scissors, trimmers, and adhesives.
To make an informed decision, use a practical framework: compare the inventory list of any commercial kit against the core essentials outlined in this guide. If a kit contains beautiful paper but lacks acid-free adhesives, a reliable paper trimmer, or archival-safe pens, calculate the additional cost of buying those high-quality tools separately. Often, building your own custom set starting with premium adhesives and a robust trimmer is more cost-effective in the long run.
For first-time buyers on a budget, prioritize your spending on the items that directly affect the longevity of your memories. Allocate a portion of your budget (perhaps ₱500 to ₱1,500) to certified acid-free adhesives, archival journaling pens, and high-quality cardstock. You can save money by opting for basic, reliable cutting tools and keeping your initial decorative embellishments minimal, expanding your collection only as you discover your personal scrapbooking style.
When shopping on e-commerce platforms or online craft stores, always verify product specifications rather than relying on generic titles. Read the customer reviews closely to check for complaints about paper thickness, strong chemical smells (which can indicate high acid content), or adhesives failing in humid conditions. Genuine archival-quality products will explicitly state “acid-free” and “lignin-free” in their technical descriptions, giving you peace of mind that your creative efforts will be preserved for future generations.
Frequently Asked Questions (FAQ)
Do I need a die-cutting machine to start scrapbooking?
No, a die-cutting machine is an advanced, optional tool and is absolutely not a requirement for beginners starting their first scrapbook. While electronic and manual die-cutting machines are excellent for producing complex shapes and custom lettering, they represent a significant financial investment that is unnecessary when you are just learning the basics of layout and design.
You can easily achieve beautiful, custom cut-outs and clean geometric shapes using a sharp craft knife, a metal ruler, and a pair of precision craft scissors. Additionally, the market offers a massive variety of affordable, pre-cut die-cast embellishments, chipboard shapes, and stickers that provide the same dimensional look without the high cost of specialized machinery.
It is highly recommended to wait on investing in expensive equipment until you have developed a consistent scrapbooking style and confirmed your long-term interest in the craft. Focus first on mastering composition, color coordination, and clean cutting techniques with basic tools before expanding your studio with high-end machinery.
Community discussion
Share your experience or ask a question. Comments are reviewed before publication.