
Selecting the right DIY refrigerator magnet kit for a school art class requires balancing creative freedom with classroom logistics. An ideal kit must not only spark joy in students but also fit neatly within a standard class period, withstand the rigors of daily handling, and remain completely safe for the target age group. In tropical environments where high humidity can delay drying times, choosing the wrong materials can turn a fun afternoon activity into a sticky, disorganized mess. By focusing on practical material checks, safety standards, and realistic drying schedules, educators can select kits that deliver beautiful, lasting results without the classroom chaos.
Core Selection Criteria for Classroom Magnet Kits
When evaluating magnet kits for a school environment, three primary pillars should guide your decision: safety compliance, logistical efficiency, and physical durability. A classroom is a high-activity space where time is limited, meaning kits must be highly organized and easy to distribute. Look for kits that feature clear, non-toxic labeling and age-grade alignments that match your students’ developmental stages.
Logistical efficiency hinges on mess-free assembly and predictable drying times. In a typical school schedule, you rarely have the luxury of waiting hours for heavy liquid glues to cure before the next class enters the room. Therefore, kits utilizing self-adhesive backings or fast-drying, water-based adhesives are highly preferable.
Products mentioned in this guide
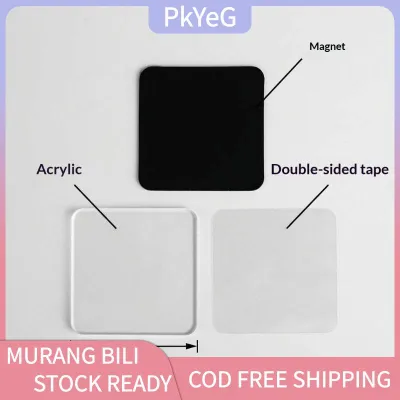
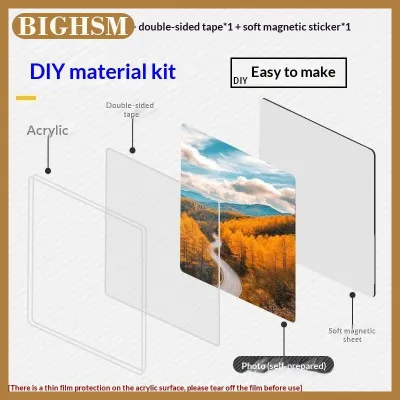
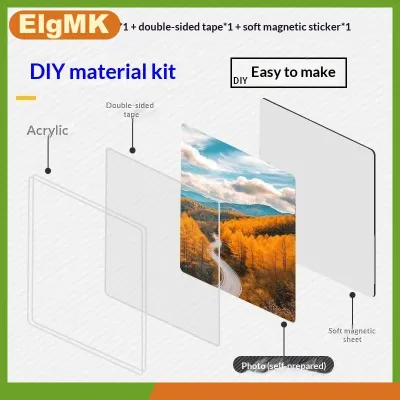
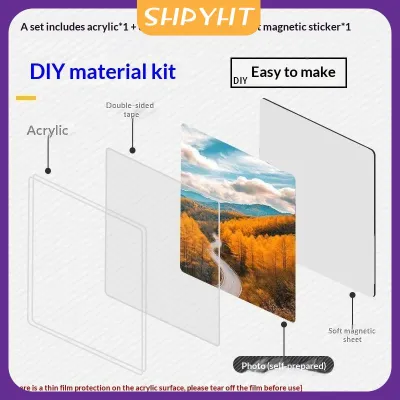
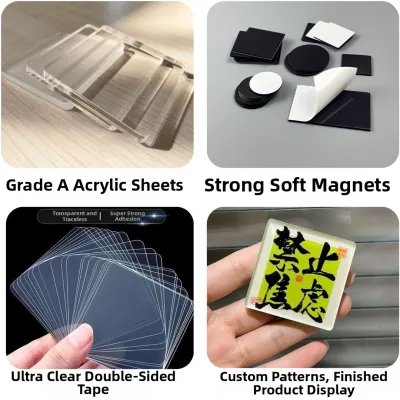
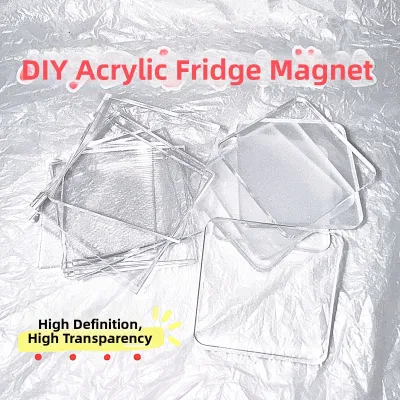
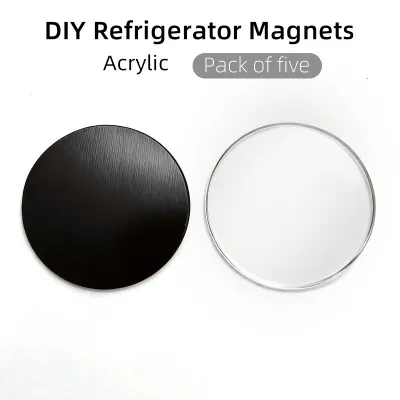

Prices are valid at publication and may change. Please refer to the product page for the latest price.
Finally, the finished product must be durable enough to survive the journey home in a crowded school bag. The bond between the decorative element and the magnet must withstand repeated handling, dropping, and the humid conditions common in tropical climates, which can weaken low-quality glues over time.
Safety and Age-Appropriateness Checks
Safety is the non-negotiable foundation of any school art project. When introducing magnets into the classroom, the first hazard to evaluate is the physical size of the components. Small, high-powered rare-earth magnets pose severe internal safety risks if swallowed and should be strictly avoided in school settings, particularly for primary grades. Instead, opt for larger, flexible magnetic sheets or thick ceramic disc magnets that exceed standard choking hazard thresholds.

Before purchasing any kit, carefully inspect the packaging or product specifications for recognized non-toxic certifications. Look for labels indicating compliance with international safety standards, such as the AP (Approved Product) seal from the Art and Creative Materials Institute (ACMI), or regional equivalents that certify the paints, glues, and sealants are free from harmful solvents or heavy metals. If a kit lacks clear ingredient disclosures or safety certifications, it is best to pass it over in favor of a fully transparent alternative.
Physical hazards also extend to the structural materials of the kit. Pre-cut wooden, plastic, or metal bases must be checked for sharp edges, splinters, or burrs that could cut small hands during assembly. If the kit includes decorative elements like glass gems or ceramic tiles, ensure they are durable enough not to shatter if dropped on a hard classroom floor. For younger students, soft EVA foam, thick cardstock, or felt bases are excellent, low-risk alternatives that eliminate the danger of sharp edges entirely.
Evaluating Kit Components and Material Quality
Magnet Strength and Base Materials
A magnet kit is only as good as its ability to stick to a refrigerator door. To prevent student disappointment, you must evaluate the pull force of the included magnets. A simple, observable test you can perform before buying in bulk is to apply the magnet to a vertical steel surface, such as a classroom whiteboard or a metal filing cabinet. The magnet should easily hold its own weight plus the weight of the decorative base without sliding downward. If you plan to have students attach additional artwork, like a drawing on 230gsm cardstock, the magnet must be strong enough to clamp that extra layer securely.
Equally important is surface scratch prevention. Hard ceramic or metal magnets can easily scratch the delicate finish of home appliances if they have rough or unpolished backings. Flexible rubber magnetic sheets or magnets with protective vinyl coatings are highly recommended for school projects, as they provide a soft contact surface that protects household appliances.
You must also verify the compatibility between the magnet’s adhesive side and the base materials. For instance, self-adhesive magnetic strips bond exceptionally well to flat, non-porous surfaces like plastic or laminated paper, but they may peel away from textured wood, porous air-dry clay, or heavy felt. If your curriculum involves porous mediums, you will need to plan for a secondary adhesive layer rather than relying solely on the kit’s pre-applied tape.
Adhesives, Paints, and Decorative Elements
The liquid consumables in a kit—namely glues and paints—require close scrutiny. In a busy classroom, water-based acrylics or tempera paints are the standard due to their washability from skin and clothing. However, you must test their drying speed under local environmental conditions. In regions with high relative humidity, water-based mediums dry significantly slower. A paint layer that dries in fifteen minutes in an air-conditioned room might remain tacky for over an hour in a naturally ventilated classroom.
If the kit includes liquid glue, evaluate its repositionability and final bond strength. White PVA glue is highly versatile and safe, but it requires a long curing time and can warp thin paper bases. For a faster, cleaner alternative, look for kits that utilize double-sided adhesive dots or peel-and-stick foam tape. These dry-assembly methods eliminate spills, require zero drying time, and allow students to handle their creations immediately.
Lastly, inspect the quality of the pre-cut decorative pieces. Whether they are wooden shapes, ceramic tiles, or plastic molds, they should exhibit consistent sizing and clean cuts. Inconsistent pieces lead to frustration, as students struggle to fit mismatched parts together within the allotted class time.
Matching the Kit to Your Art Curriculum and Logistics
Integrating a craft project into a structured school day requires careful logistical planning. Most art classes operate within a strict 40-to-60-minute window. Within this timeframe, you must account for the introduction of the lesson, material distribution, actual creation, and thorough cleanup. A kit with too many intricate steps or slow-drying components can easily overrun this limit, leaving you with a classroom of unfinished projects and messy desks.
To manage this, map out a realistic timeline. For a 50-minute class, aim for a kit that requires no more than 20 to 25 minutes of active assembly. This leaves ample time for setup and the inevitable cleanup at the end of the period. If the project involves wet paint or glue, you must establish a dedicated drying zone in your classroom. Flat, out-of-the-way surfaces like countertops, window sills, or dedicated drying racks are essential. Ensure these spaces are protected with wax paper or plastic sheeting to prevent projects from sticking to the furniture.
Cleanup is often the most challenging part of any art lesson. To minimize post-class labor, select kits that limit the use of loose glitter, fine powders, or permanent dyes. Provide each student workstation with protective silicone mats or recycled newspaper, and keep a supply of damp microfiber cloths or wet wipes on hand. Choosing kits with pre-measured paint pots and self-contained embellishments will drastically reduce the volume of waste and make the transition to the next class period seamless.
Building a Conditional Shortlist for Purchasing
When you are ready to purchase, transition from theoretical evaluation to practical budgeting and sourcing. Begin by calculating the total cost per student. Take the total price of the kit, including any necessary supplementary tools like brushes or extra glue, and divide it by the number of students in your class. In the Philippines, a reasonable target for a basic classroom craft project ranges from ₱50 to ₱150 per student. Look for suppliers that offer bulk classroom packs, which often provide significant cost savings compared to buying individual retail kits.
Sourcing should be done through reputable educational distributors or highly rated sellers on online marketplaces. When browsing online, check customer reviews specifically for mentions of component consistency and packaging quality. A common issue with cheap bulk kits is missing parts, dried-out paint pots, or demagnetized strips. Ensure the seller has a clear return or replacement policy so you can resolve any discrepancies well before the day of the lesson.
To make your final decision, construct a simple comparison matrix based on your specific classroom constraints. Compare candidate kits across three main axes:
- Classroom Space: Does the kit require extensive flat drying space, or can the finished items be packed away immediately?
- Time Limits: Can the project be completed, dried, and packed within a single class period?
- Curriculum Goals: Does the assembly process teach the intended artistic skills, such as color mixing, pattern making, or structural design?
By filtering your options through this structured framework, you will select a kit that maximizes educational value while minimizing logistical stress.
Frequently Asked Questions (FAQ)
Can students take the finished magnets home immediately?
Whether students can transport their magnets home on the same day depends entirely on the materials used. If the kit relies on liquid PVA glue or thick layers of acrylic paint, the project will require at least several hours—and up to a full day in humid conditions—to cure completely. Transporting wet magnets in school bags will ruin the artwork and stain other school supplies. To allow immediate transport, choose kits that use dry adhesives like double-sided foam tape and quick-drying paint markers instead of liquid paints. If wet materials are unavoidable, provide small, shallow cardboard trays or paper plates for students to carry their projects flat.
How do I prevent strong magnets from sticking together in storage?
Storing bulk magnets requires care to prevent them from clumping together, which can chip fragile ceramic magnets or peel off self-adhesive backings. Keep the magnets in their original protective packaging, which often includes plastic spacers or cardboard dividers. If you must store them loose, place physical barriers like thick cardstock, bubble wrap, or silicone sheets between individual magnets. Store the kit in a cool, dry cupboard, as high tropical temperatures and humidity can degrade the pre-applied adhesive backings, causing them to become gooey or lose their stickiness before the project even begins.
Community discussion
Share your experience or ask a question. Comments are reviewed before publication.