
Selecting your first perler beads kit can transform a quiet afternoon into a highly satisfying, screen-free creative session. This classic pixel-art craft has captured the imagination of makers of all ages, offering a straightforward way to design everything from custom keychains to intricate wall art. However, walking into the craft store or browsing an online marketplace can quickly become overwhelming due to the sheer variety of options, sizes, and price points available.
To ensure a successful and frustration-free introduction to the hobby, a beginner should prioritize a perler beads kit that offers high bead size consistency, a well-sorted palette of core colors, durable heat-resistant pegboards, and essential tools like ironing paper and fine-tip tweezers. Investing in these core elements guarantees that your first designs fuse together smoothly without warping, melting unevenly, or falling apart. Focusing on these foundational qualities, rather than simply buying the largest or cheapest bulk bucket available, will set you up for immediate success.
Quick Checklist: What to Prioritize in Your First Kit
Before purchasing your first kit, it helps to have a clear set of criteria to evaluate your options. A high-quality starter set should make your introduction to the craft seamless, providing all the necessary components in a single package so you do not have to make multiple trips to the store.
Products mentioned in this guide
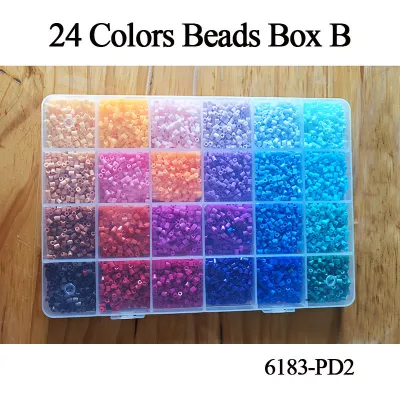
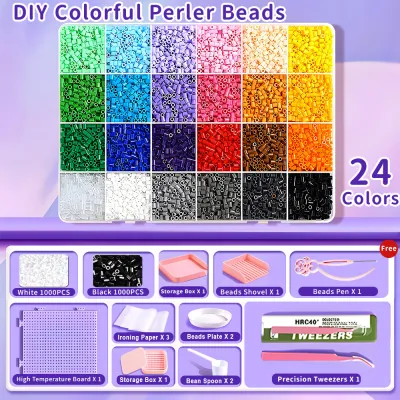
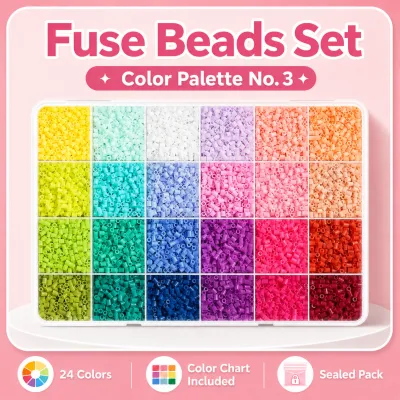
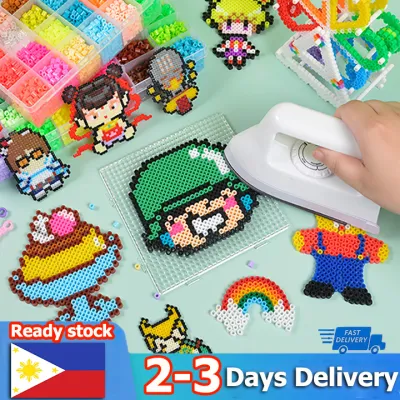
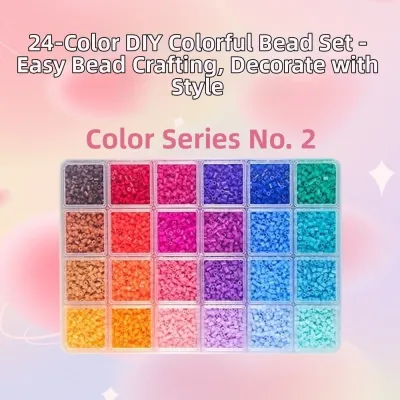
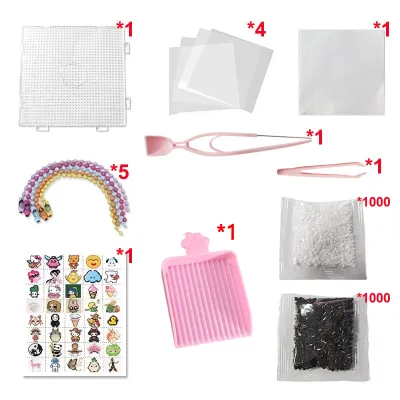
Prices are valid at publication and may change. Please refer to the product page for the latest price.
When evaluating a potential kit, verify that it meets the following four pillars of a reliable starter set:
- Bead Consistency: Look for kits that specify a standard 5mm midi size made from uniform plastic, which ensures even melting and structural integrity.
- Color Variety and Sorting: Prioritize kits that offer 20 to 30 distinct, pre-sorted colors in a partitioned storage box rather than a giant, unsorted bucket.
- Template Durability: Choose kits that include thick, warp-resistant, reusable pegboards (ideally at least one standard square board).
- Essential Tool Inclusion: Ensure the kit contains dedicated ironing paper (or reusable fusing sheets) and fine-tip tweezers for precise bead placement.
Your primary goal as a beginner is ease of use and achieving a successful first melt. While a massive bucket of 10,000 unsorted beads might look like a bargain, the tedious process of sorting them by hand can stall your creative momentum before you even begin. The following sections will break down exactly how to evaluate each of these checklist items so you can make an informed decision.
Bead Quality and Consistency: Why Uniform Sizing Matters
The physical quality of the beads is the single most important factor in how your finished project will look and hold together. In the world of fuse beads, dimensions are standardized into three main categories: mini (2.6mm), midi (5mm), and maxi (10mm). For absolute beginners, the 5mm midi bead is the industry standard and the absolute best starting point, as they are large enough to handle easily with tweezers but small enough to allow for detailed pixel designs.

Uniformity in bead height and wall thickness is critical for a clean fuse. When you run a hot household iron over your design, the heat must distribute evenly across all the beads. If some beads in a low-quality kit are even a fraction of a millimeter shorter than others, the iron’s soleplate will not make contact with them. This results in weak spots, unsightly gaps, or sections of your design that completely fall apart when lifted from the pegboard.
Plastic composition also plays a massive role in how beads behave under heat. Reputable brands typically manufacture beads using Ethylene-Vinyl Acetate (EVA), a food-safe plastic that melts at a relatively low, predictable temperature and retains a slight, rubbery flexibility after cooling. Cheap, unbranded kits often mix different types of plastics, such as polyethylene (PE) or low-grade polypropylene. Because these plastics have different melting points, a mixed-material kit will result in some beads burning and flattening completely while adjacent beads remain entirely unmelted.
To safeguard your projects, look for kits that explicitly mention consistent sizing and smooth fusing in their product descriptions. You can verify bead quality through a simple, observable trial once you open your kit. Place a small 3×3 square of beads on your pegboard, cover it with ironing paper, and apply heat. A high-quality bead set will melt uniformly into a neat grid of rounded squares with clean edges, emitting minimal odor and leaving no sticky residue on your ironing paper.
Color Range and Sorting: Building a Versatile First Palette
When you are first starting out, having the right colors is far more valuable than having a massive quantity of a single shade. A versatile starter kit should offer a broad spectrum of 20 to 30 core colors. This range should include vibrant primary and secondary colors, alongside a generous supply of essential neutrals.
Neutrals are the unsung heroes of fuse bead crafting. Black and white are used at an incredibly high rate because they provide the outlines, highlights, and contrast that make pixel designs pop. Gray, brown, and basic skin tones are also highly frequently used for character designs, animals, and shading. Cheap novelty kits often skimp on these shades, leaving you with an abundance of neon colors but no way to outline or anchor your designs.
Equally important to the color selection is how those colors are packaged. Beginners should avoid unsorted buckets at all costs. Sorting thousands of tiny beads by hand under poor lighting is incredibly tedious and can quickly lead to eye strain. Instead, look for a kit that houses the beads in a sturdy, multi-compartment storage box. A tackle-box style container with secure, snap-locking latches is ideal, as it keeps the colors separated and prevents disastrous spills if the box is bumped or dropped.
Proper sorting is not just about convenience; it directly impacts your crafting workflow. When your beads are neatly divided, you can focus entirely on your pattern, picking up the exact shades you need without interruption. This organization prevents color contamination, ensuring that stray dark beads do not accidentally end up in the middle of a bright yellow background, which would ruin the clean look of your finished piece.
Peg Boards and Templates: Selecting the Right Canvas
The pegboard serves as the canvas for your bead art, holding each individual piece in place until it is fused. For beginners, the shape and grid layout of the board are crucial. You will encounter two main styles of pegboards: standard geometric grids (squares, hexagons, circles) and novelty shapes (such as animals, flowers, or stars).
While novelty shapes are fun for quick, guided projects, a standard square pegboard is the absolute best tool for learning. Square boards utilize a perfect orthogonal grid, which is the foundation of all classic pixel art. This layout allows you to easily recreate sprites from retro video games or follow grid-based patterns found online. A medium-sized square board, measuring roughly 5×5 inches (typically a 29×29 peg grid), is the ideal size. It offers enough space for substantial designs without being so large that keeping the iron level becomes difficult.
Because pegboards are exposed to high heat during the ironing process, material durability is paramount. High-quality pegboards are made from thick, rigid, heat-resistant plastics like polycarbonate. Flimsy, thin plastic boards included in budget kits will warp or melt under the heat of a standard household iron. Once a board warps, the pegs become crooked, making it impossible to place beads evenly in future projects. Look for boards that feature a solid, heavy feel and clean, straight pegs.
As you progress in the hobby, you may want to create larger murals that exceed the limits of a single board. While not strictly necessary for your very first project, selecting a kit that includes interlocking pegboards is a smart, future-proof choice. These boards feature tabs and slots along their edges, allowing you to link multiple squares together to form a massive, seamless crafting surface whenever you are ready to expand your skills.
Essential Accessories: Tools You Actually Need
A complete perler beads kit should provide the auxiliary tools required to take your project from a loose collection of plastic cylinders to a solid, finished piece of art. While the beads and boards are the stars of the show, your crafting experience will quickly stall without the proper accessories.
First and foremost is ironing paper, which acts as a protective barrier between the plastic beads and your iron. High-quality kits include sheets of reusable, silicone-coated parchment paper. This paper allows the heat to pass through to melt the beads while preventing the hot plastic from sticking to the soleplate of your iron. Never use wax paper, as the wax will melt off onto your iron and ruin your bead design. If your kit runs out of paper, standard kitchen baking parchment is an excellent, highly accessible local substitute.
Another indispensable tool is a pair of fine-tip tweezers. Trying to place tiny 5mm beads onto plastic pegs using only your fingers can be incredibly frustrating, especially when working in tight corners or correcting a mistake in the middle of a dense design. Metal tweezers with a fine, angled tip offer the best control and durability, though sturdy plastic tweezers with ribbed tips can also work well for beginners.
It is important to note that craft kits do not include the iron itself. You will need to provide a standard household iron. When preparing to fuse your beads, always ensure the steam function of your iron is completely turned off and the water reservoir is empty. Moisture is the enemy of a clean fuse; steam will escape through the pegboard holes, creating pockets of superheated gas that cause the beads to bubble, warp, or fail to fuse together properly.
Finally, consider the value of included pattern booklets and finishing hardware. While optional, a booklet featuring clear, full-scale patterns that can be placed directly under a clear pegboard is incredibly helpful for building confidence. Additionally, kits that include basic hardware like keychain rings, ball chains, or lanyard hooks allow you to immediately turn your finished designs into functional, wearable crafts.
Recommended Kit Profiles for First-Time Crafters
Because beginner crafters have different goals, budgets, and learning styles, there is no single kit that fits everyone perfectly. Instead, starter kits generally fall into three distinct profiles. Understanding these profiles will help you select the option that best matches your creative intentions.
The Comprehensive Starter Box (Best for Open-Ended Creativity)
This profile represents the gold standard for beginners who want to dive deeply into the hobby and experiment with their own custom designs. These kits typically retail in the range of ₱600 to ₱1,500 and are packaged in durable plastic organizer boxes.
- Features: Includes 2,000 to 5,000 beads pre-sorted into 20 or more distinct colors, multiple interlocking square pegboards, metal tweezers, several sheets of high-quality ironing paper, and an inspiration booklet.
- Pros: High replay value, complete creative freedom, and excellent organization that keeps your workspace tidy.
- Cons: Higher initial cost and a larger physical footprint to store.
The Themed Project Kit (Best for Immediate Gratification)
Ideal for younger crafters, gift-givers, or those who prefer a guided, step-by-step experience, themed kits focus on creating specific designs, such as animals, fantasy creatures, or vehicles. These kits are highly affordable, usually priced between ₱250 and ₱500.
- Features: Contains a precise count of pre-selected bead colors required to complete the featured designs, one or two shaped pegboards, a step-by-step pattern guide, and a small sheet of ironing paper.
- Pros: Low price point, zero guesswork, and a guaranteed successful result that is highly motivating for beginners.
- Cons: Extremely limited creative freedom, minimal extra beads for mistakes, and low long-term value once the specific projects are completed.
The Bulk Color Refill Kit (Best for Expanding a Basic Set)
While highly visible on online marketplaces, bulk refill kits are designed for crafters who already own pegboards and tools but need to replenish their bead supply. These kits are priced around ₱400 to ₱800 and focus entirely on volume.
- Features: Offers a large volume of beads (often 5,000 to 10,000) either in single-color bags or a giant mixed bucket, with no pegboards, tweezers, or ironing paper included.
- Pros: Highly cost-effective on a per-bead basis, making them perfect for filling in large backgrounds or building massive projects.
- Cons: Completely unsuitable as a standalone purchase for an absolute beginner, as you will still need to purchase boards and tools separately to complete any project.
Frequently Asked Questions (FAQ)
Can I mix different brands of fuse beads in the same project?
It is highly recommended that you avoid mixing different brands of fuse beads within a single design. Different manufacturers use unique plastic formulations, which results in varying melting points and rates of expansion. Mixing brands often leads to highly uneven fusing, where one brand’s beads melt completely flat and lose their shape while the adjacent brand’s beads remain rigid and unfused. This discrepancy creates structural weak points, causing your finished design to warp, crack, or break apart easily.
Do I need a special craft iron for perler beads?
No, you do not need a specialized craft iron to enjoy this hobby. A standard household dry or steam iron works perfectly. The most critical step is to ensure that the steam setting is completely turned off and any water is fully drained from the reservoir before you begin. Using an iron with active steam will introduce moisture into the melting plastic, causing the beads to bubble, warp, and fuse unevenly. Set your dry iron to a medium heat setting (usually the wool or silk setting) and keep it moving in slow, circular motions.
How do I store perler beads in a humid climate?
In tropical climates like the Philippines, high humidity can affect the performance of your craft supplies over time. Excess moisture in the air can settle on the surface of plastic beads, making them slightly tacky or causing them to release steam when heated, which ruins the smooth fusing process. To prevent this, store your beads in airtight plastic containers or heavy-duty zip-top bags. Dropping a few food-grade silica gel packets (desiccants) into your storage compartments will absorb any trapped moisture, keeping your beads dry, crisp, and ready for a perfect melt.
Community discussion
Share your experience or ask a question. Comments are reviewed before publication.