
Starting your first pop-out craft kit is an exciting way to dive into three-dimensional modeling, paper engineering, or miniature building without needing advanced sculpting skills. To help ensure a rewarding first experience, a beginner should look for a kit with a manageable piece count, clean pre-cut lines that release easily without tearing, comprehensive visual instructions, and a complete list of required assembly tools. Choosing a kit that matches your current patience level and workspace prevents frustration and helps you complete your project with a sense of accomplishment.
Assessing Your Patience and Crafting Goals
Before browsing the colorful options on an online marketplace, take a moment to evaluate how much time and focus you can realistically dedicate to a single project. Pop-out craft kits, whether made of thick cardstock, plywood, or plastic, vary widely in the amount of detailed work they require. Some designs can be completed in a single afternoon, while others demand hours of meticulous folding, slotting, and gluing. If you enjoy quick gratification, starting with a massive, multi-layered castle might lead to an unfinished project gathering dust on your shelf.
Your primary goal for the project should also guide your choice of complexity and style. If you are looking for a relaxing weekend activity to unwind after a busy workweek, a simple botanical or animal model with larger, forgiving pieces is ideal. On the other hand, if you want to create a permanent piece of home decor or a personalized gift, you might tolerate a slightly higher difficulty level to achieve a more detailed final look. Matching the kit’s theme and complexity to your personal motivation helps keep the assembly process enjoyable rather than feeling like tedious chore work.
Products mentioned in this guide
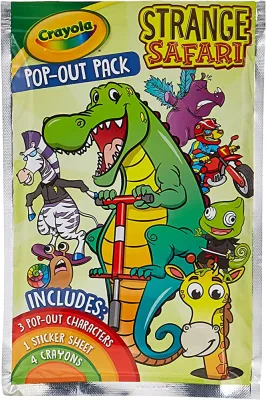

Prices are valid at publication and may change. Please refer to the product page for the latest price.
Additionally, consider your physical workspace and storage options before making a purchase. In tropical climates like the Philippines, high humidity can affect how paper and wood materials behave over extended periods. If you do not have a dedicated, dry crafting table where you can safely leave an unfinished model away from dust, moisture, or pets, you should prioritize a compact kit that you can assemble in one or two short sessions. Having a clear plan for where the finished model will stand—and how you will protect it from environmental factors—will help you select the right physical scale for your first project.
Core Features to Check Before Buying
When evaluating a pop-out craft kit, the sheer variety of designs can be overwhelming, but focusing on a few structural features will help you filter out kits that are too advanced for a beginner. The first specification to check is the piece count and the manufacturer’s difficulty rating. For your very first project, look for kits with fewer than 100 pieces, as these generally feature larger components that are easier to handle and align. Avoid complex mechanical models or highly intricate miniature book nooks until you have built up your spatial awareness and finger dexterity on simpler designs.

Another critical factor is the inclusion of essential tools and adhesives within the box. While some kits are advertised as entirely glue-free, relying solely on interlocking tabs, others require specific adhesives to remain structurally sound. Check the product description carefully to see if you need to purchase external supplies like fine-tip tweezers, a precision craft knife, or specialized paper glue. If you must buy glue separately, look for quick-drying, clear-drying formulas that will not warp the paper or leave unsightly residue on your finished model.
The quality of the material and the precision of the pre-cutting are what truly shape a beginner’s experience. Sturdier kits use thick, heavy cardstock or premium plywood that resists bending and warping during handling. When inspecting product images or reviews, look closely at the punch-out borders; the laser-cut or die-cut lines should be clean and deep, with minimal holding tabs. If the pre-cutting is shallow or poorly aligned, you will struggle to pop the pieces out, which often leads to torn edges, split wood layers, and immense frustration before you even begin assembly.
Evaluating Instructions and Assembly Support
Clear guidance is the bridge between a box of loose parts and a beautiful finished model, making the instruction manual one of the most important components to evaluate. Beginners should look for kits that feature highly detailed, step-by-step visual diagrams rather than dense blocks of text. Visual guides that use color-coded illustrations, clear directional arrows, and exploded-view diagrams make it much easier to understand how three-dimensional parts slot together. Some modern kits even include QR codes linking to official video tutorials, which can be incredibly helpful for visualizing tricky folds or alignment steps.
Part numbering and logical sequencing are equally vital for a smooth building experience. A well-designed kit will have every piece clearly labeled on the sheet, with a corresponding number that matches the steps in the manual. The assembly sequence should progress logically, building small sub-assemblies first before joining them into the main structure. Be cautious of kits that feature poorly translated text-only instructions or manuals that skip steps, as these often require frustrating trial-and-error that can ruin the delicate materials.
Before committing to a kit, try to verify if the manual includes a troubleshooting section or tips for correcting common mistakes. A good manufacturer anticipates where beginners might struggle, offering advice on how to reinforce loose joints or correct misaligned folds. If you cannot find reviews of the instructions online, look for brands that are known for their educational or hobbyist focus, as they are more likely to invest in user-friendly documentation that supports you through every stage of the build.
Finalizing Your Kit Selection
Once you have narrowed down your options based on features and instructions, it is time to make your final decision using a practical comparison framework. Start by cross-referencing the kit’s recommended age or skill level with your own self-assessment. If a kit is rated for older age groups and you are crafting with younger family members, you will need to provide active supervision and assistance. Choosing a kit that aligns closely with your actual experience level—rather than one that simply looks impressive—helps ensure a much higher chance of successful completion.
Next, calculate the total cost of your project to ensure it fits comfortably within your budget. While a basic pop-out kit might seem inexpensive, you must factor in the price of any missing tools, cutting mats, or specialized adhesives that you need to purchase separately. If you find that buying these extra tools pushes the total cost too high, look for an all-inclusive beginner kit that bundles everything you need in one package, which often provides better overall value for a first-time crafter.
Finally, pay close attention to the seller’s return and replacement policies, especially when ordering online. Because pop-out kits rely on precise, undamaged sheets of paper or wood, any rough handling during shipping can bend tabs or crack delicate pieces. Verify that the retailer offers a clear return policy or a customer support channel that can send replacement sheets if your kit arrives damaged. Checking these details beforehand protects your investment and helps make your introduction to the world of pop-out crafting smooth, enjoyable, and successful.
Frequently Asked Questions (FAQ)
Can children use pop-out craft kits designed for adults?
While older children can enjoy many aspects of pop-out crafting, kits designed specifically for adults often feature complex assembly sequences, tiny delicate parts, and sharp tools. Adult kits may require the use of sharp craft knives for clean removal or strong adhesives that are not suitable for unsupervised children. Always check the manufacturer’s recommended age on the packaging and provide close adult supervision if a younger crafter is assisting with intricate steps or handling sharp utility tools.
What should I do if a pop-out piece tears during removal?
If a piece begins to tear or resists popping out, stop pushing immediately and use a sharp craft knife to carefully score the remaining holding tabs from the back of the sheet. For minor tears that have already occurred, you can easily repair the damage using a tiny amount of clear-drying, acid-free paper glue applied with a toothpick. Hold the torn edges together gently for a few seconds until the adhesive sets, allowing it to dry completely before attempting to slot the repaired piece into the main model.
Community discussion
Share your experience or ask a question. Comments are reviewed before publication.