
Selecting your first pearler beads set is the gateway to a highly satisfying, tactile hobby that blends pixel art with hands-on crafting. To make the best choice as a beginner, you should look for a starter kit that includes standard 5mm midi beads, at least one reusable pegboard, heat-resistant ironing paper, and a fine-tipped bead tweezer. Prioritizing a set with pre-sorted colors rather than a mixed bucket will save you hours of tedious sorting and keep your early crafting sessions fun and productive. By focusing on these essential components, you can avoid the common pitfalls of incomplete kits and start creating durable, vibrant designs right away.
Essential Components of a Beginner Perler Beads Set
When browsing online marketplaces or local craft stores, it is easy to get distracted by massive containers boasting tens of thousands of beads. However, a truly beginner-friendly pearler beads set must contain a specific ecosystem of tools to ensure you can complete a project from start to finish without making secondary purchases.
The most critical element is the bead size itself. For those new to the craft, standard midi beads—which measure approximately 5mm in diameter—are the absolute benchmark. Midi beads are large enough to be easily handled with basic tweezers or even bare fingers, making them highly forgiving for beginners of all ages. In contrast, mini beads (typically around 2.6mm) require extreme precision, specialized tools, and a level of patience that can quickly frustrate someone just starting out.
Products mentioned in this guide
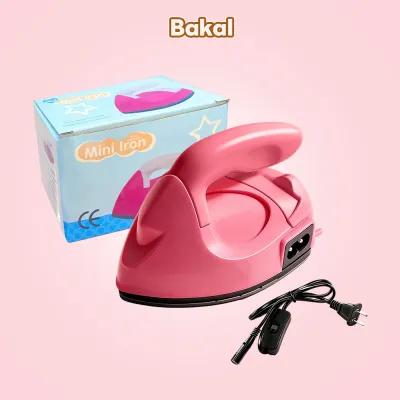
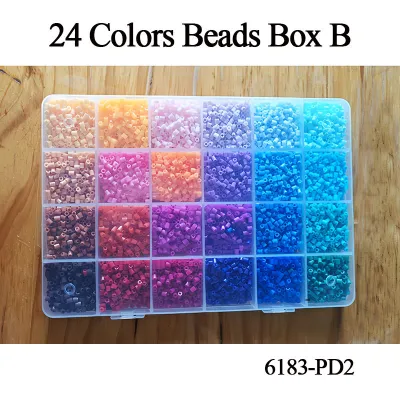
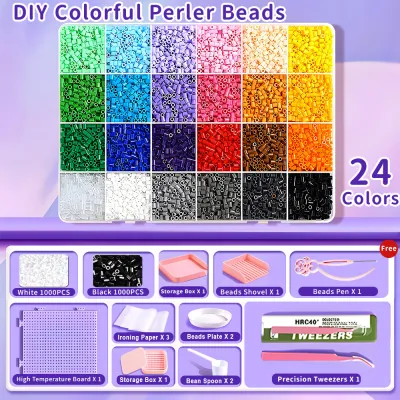
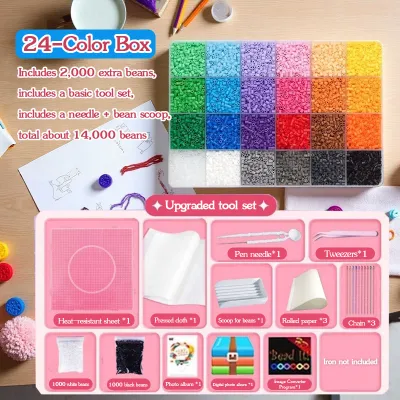
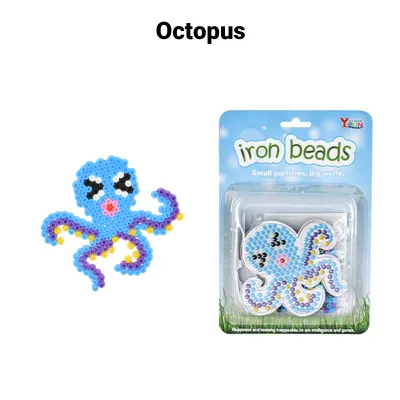
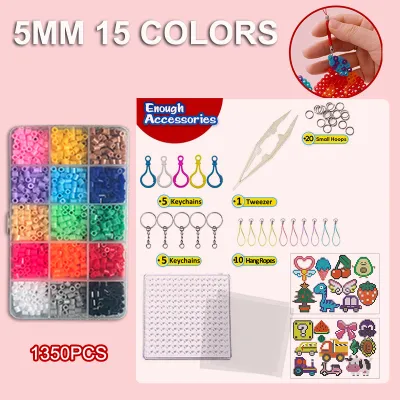
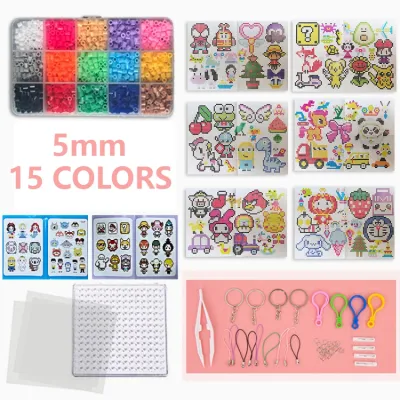
Prices are valid at publication and may change. Please refer to the product page for the latest price.
A functional starter kit must also include at least one high-quality, reusable pegboard. These boards feature rows of small plastic pegs that hold your beads in place while you assemble your pattern. For your very first projects, look for kits that provide a standard square pegboard, as this shape accommodates almost any basic pixel art design. A circular pegboard is another excellent inclusion, allowing you to experiment with radial patterns, coasters, and curved shapes.
Ironing paper is the unsung hero of the fuse bead process. This heat-resistant paper acts as a protective barrier between your household iron and the plastic beads, allowing the heat to distribute evenly and melt the beads together without sticking to your iron’s soleplate. While standard kitchen parchment paper can work as a substitute, a dedicated starter set should include pre-cut sheets of reusable ironing paper or ironing film that fit your pegboards perfectly.
Finally, do not underestimate the value of a dedicated bead tweezer or stylus. Placing tiny plastic cylinders onto tiny plastic pegs can quickly lead to hand fatigue if you rely solely on your fingers. A pair of fine-tipped tweezers allows you to pick up individual beads with precision, place them accurately on the board, and easily correct any mistakes without accidentally knocking over adjacent beads.
Evaluating Bead Count and Color Variety
One of the most common mistakes beginners make is choosing a pearler beads set based solely on the total bead count. A bucket containing 10,000 unsorted beads might seem like an incredible value, but it presents a significant hidden challenge. Sorting thousands of mixed beads by color is an incredibly time-consuming task that can drain the enthusiasm right out of your new hobby.

Instead, look for starter sets that offer a lower total bead count—such as 2,000 to 3,000 beads—but come pre-sorted in a divided plastic storage tray. Having your colors neatly separated from the moment you open the box allows you to focus entirely on the creative process. It also makes it much easier to see which colors you are running low on as you work through your designs.
When evaluating the color palette of a starter set, check for a healthy balance of essential base colors and accent shades. A versatile beginner set should include a generous amount of black and white beads. Black is crucial for creating outlines that give pixel art its defined, classic look, while white is essential for highlights, eyes, and negative space. Beyond these neutrals, ensure the kit provides a solid selection of primary colors (red, blue, yellow) and secondary colors (green, orange, purple), rather than relying too heavily on niche neon, glitter, or glow-in-the-dark shades.
Consistency in bead manufacturing is another factor that directly impacts your crafting success. High-quality beads feature uniform heights and wall thicknesses. If you purchase an ultra-cheap, unbranded set, you may find that the beads vary slightly in size. This inconsistency prevents them from sitting securely on standard pegboards and leads to uneven melting during the ironing phase, which can ruin your hard work.
Choosing the Right Pegboards and Accessories
The pegboard you use serves as the canvas for your bead art, and the accessories you choose will dictate how comfortable your crafting sessions are. While specialized shapes like stars, hearts, or animals can be fun for quick projects, they limit your creative freedom because you are forced to follow the pre-determined outline of the board.
For long-term enjoyment, prioritize sets that feature interlocking square pegboards. These boards are designed with matching tabs and slots along their edges, allowing you to connect multiple boards together like puzzle pieces. While you might start with a single board for small designs, having interlocking boards ensures that your setup can grow with your skills, enabling you to tackle larger, more complex murals and pixel art pieces in the future.
The material of the pegboard also matters. Look for boards made from durable, heat-resistant plastics. During the ironing process, some heat will inevitably transfer through the beads to the pegboard itself. Low-quality boards are prone to warping under this heat, which bends the pegs and makes the board unusable for future projects.
To complement your boards, pay close attention to the tweezers included in the kit. Many budget sets include cheap, flexible plastic tweezers that offer very little grip and can cause your hand to cramp. If possible, opt for a set that includes sturdy, ergonomic metal tweezers. Metal tweezers provide a much firmer grip on the beads, allowing for faster placement and a more comfortable crafting experience, especially during longer sessions.
Comparing Starter Set Types for Your First Project
To help you navigate the wide variety of options available on e-commerce platforms, it is helpful to understand the three primary categories of beginner pearler beads sets. Each type caters to a different style of crafting and budget.
Pre-designed theme kits are highly structured. They typically focus on a specific subject, such as marine life, fantasy creatures, or vehicles. These kits include a step-by-step pattern guide, the exact number of beads required in the correct colors, and a matching pegboard. They are perfect for beginners who want a guided, stress-free introduction to the hobby with a guaranteed successful outcome.
Bulk color assortment kits are designed for open-ended creativity. These sets provide a wide array of colors organized in a plastic storage case, along with a few standard pegboards and ironing paper. While they do not always include specific patterns, they give you the freedom to download free pixel art templates online or design your own custom creations from scratch.
Mini trial kits are the most budget-friendly option. They contain a very small number of beads, a single small pegboard, and just enough paper for one or two tiny projects. These are ideal if you are highly skeptical about whether you will enjoy the hobby and want to test the waters with minimal financial commitment.
| Set Type | Pros | Cons | Ideal User |
|---|---|---|---|
| Theme Kits | Guided instructions; exact bead counts; no design guesswork | Limited replayability; cannot easily create custom designs | Absolute beginners, children, or those who prefer structured projects |
| Bulk Assortment Kits | High color variety; reusable storage tray; unlimited creative freedom | Requires sourcing your own patterns; higher initial cost | Creative hobbyists, pixel art fans, and long-term crafters |
| Mini Trial Kits | Very low cost; minimal storage space required; quick to complete | Extremely limited bead supply; basic, non-expandable boards | Skeptical beginners or those looking for a quick weekend activity |
Safety and Ironing Setup for Beginners
The ironing phase is where your loose plastic beads are permanently fused into a solid piece of art. Because this step involves high heat, establishing a safe, organized workspace is essential to protect both yourself and your household surfaces.
Always perform your ironing on a flat, stable, and heat-resistant surface, such as a sturdy wooden table or a dedicated ironing board. Avoid working on surfaces that can warp or trap moisture, such as plastic folding tables. When preparing your iron, ensure that the steam function is completely turned off. Steam introduces moisture into the melting process, which can cause the beads to bubble, warp, or fuse unevenly. In warm, humid tropical climates, keeping your workspace dry and free of excess moisture is particularly important for achieving a smooth, professional finish.
Set your household iron to a medium heat setting, or follow the specific temperature guidelines provided on your bead manufacturer’s packaging. Gently press the iron onto the ironing paper covering your design, moving it in slow, circular motions. Avoid pressing too hard, as this can crush the beads or melt them flat against the pegboard, potentially damaging the plastic pegs underneath. You want to apply just enough heat to see the beads begin to fuse together through the semi-transparent paper.
Finally, safety should always be a priority, especially if you are crafting in a household with young children or pets. Unfused pearler beads are very small and present a significant choking hazard. Always store your bead kits in secure, latching containers when not in use, and carefully sweep your workspace after each session to catch any stray beads that may have rolled onto the floor.
Frequently Asked Questions (FAQ)
Can I mix different brands of fuse beads in one project?
While it is tempting to combine beads from different manufacturers to expand your color palette, doing so carries some risks. Different brands often use slightly different plastic formulations, which means they melt at different temperatures and may have minor variations in height or wall thickness. Mixing them can lead to uneven fusing, weak structural joints, or a warped final product. If you want to combine brands, it is highly recommended to create a small test design on a spare pegboard first to observe how they melt together before committing to a large, complex project.
How do I store leftover perler beads to keep them organized?
Proper storage is key to keeping your crafting space organized and protecting your materials. Stackable plastic craft organizers with adjustable dividers are the most effective solution, as they allow you to customize compartment sizes for different colors. Alternatively, you can repurpose small hardware sorting bins or embroidery floss boxes with secure latches to prevent accidental spills. Always store your bead containers in a cool, dry place away from direct sunlight, as prolonged exposure to high heat and UV rays can cause the plastic beads to warp, fade, or become brittle over time.
Community discussion
Share your experience or ask a question. Comments are reviewed before publication.