
A glowing drawing board, often referred to as an LED light pad, has become an indispensable tool for artists, designers, calligraphers, and crafters in the Philippines. Whether you are a student tracing architectural layouts, a hobbyist working on diamond paintings, or an animator refining keyframes, this device provides the consistent, back-lit illumination needed to see through multiple layers of paper or fabric. Modern LED drawing boards are incredibly thin, lightweight, and energy-efficient, making them easy to slip into a backpack alongside your sketchbooks.
However, choosing the right glowing drawing board involves more than picking the first option you see on an online marketplace. The local market is flooded with various models, from budget-friendly USB-powered sheets to premium, battery-operated displays. To make a smart purchase that fits your creative workflow and survives the tropical climate, you must evaluate critical hardware specifications, build materials, and power configurations. Understanding these factors ensures you select a board that offers comfortable viewing, precise control, and long-term durability.
Core Hardware Specifications That Actually Matter
When evaluating a glowing drawing board, the physical dimensions and the actual illuminated workspace are the first details to verify. Manufacturers often advertise the overall size of the board, which includes the plastic or acrylic bezel surrounding the screen. However, what truly matters is the active lighting area. If you work with standard A4 paper (210 x 297 mm) or A3 paper (297 x 420 mm), ensure the illuminated portion fully covers these dimensions. A board with an active area smaller than your paper will cause the edges of your medium to hang over the bezel, creating annoying creases and making it difficult to draw smooth lines near the borders.
Products mentioned in this guide
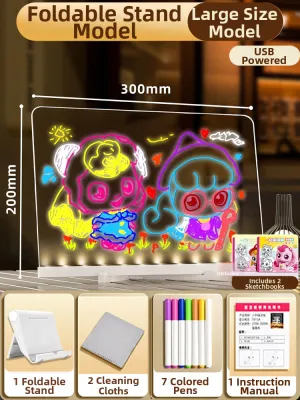
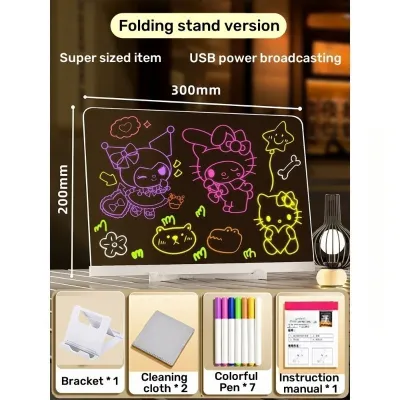
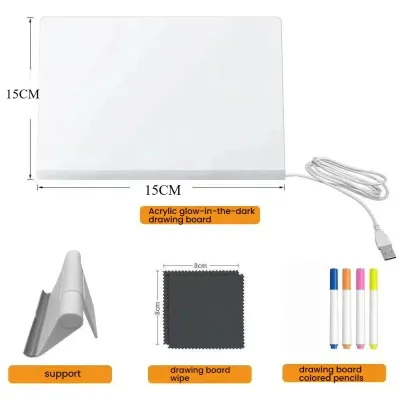
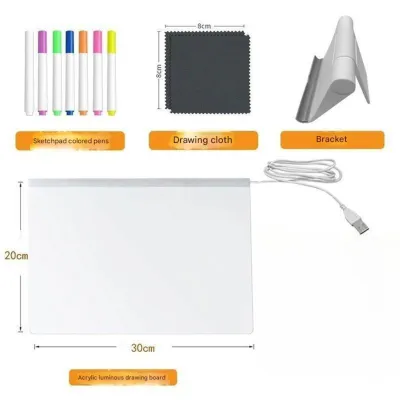
Prices are valid at publication and may change. Please refer to the product page for the latest price.
Brightness control is another critical feature that directly impacts your comfort and the versatility of the board. Budget models often feature a single, fixed brightness level, which can be either too dim for thick paper or blindingly bright in a dark room. Upgraded models offer three-level touch dimming, while the most versatile boards feature stepless dimming. Stepless dimming allows you to hold down the power button to smoothly adjust the light intensity from a faint glow to maximum brightness. This precise control lets you match the light output to the exact thickness of your paper and the ambient lighting of your workspace, significantly reducing eye strain.
The power supply configuration determines where and how you can use your board. Most modern light pads are USB-powered, utilizing a Micro-USB or USB Type-C port. This setup offers excellent flexibility, as you can power the board using a standard phone charger, a laptop port, or a portable power bank while working in a local café or classroom. Some premium models come with built-in rechargeable lithium batteries, providing complete wireless freedom for several hours. If you plan to use the board primarily at a dedicated desk, a model that supports a direct AC wall adapter is ideal, as it ensures a stable, flicker-free power supply without relying on battery life.
Finally, pay close attention to the surface material and overall build quality. The vast majority of glowing drawing boards use an acrylic (PMMA) panel, which is lightweight and highly shatter-resistant compared to glass. Look for boards that feature an anti-glare surface treatment, which diffuses the LED light evenly across the panel and prevents harsh reflections from overhead lights. The thickness of the board also matters; ultra-thin models (around 5mm to 8mm) are highly portable and allow your wrist to rest comfortably on the desk surface, but they must be rigid enough not to flex or bend when you apply pressure with a pencil or stylus.
Matching the Right Board Profile to Your Art Style
Different artistic disciplines and crafting hobbies require distinct hardware profiles to achieve the best results. If your primary focus is traditional tracing, sketching, or 2D animation, your main priorities should be light uniformity and a low-profile design. When tracing fine pencil lines or ink illustrations, any unevenness in the backlighting can cause you to misjudge line weights or miss subtle details. A thin, lightweight board with a smooth acrylic surface allows your pen or pencil to glide effortlessly across the paper. For these applications, an A4 or A3 USB-powered board with stepless dimming provides the perfect balance of portability and precise light control.

For diamond painting and cross-stitch enthusiasts, the demands on a glowing drawing board are quite different. These crafts involve working with large, opaque canvases and applying repetitive pressure with stylus pens and metal tools. Consequently, you should look for a board with a highly durable, scratch-resistant surface that can withstand constant friction. A larger workspace, such as an A3 or A2 board, is often necessary to accommodate expansive crafting sheets without constantly shifting them. Additionally, boards that feature integrated grid lines or ruler markings along the borders are incredibly helpful for keeping your diamond drills or fabric patterns perfectly aligned.
Calligraphers and hand-lettering artists frequently work with thick, textured paper stocks, such as watercolor paper, cardstock, or heavy parchment. Because these materials are dense and opaque, standard light pads may not provide enough illumination to shine through them. If you specialize in calligraphy, you need a board with a high maximum brightness rating (measured in lux) to project your guidelines clearly through heavy paper. Stepless dimming is particularly useful here, as it allows you to crank the brightness to its maximum limit for heavy cardstock, and then quickly lower it to a comfortable level when practicing on thinner layout paper.
If you are purchasing a glowing drawing board for children’s crafts, school projects, or frequent travel, safety and portability should guide your decision. For younger users, look for compact, battery-operated models that eliminate the hazard of dangling power cords and hot adapters. The board should be made of thick, high-impact, shatter-resistant acrylic with rounded corners to prevent accidental cuts or scrapes. A built-in power button lock is also a valuable feature for kids, as it prevents them from accidentally turning off the light pad or changing the brightness level mid-project while resting their hands on the frame.
Protecting Your Eyes and Maintaining the Board Surface
While a glowing drawing board is an excellent tool for enhancing your creative precision, improper use can lead to eye strain and physical fatigue. To protect your vision during long drawing or crafting sessions, always establish a proper ergonomic setup. Avoid using the light pad in a completely dark room, as the extreme contrast between the bright screen and the dark surroundings forces your pupils to constantly adjust, leading to rapid eye fatigue. Instead, maintain comfortable ambient lighting in your workspace and adjust the board’s brightness so it is just bright enough to reveal your guidelines. Utilizing an adjustable desktop stand to tilt the board at a comfortable angle can also improve your posture and reduce neck and shoulder strain.
Power safety is another crucial factor in preserving both your health and the lifespan of your electronic drawing board. In the Philippines, household electrical systems standardly operate at 220V. When using USB-powered light pads, always connect them to high-quality, certified wall adapters or stable power sources. Avoid daisy-chaining multiple USB devices through cheap, unpowered USB hubs, as this can cause voltage drops and lead to annoying LED flickering. Flickering light not only causes immediate eye strain and headaches but can also permanently damage the internal circuitry of the light pad, leading to premature LED failure.
Maintaining the physical surface of your glowing drawing board is essential for ensuring a smooth drawing experience and clear light transmission. Over time, the acrylic panel can accumulate dust, fingerprints, paper fibers, and sticky residue from masking tape or diamond painting wax. To clean the board safely, always unplug it from the power source first. Use a soft, dry microfiber cloth to wipe away loose dust and debris. For stubborn smudges or adhesive residue, lightly dampen the microfiber cloth with water and a single drop of mild dish soap, rubbing the surface gently in circular motions. Never use harsh chemical solvents like acetone, paint thinner, or high-concentration alcohol, as these chemicals can chemically react with the acrylic, causing it to cloud, crack, or melt.
Building Your Final Shortlist: A Pre-Purchase Checklist
Before you add a glowing drawing board to your digital cart on your preferred e-commerce platform, it is wise to compile a quick checklist to verify the product’s actual value and avoid common online shopping pitfalls. First, double-check the detailed specifications to confirm the active lighting area rather than relying solely on the product title’s size label. Ensure the illuminated dimensions match the paper or canvas sizes you use most frequently. This simple check prevents the disappointment of receiving a board that is physically large but has a restricted, unusable light zone.
Next, evaluate the overall value of the package by comparing included accessories against the standalone price of the board. Many sellers bundle light pads with extra items such as USB cables, wall adapters, tracing paper, metal clips, adjustable stands, or carrying sleeves. Calculate whether these bundles offer genuine savings in ₱, or if you would be better off purchasing a high-quality standalone board and sourcing your own accessories. In many cases, basic binder clips and a DIY book stand can serve the same purpose as expensive bundled accessories, allowing you to allocate more of your budget to a board with superior LED quality.
It is also essential to review seller ratings, customer feedback, and return policies on local online marketplaces. Because glowing drawing boards are delicate electronic items containing thin LED strips and acrylic panels, they are susceptible to damage during transit. Look for sellers with high ratings and positive reviews that specifically mention secure packaging, such as thick bubble wrap or sturdy cardboard boxes. Ensure the seller offers a clear return or replacement policy in case the board arrives with dead pixels, a cracked screen, or a faulty power port.
Finaly, learn to identify common red flags in product descriptions to avoid low-quality or counterfeit items. Be highly skeptical of listings that make exaggerated brightness claims without specifying the actual power ratings or LED types used. A reliable product description should clearly state the input voltage (typically 5V for USB models), the wattage, the thickness of the board, and whether it features stepless or stepped dimming. If a listing lacks these basic technical specifications or uses generic, machine-translated descriptions with no clear warranty information, it is best to look for a more transparent seller.
Frequently Asked Questions (FAQ)
Can I use a glowing drawing board with thick watercolor paper?
Yes, you can use a glowing drawing board with watercolor paper, but the effectiveness depends heavily on the paper’s weight and texture. Standard light pads can easily project light through paper up to 150 GSM (grams per square meter). For heavy 300 GSM watercolor paper, you will need a high-lux board with adjustable brightness set to its maximum level. Keep in mind that hot-pressed watercolor paper, which has a smooth surface, allows light to pass through much more clearly than rough, cold-pressed paper, which diffuses the light and makes fine guidelines harder to see.
Do I need a special power adapter for USB-powered light pads?
No special adapter is required, but you must use a reliable power source that matches the board’s specifications. Most USB-powered light pads operate on a standard 5V power supply and can be safely plugged into standard phone chargers, power banks, or computer USB ports. However, you should avoid using high-wattage fast chargers designed for modern laptops or high-end smartphones unless the manufacturer explicitly states the board has built-in voltage regulation. Unregulated high-wattage chargers can deliver unstable current, causing the LEDs to overheat or flicker, which can shorten the board’s lifespan.
How do I remove sticky residue from the board surface?
To remove sticky residue from masking tape, drafting tape, or diamond painting wax, you must use gentle cleaning methods to avoid damaging the acrylic surface. Start by unplugging the board and wiping it with a soft microfiber cloth slightly dampened with warm water and a drop of mild dish soap. Rub the sticky area gently in circular motions until the adhesive lifts. Never use harsh chemical solvents such as acetone, nail polish remover, or high-concentration isopropyl alcohol, as these substances can chemically react with the acrylic panel, leaving permanent cloudy patches, scratches, or cracks.
Community discussion
Share your experience or ask a question. Comments are reviewed before publication.