
Selecting your first enmy acrylic marker set can transform your crafting projects, but the sheer variety of options often leaves beginners unsure of where to start. For most aspiring crafters, a versatile 24-color or 36-color set hits the ideal sweet spot. This range provides a rich selection of primary shades, earth tones, and pastels without the overwhelming cost or storage demands of massive professional-grade collections. By choosing a mid-sized set, you can easily explore diverse surfaces like wood, stone, and canvas while mastering basic color application techniques.
To make the most of your investment, it helps to understand how set sizes, ink properties, and nib designs impact your daily crafting. Matching these features to your specific creative goals prevents common beginner pitfalls, such as buying too many redundant colors or damaging delicate marker tips on rough surfaces. Let’s break down the essential factors that will help you select the perfect starting set.
What to Look for in a Beginner Acrylic Marker Set
When browsing for your first enmy acrylic marker set, the temptation to buy the largest collection available is often strong. However, starting with a massive 60+ color set is rarely practical for beginners. A smaller, well-curated palette forces you to focus on fundamental design layouts and basic color harmony. In warm, tropical climates like the Philippines, unused markers that sit in storage for months can gradually settle or dry out if not maintained, making a compact, frequently used set a much smarter choice.
Products mentioned in this guide
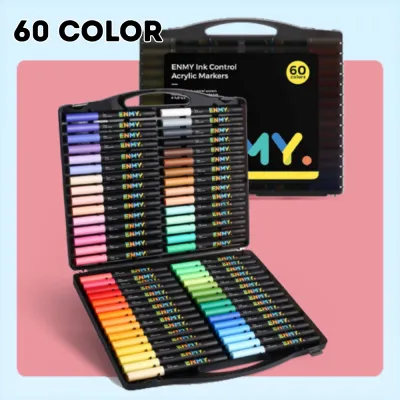
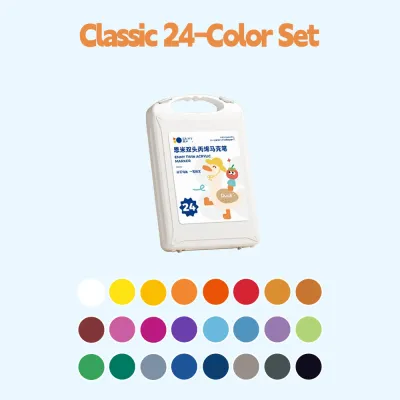
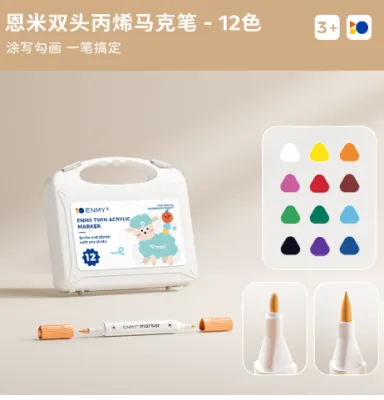
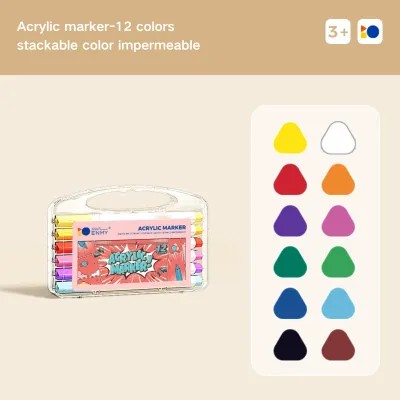


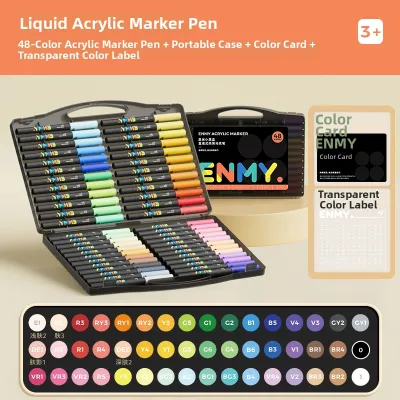
Prices are valid at publication and may change. Please refer to the product page for the latest price.
Unlike standard alcohol-based markers that soak into paper fibers and remain translucent, acrylic markers contain highly opaque, water-based paint. When applied, this ink sits on top of the surface as a solid, durable film that dries to a clean matte or semi-gloss finish. Because of this opacity, you can easily layer light colors over dark ones once the base layer is dry. Always check the product packaging for specific finish claims, as some formulations are specifically tailored for flat matte designs while others offer a subtle sheen.
Surface compatibility is another crucial factor that dictates how your marker ink behaves. Acrylic paint pens are incredibly versatile, working beautifully on paper, wood, stone, terracotta, and canvas. However, the porosity of your chosen material directly affects ink absorption and drying times. Highly porous materials like raw wood or unprimed canvas absorb more ink, requiring more layers for a vibrant finish, whereas non-porous surfaces like glazed ceramics or glass require longer drying times. Before starting a project, always verify the manufacturer’s recommended surfaces printed on the marker box.
Evaluating your budget requires looking at the overall cost-per-marker rather than just the total price tag of the set. Beginners often fall into the trap of purchasing ultra-cheap, unbranded bulk packs from general online marketplaces, only to deal with leaking barrels, watery ink, or splitting nibs. Investing in a reputable brand like ENMY ensures you get consistent paint flow, durable tips, and reliable caps. Mid-sized sets generally offer the best long-term value, giving you dependable performance for your budget without forcing you to pay for specialty colors you may not use.
Choosing the Right Set Size for Your Crafting Needs
Essential Sets (12 to 18 Colors) for Simple Projects
An essential set of 12 to 18 markers is the perfect entry point if you want to test the waters of acrylic painting without making a significant financial commitment. This size is highly budget-friendly, typically costing under ₱300, making it an accessible option for casual hobbyists. It is exceptionally portable, fitting easily into a small pencil case for crafting on the go, and is highly recommended for basic paper crafts, simple rock painting, bullet journaling, or learning how colors interact on a page.

While these small sets are highly practical, they do come with creative limitations. You will have access to standard primary and secondary colors, but you will lack subtle gradient shades, skin tones, or pastel variations. Because acrylic ink dries relatively quickly on the surface, manual color mixing to create secondary shades directly on your craft can be challenging for a beginner. If your projects require soft transitions or highly specific color palettes, you may find yourself outgrowing this size quickly.
Versatile Sets (24 to 36 Colors) for Mixed Media
A 24-color or 36-color set represents the absolute sweet spot for the vast majority of beginner crafters. This range provides a balanced variety of vibrant primaries, essential earth tones, multiple shades of green for foliage, and soft pastels. Many sets in this category also include metallic gold and silver, which are incredibly useful for holiday decorations, personalized gifts, and adding eye-catching accents to your designs.
With this size, you can comfortably tackle diverse mixed-media projects, such as decorating canvas tote bags, customizing ceramic mugs, painting detailed wood slices, or creating intermediate illustrations. The variety of colors allows you to achieve clean shading and depth without the need for manual mixing. Furthermore, a 24-to-36 set is easy to store and organize in its original packaging, ensuring that every single marker gets regular use before the pigment has a chance to settle or dry out in humid conditions.
Comprehensive Sets (48+ Colors) for Detailed Art
Comprehensive sets containing 48 or more colors are designed for individuals who are already committed to detailed illustration, realistic portraiture, or complex gradient work. If you are transitioning from traditional acrylic painting or gouache to markers, a large set provides the extensive color spectrum you need to mimic fine brushwork. These sets remove the need for layering to achieve subtle tone shifts, offering pre-mixed shades for almost every scenario.
However, for an absolute beginner, these large sets are often an unnecessary expense. Unused markers are highly prone to drying out if the caps are not perfectly sealed, and the heavy pigments can settle over time, requiring tedious shaking to remix before use. Instead of buying a massive set for the perceived bulk discount, it is highly recommended to start with a medium-sized set and gradually expand your collection by purchasing individual specialty colors or smaller thematic packs as your skills develop.
Matching the Nib Type to Your Craft Surface
Choosing the right nib type is just as important as selecting the right color count, as the tip of your marker dictates the flow of ink and the level of detail you can achieve. Using the wrong nib on a rough surface can quickly ruin your project or permanently damage the marker tip.
Fine Tips (1mm – 2mm): These extra-fine tips are designed specifically for intricate details, clean line art, small hand-lettering, and working on smooth cardstock or paper. They allow for incredible precision when outlining designs or adding highlights to a finished painting. However, you must avoid using fine fiber tips on rough, unprimed surfaces like raw wood, concrete, or coarse stone, as the abrasive texture will quickly fray the delicate nib and clog the ink flow.
Medium Bullet or Dual-Tip Nibs: Bullet tips, typically measuring between 2mm and 3mm, are the most versatile, general-purpose option for beginner crafters. They provide an excellent balance between covering larger areas and drawing clean, legible lines. They are highly durable and work beautifully on standard canvas, terracotta pots, smooth river stones, and wooden slices. Dual-tip markers, which feature a fine tip on one end and a medium bullet or brush tip on the other, offer the ultimate flexibility for beginners working across different mediums.
Brush or Broad Nibs: Brush nibs are soft and flexible, mimicking the feel of a traditional paint brush to allow for expressive, variable line weights and seamless color blending. They are excellent for covering large surfaces quickly and working on flexible fabrics like canvas bags or clothing. Because brush tips require a very light touch, applying heavy pressure or using them on highly textured, rough surfaces will cause the delicate nylon fibers to split and fray, shortening the lifespan of the marker.
Verification Step: Before completing your purchase on any online marketplace, carefully read the product title and description to verify the nib specifications. Manufacturers often sell the exact same color count in multiple nib configurations. Double-checking this detail ensures you do not accidentally order an extra-fine set when you actually need a versatile medium bullet tip for painting large wooden signs or terracotta pots.
Quick Comparison: Set Sizes and Best Use Cases
To help you quickly identify the best option for your current crafting goals, use the comparison table below to match your project types and budget to the correct set size.
| Set Size Category | Best For (Project Types) | Skill Level Focus | Budget Consideration |
|---|---|---|---|
| Small (12-18 Colors) | Basic paper crafts, simple rock painting, bullet journaling, color theory practice | Absolute Beginner | Low (Highly affordable, typically under ₱300) |
| Medium (24-36 Colors) | Canvas totes, custom mugs, detailed wood crafts, rock painting, mixed media | Intermediate / Enthusiast | Moderate (Best overall value and color variety) |
| Large (48+ Colors) | Complex illustrations, portraits, professional-grade crafts, detailed gradients | Advanced / Dedicated Crafter | High (Significant upfront investment) |
Before adding a set to your shopping cart, cross-reference this table with your immediate crafting checklist to ensure you do not buy more markers than your projects require.
How to Prime, Use, and Store Your Acrylic Markers
To ensure your markers last as long as possible and deliver a smooth, consistent paint flow, you must follow the correct preparation and maintenance steps. Most high-quality acrylic markers utilize a valve-action system, which means the ink is sealed inside the barrel and must be manually drawn down to the tip before your first use.
- Priming the Nib: Start by shaking the marker vigorously with the cap securely on to mix the internal pigment and acrylic binder. Next, place the marker tip vertically on a piece of scrap paper—never your actual project—and press down gently to retract the nib into the body. Hold it for a few seconds, then release. Repeat this gentle pumping motion until you see the paint slowly saturate the white fiber tip. Stop pumping as soon as the tip is fully colored to prevent ink pooling.
- During Use: Let the paint flow naturally onto the surface without applying heavy downward pressure while drawing. Pressing too hard damages the internal valve mechanism, which can lead to sudden ink flooding or a bent, unusable tip. Always cap the marker immediately when switching between colors. In warm, tropical environments, the exposed acrylic paint on the nib can dry out in just a few minutes, creating a stubborn clog that disrupts the ink flow.
- Proper Storage: Always store your acrylic markers horizontally when not in use. Storing them vertically tip-down can cause the heavy pigments to pool in the nib, leading to leaks and messy splatters when you remove the cap. Conversely, storing them vertically tip-up causes the ink to drain completely away from the tip, making the marker dry and difficult to prime the next time you want to paint. Horizontal storage keeps the paint mixture perfectly balanced and ready to use.
- Cleaning and Maintenance: If a marker tip becomes clogged with dried paint or dust from a rough surface, do not discard it. Gently wipe the nib with a damp cloth or press it onto a wet paper towel to dissolve the dried outer layer. If the clog is severe, check if the nib is removable; if so, you can pull it out, rinse it under warm water, dry it thoroughly with a paper towel, and reinsert it. Keep in mind that these steps only clear surface blockages—if the ink inside the main barrel has completely dried out due to leaving the cap off, the marker cannot be revived. Always refer to the care instructions on the packaging for model-specific guidelines.
Frequently Asked Questions (FAQ)
Do I need to seal my craft after using acrylic markers?
While paper crafts and journal pages do not require sealing, any porous or frequently handled surfaces—such as painted rocks, wooden signs, terracotta pots, or customized ceramics—must be sealed to protect your design. Unsealed acrylic paint can chip, scratch, or fade over time when exposed to moisture and friction. To preserve your work, apply a clear acrylic sealer in a matte, satin, or glossy finish. Always verify that the sealer is compatible with both your surface material and water-based acrylic ink, and perform a quick test on a hidden area first to ensure the spray does not reactivate or smear the paint.
Can I use these markers on dark-colored surfaces?
Yes, acrylic markers are highly opaque and perform exceptionally well on dark-colored surfaces. Unlike translucent alcohol markers that disappear on dark paper, the water-based paint in an enmy acrylic marker forms a solid, opaque layer that sits on top of the material. This allows light pastel shades, vibrant neon colors, and metallics to stand out beautifully on black cardstock, dark wood, or dark-glazed ceramics. For the best results on highly absorbent dark surfaces, apply a thin base layer, let it dry completely, and then apply a second layer to achieve maximum color vibrancy.
How do I revive an acrylic marker that has stopped flowing?
If your marker stops flowing, first ensure the cap is tightly secured and shake the marker vigorously for 30 seconds to remix the settled pigment. Next, gently press the nib down on a piece of scrap paper a few times to pump fresh ink into the tip. If the tip has become crusted with dried paint, wipe it gently with a warm, damp cloth, or carefully pull the nib out and soak it in warm water for a few minutes to dissolve the clog. Dry the nib completely before reinserting it. Note that these troubleshooting steps only resolve surface blockages; if the paint inside the main reservoir has completely dried out due to improper storage, the marker is permanently unusable.
Community discussion
Share your experience or ask a question. Comments are reviewed before publication.