
Selecting the ideal creative tool depends entirely on your specific project goals, paper choices, and artistic style. If you are looking to purchase an enmy marker, you will find three primary configurations: dual-tip, fine liner, and brush. Each variant serves a distinct purpose, from executing precise, technical lines in a daily planner to laying down broad, expressive sweeps of color on heavy mixed-media paper.
Understanding how these tips behave under different conditions is essential, especially when working in the tropical climate of the Philippines. High humidity levels can influence how quickly water-based inks dry on the page, while dry, air-conditioned rooms can accelerate evaporation if caps are left off. Matching the correct nib design to your daily writing or drawing habits ensures clean lines, vibrant colors, and a longer lifespan for your tools.
Understanding the Core Nib Differences of the ENMY Marker
To make an informed decision, you must first understand the physical design and ink delivery mechanics of each marker type. These structural variations dictate how the ink flows onto your paper and how much pressure the tip can withstand over time. These markers typically range from budget-friendly sets under ₱300 to professional collections up to ₱1,500, depending on the pack size.
Products mentioned in this guide
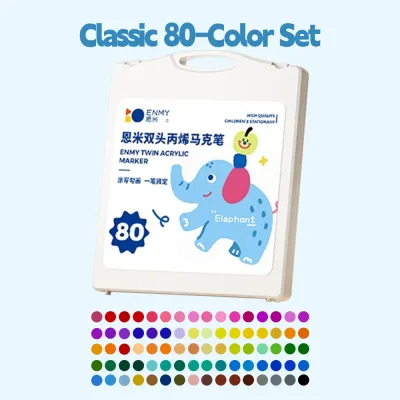
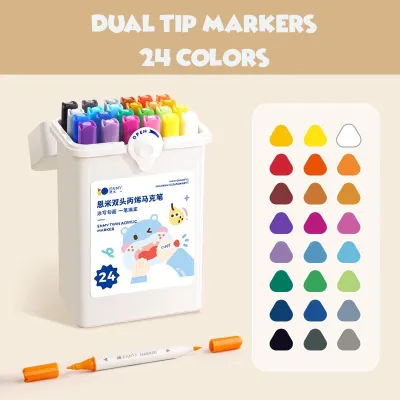
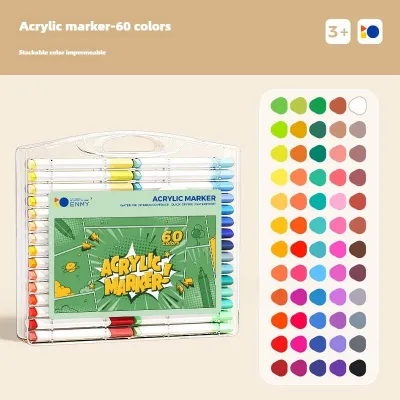
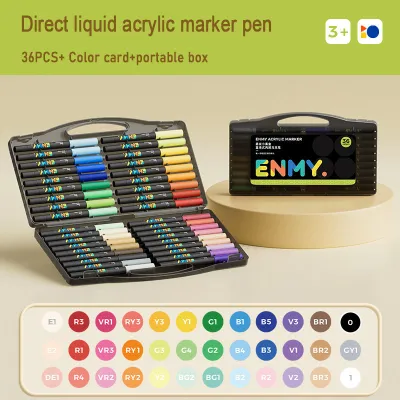
Prices are valid at publication and may change. Please refer to the product page for the latest price.
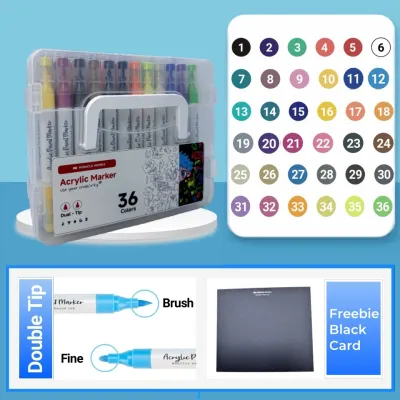
- Dual-Tip Markers: These versatile instruments feature two distinct ends connected to a single ink reservoir—typically a fine bullet point for detailed work and a broad chisel tip for quick coverage. This dual-ended design allows you to switch rapidly between outlining and filling large areas without changing pens. Because the chisel tip has a wide surface area, it delivers a high volume of ink, making it highly efficient but also more prone to bleeding through thin paper.
- Fine Liners: Fine liners utilize a rigid needle-point or a very narrow fiber tip encased in a protective metal sleeve. This structure ensures a completely consistent line width, regardless of the angle or pressure you apply. The ink flow is highly controlled and minimal, which prevents pooling and minimizes the risk of bleed-through. These are designed for precision rather than coverage.
- Brush Markers: Featuring a flexible, tapered tip made from synthetic nylon or felt, brush markers mimic the behavior of a traditional paintbrush. The line width changes dynamically based on the angle of the pen and the amount of downward pressure you apply. Because the flexible tip bends and spreads, it lays down a generous amount of ink, allowing for seamless color transitions and expressive strokes.
Beyond the nib shape, you must check the product label to identify whether the ink is water-based or alcohol-based. Water-based inks are excellent for journaling because they rarely bleed through standard paper, though they can warp thin sheets if over-saturated. Alcohol-based inks offer superior blending and streak-free coverage but require thick, bleed-proof paper. Additionally, nib materials vary in durability; rigid metal-clad fine liners withstand heavy vertical pressure, whereas flexible brush tips require a lighter, more angled touch to prevent the fibers from splaying.
Best ENMY Markers for Journaling and Daily Planning
For daily organization, bullet journaling, and keeping track of schedules, your primary requirements are precision, legibility, and minimal mess. Planners and diaries often use lightweight paper, typically ranging from 70gsm to 100gsm, which requires careful marker selection to avoid ruining the reverse side of your pages.

Fine liners are the undisputed champions for standard journaling tasks. Their ultra-fine tips allow you to write small, neat text within tight grid lines or habit trackers. Because they release a highly controlled, minimal amount of ink, they dry almost instantly, reducing the risk of smudging if you accidentally run your hand over your writing. This quick-drying property is particularly beneficial in humid tropical environments, where moisture in the air can otherwise prolong ink drying times.
Dual-tip markers serve as excellent secondary tools in a planning setup. You can use the fine bullet end to write out daily tasks and switch to the broad chisel end for color-coding categories, highlighting important deadlines, or drawing decorative borders. This dual functionality keeps your pencil case light, as one marker handles two distinct layout duties.
Before committing to a full page layout, test your marker on an inconspicuous back page of your journal. Look for feathering (ink spreading sideways) or ghosting (shadow visible on the back). If ghosting is severe, stick to fine liners or lighter pastel shades of dual-tip markers.
To keep your planning tools in top condition, practice proper tip care. Fine liners should generally be stored horizontally to keep the ink evenly distributed across the internal filter. If stored tip-up, the ink may drain away from the nib, causing it to skip; if stored tip-down, gravity can cause excess ink to pool, leading to unexpected blots when you first touch the paper.
Ideal Choices for Coloring and Illustration
When your goal shifts from writing to creative illustration and coloring, the way ink covers the page becomes your primary concern. You need tools that can fill large shapes smoothly, blend colors without leaving harsh lines, and still allow you to work on intricate details.
Brush markers are highly favored by illustrators because of their ability to create smooth gradients. The flexible synthetic tip allows you to apply light pressure for thin outlines and heavier pressure to sweep color across larger areas. This flexibility eliminates the harsh, overlapping stroke lines often left by rigid markers, resulting in a clean, professional finish. If you are blending two colors together, the brush tip allows you to work wet-on-wet, gently mixing the damp inks directly on the paper surface.
Dual-tip markers offer a highly efficient alternative, especially when blocking in solid base colors. The broad chisel tip allows you to cover large background areas quickly using consistent, parallel strokes. Once the base layer is down, you can flip the marker to the fine tip to clean up the edges, fill in tight corners, and add precise details. This combination makes dual-tip markers a practical, cost-effective choice for coloring books and graphic illustrations.
Because both brush and dual-tip markers lay down a significant volume of ink, paper weight is a critical factor. Standard copy paper or thin coloring books will quickly saturate, leading to severe bleed-through. For the best results, use heavy cardstock or dedicated marker paper (at least 120gsm to 200gsm) to hold the ink on the surface and protect your desk.
When blending, work from light to dark. Apply your lighter shade as a base, add the darker shadow, and use the lighter marker to soften the transition boundary while the ink is damp. Note that alcohol-based variants blend more seamlessly than water-based ones, which can pill the paper if overworked.
Top Picks for Lettering and Calligraphy
Hand lettering and modern calligraphy rely heavily on line variation—specifically, creating thin, delicate upstrokes and thick, dramatic downstrokes. Achieving this contrast requires a tool that responds dynamically to the movement of your hand.
Brush markers are the premier choice for lettering enthusiasts. The flexible nib acts as an extension of your hand pressure; when you push down on a downward stroke, the nib bends to create a thick line, and when you release pressure on an upward stroke, it springs back to create a hairline finish. This responsiveness allows you to achieve the classic brush calligraphy look with a single, continuous motion.
Fine liners play a vital supporting role in lettering. They are perfect for ‘faux calligraphy’—drawing letter outlines and manually coloring the downstrokes to mimic a brush effect. This is an excellent starting point for beginners. Fine liners are also ideal for adding drop shadows, fine outlines, 3D effects, and intricate flourishes around finished brush lettering.
To protect your investment, you must practice proper pressure management. Pushing too hard on the upstrokes or holding the brush marker at a sharp, vertical angle can force the delicate fibers of the nib to splay or fray permanently. Always hold the marker at a 45-degree angle to the paper, using the side of the brush tip for thick strokes rather than the very point.
The surface texture of your practice paper also directly impacts brush nib lifespan. Rough, uncoated papers act like sandpaper on flexible tips, causing them to fray rapidly. To prevent this, practice on smooth, coated papers—such as marker pads, tracing paper, or high-quality smooth pads—which allow the nib to glide effortlessly without friction.
How to Test and Verify Marker Performance on Your Paper
Because ink formulas and paper compositions vary widely, you should never begin a major project without conducting a systematic performance test. This simple, low-risk verification process ensures your materials are fully compatible and prevents frustrating mistakes.
Start by creating a dedicated swatch sheet on a scrap piece of the exact paper you plan to use. Draw a series of continuous straight lines, a cluster of small dots, and a small color gradient block. This visual test allows you to observe how the ink behaves in real-time under your local environmental conditions.
During your test, pay close attention to four key performance indicators:
- Bleeding: Check if the ink spreads beyond your drawn line, indicating the paper is too absorbent.
- Feathering: Look for fuzzy, jagged edges along your lines instead of crisp boundaries.
- Ghosting: Flip the page to see if the ink shadow is visible on the reverse side.
- Drying Time: Run a finger across the ink at intervals to find when it dries completely, preventing smudges.
You should also evaluate the physical interaction between the nib and the paper. Draw a continuous spiral to see if the fine liner skips or feels scratchy, and apply varied pressure to the brush tip to ensure it springs back to its original shape without leaving loose fibers behind.
If your test reveals severe bleed-through or feathering, you do not necessarily need to discard your markers. Instead, establish a simple adjustment rule: switch to a finer nib size to reduce ink volume, place a thick plastic or cardstock blotter sheet directly underneath your working page to protect the sheets below, or upgrade to a heavier, coated paper weight designed specifically for wet media.
Frequently Asked Questions (FAQ)
Can I use ENMY brush markers on regular printer paper?
Regular printer paper, typically around 70gsm to 80gsm, is generally too thin and highly absorbent for the generous ink flow of a brush marker. Using it often results in severe bleed-through, fuzzy feathering, and can cause the delicate synthetic fibers of your brush nib to catch on the rough paper surface, leading to premature fraying. If you must use printer paper, test a small corner first, place a protective scrap sheet underneath to save your desk, or ideally, switch to a smoother, heavier mixed-media or marker-specific paper.
How do I revive a dried-out ENMY fine liner?
If your fine liner is starting to skip, store the marker vertically with the tip pointing downward in a pen cup for a few hours. This allows gravity to pull the remaining ink reservoir down into the fine fiber nib. Always check the manufacturer’s packaging for specific care and safety guidelines before attempting any recovery steps. Keep in mind that if the internal ink reservoir is completely depleted or if the ink has dried and hardened inside the metal-clad tip, the marker cannot be revived and must be replaced to ensure clean, consistent lines.
Community discussion
Share your experience or ask a question. Comments are reviewed before publication.