
Transforming a cluttered living space into an organized, functional home often comes down to a simple yet powerful tool: the humble label roll. Whether you are sorting through a chaotic pantry, categorizing years of office paperwork, or trying to distinguish between identical bottles in the bathroom, a systematic labeling approach brings immediate clarity to your daily routine. Using continuous or pre-cut label rolls provides a uniform, highly customizable, and cost-effective way to bring order to household chaos.
A successful home organization system relies on matching the right label material to the environment, preparing the surface properly, and applying the label with care. By establishing a clear process for creating and maintaining your labels, you can ensure that every item in your home has a designated, easily identifiable place.
Preparing Your Space and Materials
Selecting the right label roll material is the first step toward a system that lasts. Paper label rolls are excellent for dry environments like filing cabinets, bookshelves, and storage boxes because they are easy to write on with almost any pen, though they will degrade if exposed to moisture.
Products mentioned in this guide
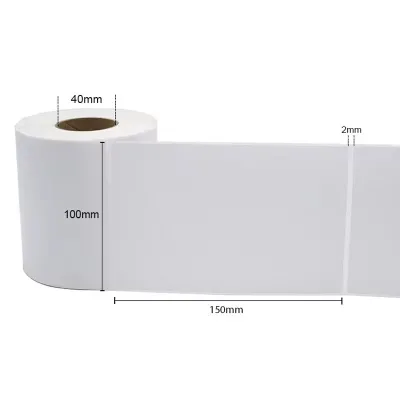
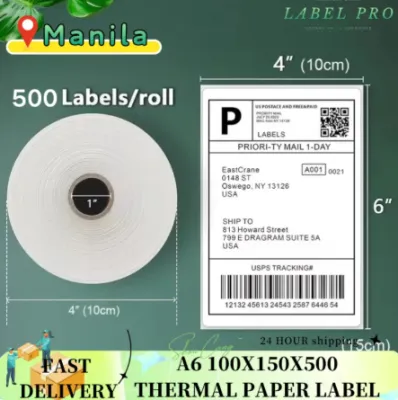
Prices are valid at publication and may change. Please refer to the product page for the latest price.
For high-moisture or high-wear areas, vinyl or synthetic label rolls are the preferred choice. These materials resist water, oils, and tearing, making them ideal for kitchens, bathrooms, and laundry rooms where spills are common.
Thermal label rolls are another popular option, especially if you use a digital label printer. They eliminate the need for ink, but you must keep them away from direct sunlight and high heat to prevent the image from fading or turning black over time.
Gather your tools before you begin to keep the process efficient. A sturdy pair of scissors or a utility knife ensures clean cuts, while a dedicated label dispenser keeps your rolls from unravelling on your workspace.
If you are writing by hand, select permanent markers with fine tips to ensure legibility. For printed labels, ensure your label maker or thermal printer is fully charged and loaded with the correct roll size before you start.
Prepare your surfaces thoroughly to ensure proper adhesive bonding. Wipe down your containers with rubbing alcohol or warm soapy water to remove dust, grease, and oils, then let them dry completely before applying any labels.
Step-by-Step Label Application Techniques
Achieving a professional, clean look requires a methodical approach to cutting and placing your labels. Start by measuring the flat surface of your container or folder, avoiding sharp corners or complex curves where the tension might cause the edges to peel up.

Cut your label roll to the desired length using sharp scissors. If you are using pre-cut label rolls, select a size that leaves a comfortable border around the edges of the container face to maintain a balanced appearance.
Write or print your text before peeling the label from its backing. Writing on a flat, supported surface prevents smudging and allows you to apply consistent pressure, resulting in much neater handwriting.
Once your text is ready and dry, carefully peel a small portion of the backing paper away from one edge of the label. Avoid touching the adhesive side with your fingers, as natural skin oils can weaken the glue.
Align the exposed adhesive edge with your container, using the container’s seams or bottom edge as a straight-line guide. Slowly press the label down, peeling the remaining backing paper away as you go.
Use your thumb or a flat plastic card to smooth the label from the center outward to the edges. This technique pushes out any trapped air, preventing unsightly bubbles and wrinkles.
Finally, press firmly along the entire surface of the label, paying extra attention to the corners and edges. Most label adhesives are pressure-sensitive and require this firm contact to establish a permanent bond. Let the adhesive cure for a few hours before exposing the container to moisture or heavy use.
Organizing Different Areas of Your Home
Every room in your home serves a different purpose, meaning your labeling system must adapt to various environmental conditions and daily habits. By tailoring your label choices and placement strategies to specific zones, you create an intuitive system that the entire household can easily maintain.
Kitchen and Pantry Containers
The kitchen is one of the most rewarding areas to organize, but it also presents challenges like grease, moisture, and frequent handling. Use waterproof or oil-resistant synthetic label rolls for all food storage containers, spice jars, and pantry bins.
When labeling pantry canisters, include essential information beyond just the name of the ingredient. Adding the purchase date, expiration date, or cooking instructions on a small secondary label helps with inventory management and reduces food waste.
Maintain visual harmony by applying your labels at a uniform height across all jars and canisters. If you store your spices or baking ingredients in deep drawers, place the labels on the lids so you can identify contents at a glance without lifting each jar.
For open pantry bins containing snacks or baking supplies, use larger, bold labels that are easy to read from a distance. This makes it simple for family members to return items to their proper places.
Bathroom and Toiletries
Bathrooms are prone to high humidity, steam, and direct water exposure, which will quickly ruin standard paper labels. Opt for durable polyester or vinyl label rolls that can withstand wet conditions without peeling or smudging.
Refillable dispensers for shampoo, conditioner, and body wash look beautiful but can easily lead to confusion if they are identical. Apply clear, high-contrast labels to the front of each bottle to ensure everyone can tell them apart, even with soapy eyes.
Safety is paramount when organizing medicine cabinets and cleaning supplies. Use bright or color-coded labels to clearly mark first-aid items, prescriptions, and household chemicals.
Always include clear usage instructions, dosage details, or expiration dates on medicine containers. Keep hazardous cleaning products in labeled bins on high shelves, out of reach of children, with clear warning labels attached.
Home Office and Files
A cluttered workspace drains productivity, but a structured labeling system for your documents and supplies can restore order. Start by establishing a consistent color-coding or naming convention for your file folders and binders.
Use different colored label rolls to represent broad categories, such as blue for financial documents, green for medical records, and yellow for personal correspondence. This visual cue allows you to locate files in seconds.
Electronic cables and chargers are notorious for creating tangled messes behind desks and entertainment centers. Create “flag” labels by wrapping a strip of a label roll around a cable, sticking the adhesive sides together, and writing the device name on the protruding tab.
Organize your desk drawers and storage boxes by labeling the exterior of shallow trays and bins. Clearly marked compartments for paperclips, pens, sticky notes, and envelopes ensure your desktop remains clear of daily clutter.
Tips for Long-Lasting and Readable Labels
The longevity of your organization system depends heavily on the tools and techniques you use to create your labels. When writing by hand, always use high-quality permanent markers or fine liners that are rated as waterproof and fade-resistant.
Avoid standard ballpoint pens or water-based gel pens, as their ink tends to smudge easily on synthetic label surfaces and will run if they come into contact with water.
If you only have paper label rolls available but need to use them in a damp environment, you can protect them by applying a layer of clear packing tape over the top. Ensure the tape extends slightly past the edges of the paper label to seal out moisture.
Be mindful of the surfaces you choose for label placement. Adhesives struggle to stick to highly textured plastics, unfinished wood, or heavily curved surfaces.
If you must label a textured basket or a fabric bin, apply your label roll to a smooth plastic luggage tag or a wooden hanging tag instead, then tie it to the container. This keeps your labels secure while maintaining a clean aesthetic.
Maintaining and Updating Your Label System
An organizing system is not static; it must evolve as your household needs change. When it is time to update a container, removing the old label cleanly is the first step to keeping your storage looking pristine.
To remove old labels without tearing them into tiny pieces, peel them slowly from one corner. Applying gentle heat from a hair dryer for a few seconds can soften the adhesive, making the label much easier to pull off in one clean sheet.
If the label leaves behind a sticky residue, do not scratch the surface with sharp tools, as this can permanently damage your containers. Instead, apply a small amount of cooking oil, rubbing alcohol, or warm soapy water to a soft cloth and gently rub the area until the adhesive dissolves.
Always test any adhesive remover or oil on a small, inconspicuous area of the container first to ensure it does not cloud the plastic or strip the finish off wood and metal.
Establish a regular routine to review and update your labels, perhaps during your seasonal cleaning or at the start of a new school year. Keeping your labels accurate ensures your home organization system remains functional and reliable for years to come.
Frequently Asked Questions (FAQ)
Can I use standard paper label rolls in the kitchen or bathroom?
Standard paper label rolls are not recommended for high-moisture environments like kitchens or bathrooms. When exposed to water, steam, or oils, paper labels quickly absorb moisture, causing the ink to bleed and the paper to disintegrate. The adhesive can also break down, leading to peeling edges.
For these areas, opt for synthetic alternatives such as vinyl or polyester label rolls. These materials are waterproof, oil-resistant, and durable enough to withstand frequent wiping and humid conditions.
How do I remove sticky residue left behind by old labels?
Removing sticky residue can be done easily using common household items. Start by applying a small amount of cooking oil, rubbing alcohol, or warm soapy water to the residue. Let it sit for a few minutes to soften the adhesive, then gently wipe it away with a soft cloth.
Always test your chosen cleaning agent on a small, hidden area of the container first. This precaution ensures the liquid will not discolor, cloud, or damage the surface material.

Community discussion
Share your experience or ask a question. Comments are reviewed before publication.