
Personalizing drinkware with a sticker for cups is a popular way to express individuality, but the tropical heat and high humidity of the Philippines present unique challenges for adhesive durability. Standard paper stickers quickly degrade, peel, or bleed when exposed to condensation from ice-cold drinks or frequent washing. Finding a sticker that remains firmly attached to your favorite tumbler or mug requires looking beyond generic labels and understanding how specific materials, adhesives, and application techniques interact with different surfaces. This guide explores the essential characteristics of truly water-resistant stickers, details what to look for when browsing online marketplaces, and provides a step-by-step application and care routine to ensure your designs survive daily use and washing.
Understanding Waterproof Sticker Materials for Drinkware
To select a sticker for cups that will not peel or fade, you must first understand the physical composition of the sticker itself. Not all materials handle moisture, temperature changes, and physical friction the same way.
Vinyl is widely considered the standard for durable drinkware decoration. Polyvinyl chloride (PVC) stickers are inherently water-resistant, flexible, and highly resistant to tearing. Because vinyl can stretch slightly, it conforms well to the compound curves of tumblers, bottles, and mugs without creasing. Within the vinyl category, you will often find monomeric and polymeric options. Monomeric vinyl is thinner and best suited for flat surfaces, whereas polymeric vinyl contains added plasticizers that make it highly flexible and resistant to shrinkage, making it the ideal choice for curved drinkware.
Products mentioned in this guide
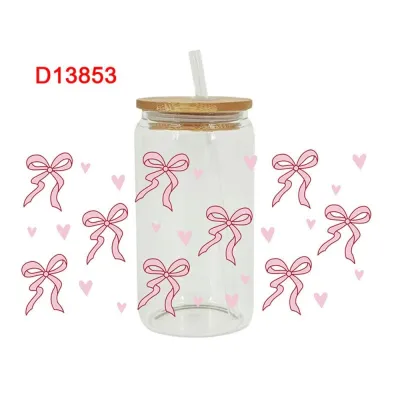
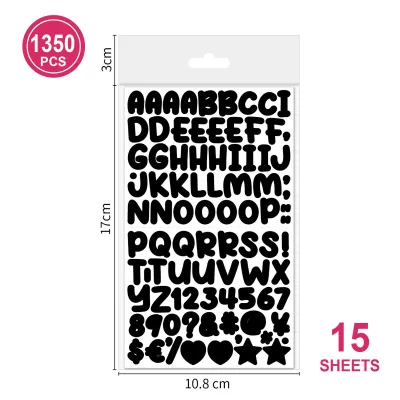
Prices are valid at publication and may change. Please refer to the product page for the latest price.
Laminated paper consists of a standard paper base covered by a thin plastic film. While the top laminate layer protects the printed design from splashes and light handling, the exposed paper edges remain vulnerable. Over time, water can seep into the sides, causing the paper core to swell, the ink to bleed, and the laminate to separate. This material is generally unsuitable for items that undergo regular washing or hold ice-cold drinks that produce heavy condensation.
Synthetic waterproof paper, often made from polyester or polypropylene, offers a middle ground. It resists water absorption and tearing much better than traditional paper, making it suitable for flat or gently curved surfaces. However, it tends to be stiffer than vinyl, which can make application on tight curves more challenging. If you choose synthetic paper, ensure the design does not wrap around sharp angles where the material’s natural stiffness might cause it to lift.
Material thickness and flexibility are critical factors when dealing with curved drinkware. A sticker that is too thick or rigid will naturally try to spring back to its flat shape, causing the edges to lift off a curved tumbler. Conversely, a sticker that is too thin may stretch excessively during application, distorting the design or creating weak points that tear easily. Finding a balance—typically around 3 to 4 mils in thickness—ensures both durability and ease of application.
When shopping, avoid relying solely on generic marketing terms like “waterproof” or “water-resistant.” Instead, look for technical specifications provided by the manufacturer or seller. Check if the product description explicitly mentions the base material (such as polymeric vinyl) and the type of ink used, as pigment-based or UV-cured inks offer significantly better fade resistance under the intense Philippine sun than standard dye-based inks.
Key Features to Verify When Shopping Online
Navigating online marketplaces in the Philippines requires a discerning eye to separate high-quality stickers from cheap, temporary novelty decals. When evaluating a sticker for cups, use a structured checklist to verify its suitability for daily drinkware use.

First, distinguish between “waterproof” and “dishwasher safe.” A waterproof sticker can survive splashes, condensation, and gentle hand washing without losing its print quality or adhesive bond. However, “dishwasher safe” implies the sticker can withstand the high heat, intense water pressure, and harsh detergents of a dishwasher cycle. Most custom vinyl stickers are waterproof but not dishwasher safe; the high temperatures can melt or weaken the adhesive, causing the edges to curl. If you plan to use a dishwasher, look for stickers specifically certified for high-heat environments.
Second, check for UV-resistant or fade-resistant protective coatings. If you carry your tumbler outdoors during daily commutes or outdoor activities, exposure to sunlight can rapidly fade unprotected inks. A matte or glossy UV-resistant laminate layer not only protects the print from scratches and oils from your hands but also preserves the vibrant colors against solar degradation. This is especially important in tropical climates where UV exposure is consistently high throughout the year.
Third, evaluate the adhesive type. Permanent acrylic-based adhesives are ideal for drinkware because they form a strong, long-lasting bond that resists water penetration. Removable adhesives may be easier to reposition during application, but they are more likely to lift at the edges when exposed to moisture and friction. Some premium stickers feature air-release technology, which utilizes tiny channels in the adhesive layer to allow trapped air to escape easily during application.
Finally, scrutinize user reviews on e-commerce platforms. Look for feedback that specifically mentions how the stickers perform on different cup materials, such as powder-coated stainless steel, smooth metal, or textured plastic. Powder-coated surfaces have a rougher texture that provides less surface area for adhesives to grip, meaning you will need a highly conformable vinyl with a strong permanent adhesive. Reviews that include photos or videos of the stickers after several weeks of use provide valuable, real-world evidence of adhesive performance and wear resistance.
How to Apply Stickers for Maximum Adhesion
Even the highest-quality vinyl sticker will fail to adhere if the surface of your cup is not prepared correctly. Proper application is essential to prevent edge lifting and ensure a long-lasting bond.
Begin by thoroughly cleaning the application area. Wash the cup with dish soap and warm water to remove surface dirt, then dry it completely. Next, wipe the specific area where the sticker will go with isopropyl alcohol (70% concentration is widely available and effective). This step is crucial because it removes invisible manufacturing oils, fingerprints, and residual soap film that can prevent the adhesive from making direct contact with the cup’s surface. Allow the alcohol to evaporate completely before proceeding; do not wipe it dry with a lint-producing towel, which can introduce new fibers to the surface.
Applying a flat sticker to a curved surface requires patience to avoid trapping air bubbles or creating creases. For cylindrical cups, start by peeling away a small portion of the backing paper to expose one edge of the sticker. Align the sticker carefully, then press the exposed edge onto the cup. Using a soft squeegee, a clean microfiber cloth, or a credit card wrapped in a soft cloth, slowly smooth the sticker down from the center outward to the edges while gradually peeling away the remaining backing paper. This outward motion pushes air bubbles out rather than trapping them under the vinyl.
If you are applying a sticker to a tapered or spherical surface, you may need to make small, strategic relief cuts in the waste border of the sticker sheet, or choose designs with organic shapes that naturally conform to curves. For stubborn edges on textured or powder-coated tumblers, applying gentle heat from a hairdryer on a low setting can soften the vinyl and activate the adhesive, allowing you to press it firmly into the texture of the cup. Be careful not to overheat the vinyl, as excessive heat can cause it to shrink or distort.
Once the sticker is applied, resist the temptation to use or wash the cup immediately. The adhesive requires time to cure and form a permanent bond with the surface. While some stickers may feel secure right away, full adhesion typically takes 24 to 48 hours. Keep the cup dry and at room temperature during this curing period to ensure the edges do not lift when first exposed to moisture.
Care and Maintenance for Sticker Longevity
After successfully applying your sticker for cups, proper maintenance is key to preserving both the design and the adhesive bond over months or years of daily use.
Hand washing is the safest and most reliable method for cleaning decorated drinkware. Use lukewarm or cool water, a mild dish soap, and a soft sponge or microfiber cloth. Gently wipe the stickered area without scrubbing aggressively. Even if a manufacturer claims a sticker is dishwasher safe, the combination of high heat, prolonged submersion, and harsh chemical detergents can eventually degrade the protective laminate and soften the adhesive.
Avoid using abrasive scrubbers, such as steel wool, scouring pads, or stiff-bristled brushes, directly on or near the sticker. These tools can scratch the protective coating, tear the edges of the vinyl, and ruin the printed design. Similarly, steer clear of harsh chemical cleaners, bleach, or solvents, which can dissolve the adhesive and cause the sticker to peel away entirely.
If you notice the edges of a sticker beginning to lift over time, act quickly to prevent further peeling. Clean the area under the lifted edge with a damp cotton swab, allow it to dry completely, and press it down firmly. You can apply gentle heat from a hairdryer for a few seconds to reactivate the adhesive, then press the edge down with your thumb until it cools. If the adhesive has lost its tackiness or has accumulated dirt, it may be necessary to replace the sticker to maintain a clean, professional appearance.
Additionally, consider how you store and transport your decorated drinkware. Avoid leaving your stickered cups in direct sunlight for extended periods, such as on a car dashboard or a sunny windowsill, as extreme heat can weaken the adhesive bond and accelerate color fading. When packing your cup in a bag, place it in a dedicated pocket where it will not rub against sharp objects like keys or zippers, which can catch on the sticker edges and cause them to peel.
Frequently Asked Questions (FAQ)
Can I use regular paper stickers if I seal them with a clear coat?
Using a clear sealant over regular paper stickers is generally not recommended for drinkware. While a clear acrylic spray or mod podge can create a temporary water-resistant barrier on the surface, it does not protect the paper from absorbing moisture from underneath or along the edges. If water penetrates the paper base, the sticker will swell and peel, cracking the clear coat. Furthermore, many commercial sealants and clear coats are not certified as food-safe. Since your hands and lips frequently contact the surface of a cup or tumbler, using non-food-safe chemicals on drinkware poses potential health risks. For reliable and safe results, it is always better to use inherently waterproof vinyl stickers.
How long should I wait before washing a newly stickered cup?
You should generally wait at least 24 to 48 hours before washing a newly stickered cup. This waiting period allows the pressure-sensitive adhesive to flow into the microscopic textures of the cup’s surface and cure completely. In the tropical climate of the Philippines, high humidity can sometimes slow down the curing process, while warm ambient temperatures can accelerate it. To ensure the best possible bond, keep the cup in a dry, indoor environment during this time. Always check the specific manufacturer’s instructions, as some specialized adhesives may require up to 72 hours to reach maximum water resistance before they can be safely exposed to moisture or washing.

Community discussion
Share your experience or ask a question. Comments are reviewed before publication.