
Selecting the right MKMK acrylic marker set requires matching the marker’s physical specifications to the specific demands of your creative project. Because acrylic paint markers combine the rich, opaque coverage of traditional acrylic paint with the precise control of a pen, they are highly versatile tools for artists, hobbyists, and crafters alike. However, a set that works beautifully for fine-line illustration on paper might prove frustrating when painting porous river stones or large wooden signs. To make an informed purchase, you must evaluate three primary factors: the physical tip size and shape, the color assortment relative to your artistic style, and how the ink behaves on your chosen surface. By focusing on these practical parameters, you can select a set that maximizes your creative output while avoiding the common pitfalls of clogged nibs or unused shades.
Match the Tip Size to Your Canvas and Detail Level
The nib or tip of an acrylic marker dictates both the precision of your lines and the speed at which you can cover a surface. For intricate line art, detailed illustrations, mandalas, or outlining, fine or extra-fine tips are indispensable. These narrow tips, often ranging from 0.7mm to 1mm, allow for controlled ink flow on small-scale canvases, customized stationery, and tight corners. Using a fine tip on a large surface, however, can quickly wear down the nib and lead to uneven, streaky coverage, making it essential to reserve these sizes for detailed work.
Conversely, broad, chisel, or brush tips are designed to handle large areas, background washes, and bold hand lettering. Chisel tips offer versatility by allowing you to create both thick strokes and thin edges depending on the angle at which you hold the marker. Brush tips provide a more fluid, painterly experience, responding dynamically to hand pressure for expressive strokes and calligraphy. When working on expansive surfaces like large wooden plaques, cardboard, or wide canvases, these larger nib sizes ensure smooth, efficient paint delivery without exhausting the marker’s ink reservoir prematurely.
Products mentioned in this guide
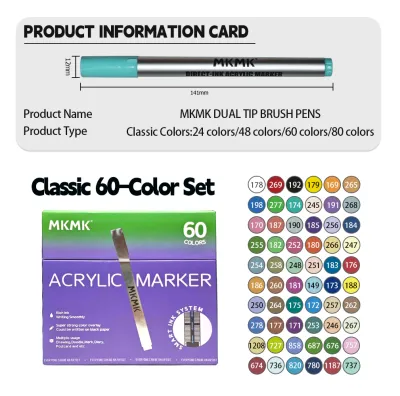
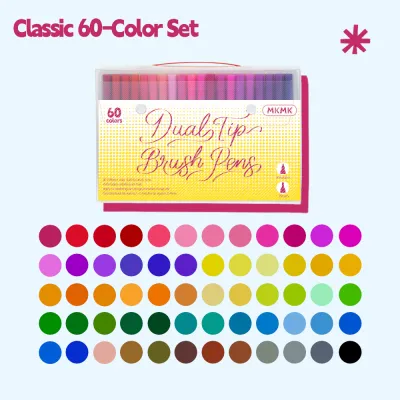
Prices are valid at publication and may change. Please refer to the product page for the latest price.
Before finalizing your choice, always check the manufacturer’s specifications for the exact nib widths and whether the tips are reversible. Many modern acrylic markers feature replaceable or reversible nibs that can be flipped from a bullet tip to a chisel tip, effectively doubling the utility of a single marker. Verifying these physical details on the product packaging or official online listings helps ensure that the physical tool matches the scale of your canvas.
Determine the Ideal Color Range and Set Quantity
Choosing the right set size is a balance between creative freedom and practical utility. For beginners or artists who enjoy color mixing, an essential or primary color set containing 12 to 24 markers is often the most practical starting point. These basic sets typically feature primary colors, black, white, and a few secondary shades, allowing you to layer and blend to create custom hues directly on your work surface. Starting with a smaller, focused palette prevents overwhelm and helps you master the flow and drying characteristics of the ink before investing in a larger collection.

If your art style relies heavily on specific aesthetics, look for specialized expanded sets rather than simply buying the largest box available. Many collections are curated around specific color families, such as soft pastels for journaling, vibrant metallics for holiday crafts, or rich earth tones for landscape painting and rock art. Selecting a targeted palette ensures that every marker in the set serves a purpose in your workflow, reducing the likelihood of having several unused neon or fluorescent shades sitting idle in your storage drawer.
In the local market, balancing your budget in Philippine Pesos (₱) against the risk of unused colors is a key consideration for smart shopping. While bulk sets containing 40, 60, or more markers offer a lower cost per pen, they represent a higher upfront investment that may not be necessary if you only use a fraction of the palette. Carefully assess your project requirements to decide whether a smaller, high-quality set of frequently used colors is more cost-effective than a massive collection of shades you may never need.
Evaluate Ink Opacity and Surface Compatibility
The performance of an acrylic marker depends heavily on the interaction between the ink formula and your drawing surface. High-quality acrylic ink should offer excellent opacity, meaning it can completely cover dark backgrounds with a single, solid layer of vibrant color. To verify this capability, perform a simple test on a scrap piece of dark cardstock or painted wood before starting your main project. If the ink appears translucent or streaky, it may require multiple layers, which can lead to pooling or warping on delicate paper surfaces.
Surface porosity is another critical factor that influences ink adhesion and drying behavior. Porous surfaces like canvas, raw wood, terracotta, and unglazed pottery absorb the ink readily, resulting in a matte, durable finish that bonds securely with the fibers. Non-porous surfaces such as glass, glazed ceramics, plastic, and metal present a different challenge, as the ink sits on top of the material rather than soaking in. On these smooth surfaces, you must observe how the ink dries and check if it scratches off easily, which often necessitates the application of a clear protective sealant to preserve your work.
To achieve optimal results on any surface, always follow the manufacturer’s priming, shaking, and pumping instructions before your first creative session. Acrylic markers contain heavy pigments that settle over time, requiring a thorough shake with the cap securely on to mix the paint thoroughly. Gently pressing or pumping the nib vertically on a scrap piece of paper coaxes the ink down through the valve to saturate the tip. Rushing this priming process or pressing too hard can flood the nib, leading to messy drips and ruined artwork.
Build Your Shortlist: Project-Based Selection Matrix
To simplify your decision-making process, you can map your specific art projects to the ideal marker specifications. Different crafts demand distinct physical properties from your tools, and selecting a set tailored to your primary medium will yield the most satisfying results.
For rock painting and pottery decoration, look for medium to broad bullet tips that can withstand rough, textured surfaces without fraying. These projects require highly opaque, weather-resistant ink formulas that can endure outdoor exposure or frequent handling. A set with strong primary colors and a reliable white marker is excellent for creating bold designs on dark river stones, which can then be sealed with a clear acrylic spray for long-lasting durability.
Canvas painting and mixed media projects benefit from a versatile combination of fine and broad tips, along with a comprehensive color range. Having both fine tips for detailed linework and broad tips for blocking in large background shapes allows you to transition smoothly between different stages of your painting. A larger set with a wide spectrum of blendable shades is ideal here, as it minimizes the need to manually mix paint on a separate palette while working on canvas.
Journaling, scrapbooking, and paper crafts require fine or extra-fine tips that offer precise control and quick-drying properties to prevent bleeding through thin pages. When working in a notebook or planner, look for water-based acrylic formulas that dry rapidly to a matte finish, allowing you to close your journal without smudging your work. A pastel or earth-toned set is highly suitable for these applications, providing subtle, aesthetic accents that do not overpower your written notes.
By using this project-based framework, you can easily filter the available MKMK options on official brand stores or authorized online retailers. Focus your search on the specific tip sizes and color palettes that align with your primary crafting activities, ensuring that your investment directly supports your creative goals.
Pre-Purchase Checks and Maintenance Requirements
Before completing your purchase, performing a few quick quality checks can save you from the disappointment of receiving dried-out or unusable markers. Inspect the product packaging carefully to ensure that the factory seals are intact, which guarantees that the markers have not been opened or exposed to air during transit. If possible, check the manufacturing or batch dates on the box, as acrylic markers have a shelf life and older inventory stored in warm, humid conditions may begin to dry out or separate inside the barrel.
Another important consideration is the long-term sustainability of the set, specifically whether replacement nibs and ink refills are readily available. Over time, rough surfaces like wood or stone will naturally wear down even the sturdiest fiber tips, while popular colors like white and black will inevitably run out faster than others. Choosing a marker line that supports individual nib replacements and open-stock refills allows you to maintain your favorite set indefinitely without having to purchase an entirely new multi-pack.
Proper storage and routine maintenance are essential to extending the lifespan of your acrylic markers once you bring them home. Always store your markers horizontally when not in use; this keeps the pigment evenly distributed throughout the barrel and prevents the ink from settling entirely at either the tip or the tail. Additionally, make it a habit to wipe the nibs clean with a lint-free cloth immediately after use to remove any dried paint buildup, and always snap the caps on tightly to maintain an airtight seal.
Frequently Asked Questions (FAQ)
Can you use MKMK acrylic markers on fabric or glass?
Yes, you can use these markers on both fabric and glass, but each surface requires specific preparation and post-treatment to ensure the design lasts. When painting on glass or glazed ceramics, the ink sits on the non-porous surface and can easily scratch off, so you must bake the item in a home oven or apply a clear, food-safe polyurethane topcoat to cure the paint. For fabric projects, check the product label to confirm compatibility, and always heat-set the dried design with an iron on the reverse side of the fabric to prevent the paint from washing out during laundry cycles.
How do you fix a dried-out acrylic marker tip?
If an acrylic marker tip becomes dry or clogged with dried paint, you can often restore it using simple, reversible troubleshooting steps. Start by removing the nib gently with tweezers and rinsing it under warm water, or wiping it with a damp, lint-free cloth to dissolve any hardened paint crust. Once the nib is clean and reinserted, cap the marker and shake it thoroughly, then gently pump the valve on a scrap piece of paper to draw fresh ink into the tip. Avoid using harsh chemical solvents or alcohol, as these can break down the acrylic binder inside the marker and permanently ruin the ink formula.

Community discussion
Share your experience or ask a question. Comments are reviewed before publication.