
Metallic accents bring a striking, reflective elegance to journal pages, but applying a delicate copper sticker without creating unsightly creases or watching the edges lift over time requires a blend of physical care and material knowledge. Unlike standard paper or vinyl decals, metallic foil stickers possess a physical “memory.” Once a metallic foil is bent, creased, or stretched, it cannot easily return to its flat state, making precision during the initial application absolutely critical. To achieve a flawless, professional finish, you must prepare a smooth, dry surface, use specialized tools to avoid transferring skin oils, and apply the sticker using a systematic, gradual rolling technique.
In the warm, humid climate of the Philippines, managing moisture is an extra, vital step in this creative process. High ambient humidity softens paper fibers and can compromise pressure-sensitive adhesives before they have a chance to bond fully. By understanding how metallic foils interact with paper mediums and environmental factors, you can ensure your scrapbooking layouts remain pristine, flat, and beautifully reflective for years to come.
Preparing Your Scrapbook Page and Tools for Flawless Application
Setting the stage for a smooth application begins long before the sticker touches the page. Any microscopic barrier between the sticker’s adhesive and the paper fibers will eventually cause the edges to lift. Dust, eraser crumbs, lint, and even the natural oils from your fingertips can ruin the adhesive bond. Before you begin, thoroughly clean your hands with oil-free soap and dry them completely, or consider wearing lightweight cotton crafting gloves. Clean your workspace with a dry microfiber cloth to eliminate lingering debris, and always work on a flat, hard surface such as a self-healing craft mat to provide consistent resistance when applying pressure.
Products mentioned in this guide
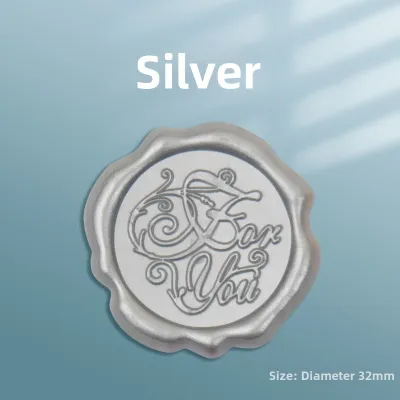
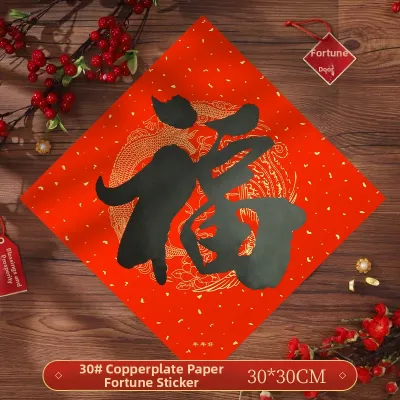
Prices are valid at publication and may change. Please refer to the product page for the latest price.
Paper selection and surface texture play a massive role in how well a metallic foil sticker adheres. Heavily textured papers, such as handmade cotton rag, deeply embossed cardstock, or rough watercolor papers, present a challenge because the adhesive cannot make 100% contact with the recessed valleys of the paper. If you are working with textured backgrounds, use a bone folder to gently burnish and flatten the specific area where the sticker will be placed. For the most secure bond, opt for smooth, high-density cardstock or coated journaling papers.
Equipping yourself with the right tools will elevate your precision and protect your materials from damage. You will need:
- Precision tweezers: Fine-tipped, non-serrated tweezers allow you to pick up and position stickers without touching the adhesive backing or leaving oily fingerprints on the reflective copper finish.
- A bone folder or soft squeegee: A traditional bone folder (made of natural bone or smooth Teflon) is indispensable for burnishing. If you do not have one, a hard plastic squeegee wrapped in a soft microfiber cloth works beautifully.
- A clean craft mat: This provides a stable, non-slip foundation for your page.
In tropical environments, relative humidity often exceeds 80%, causing paper fibers to absorb moisture and swell. If you apply a metallic sticker to damp paper, the trapped moisture can distort the page as the humidity fluctuates, leading to bubbling or adhesive failure. Work in an air-conditioned room if possible, or store your scrapbook pages in an airtight container with silica gel packets prior to crafting to ensure the paper fibers are dry and stable.
Step-by-Step Technique for Applying Copper Stickers Smoothly
Applying a metallic copper sticker successfully requires a slow, deliberate technique that prevents air from becoming trapped beneath the impermeable foil barrier. Unlike paper stickers, which allow air to pass through their fibers, metallic foils trap air completely, turning tiny pockets of atmosphere into permanent, unsightly bubbles.

Follow this systematic method to achieve a perfectly flat, bubble-free application:
1. Peel the Backing Safely
Never pull a metallic sticker directly off its backing sheet from a single corner, as this action stretches the foil and creates permanent curling. Instead, place the sheet face down on your craft mat. Hold the edge of the sticker down gently with your tweezers, and peel the backing paper away from the sticker at a sharp, 180-degree angle. This keeps the copper foil perfectly flat and prevents it from curling or distorting before it even reaches your page.
2. Position with Light Contact
Hold the sticker by its extreme edges using your precision tweezers. Hover the sticker over your page to align it with your layout design. Once you are satisfied with the placement, let only a tiny portion—such as the bottom edge or the center—make light contact with the paper. Do not press down on the entire sticker yet; keeping the contact minimal allows you to make micro-adjustments if the alignment is slightly off.
3. Execute the "Anchor and Smooth" Method
With one edge or the center anchored, use your bone folder or a cloth-covered finger to smooth the sticker down. Always work from the anchored point outward to the edges in a single, continuous sweep. If you anchored the center, push outward in a starburst pattern (center to top, center to bottom, center to sides). If you anchored one side, sweep progressively toward the opposite side. This systematic motion pushes air out from under the foil, preventing bubbles from forming.
4. Activate the Adhesive with Controlled Pressure
Most scrapbook stickers use pressure-sensitive adhesives (PSAs). These adhesives do not dry; instead, they require physical pressure to flow into the microscopic crevices of the paper fibers. Place a clean sheet of parchment paper or tracing paper over your applied copper sticker to protect the metallic surface from scratches. Take your bone folder and rub firmly over the entire sticker, paying special attention to the delicate outer edges. This burnishing step ensures a deep, permanent bond that resists lifting.
Handling Large or Intricate Copper Stickers
Large sheets of copper foil or highly detailed, delicate filigree stickers present unique challenges because they easily fold over and stick to themselves. For large designs, employ the hinge method. Partially peel back a small strip of the backing paper along one edge, fold the backing paper flat against itself, and align the exposed adhesive strip on your page. Once this “hinge” is secured, slowly pull the remaining backing paper out from underneath the sticker with one hand while simultaneously smoothing the top of the foil down with your bone folder in the other hand.
For intricate, thin, or web-like copper die-cuts, use a piece of low-tack transfer tape or masking tape. Gently press the low-tack tape over the front of the copper sticker while it is still on its backing, then peel the backing away. The transfer tape will hold the delicate copper lines in their correct orientation, preventing them from tangling or stretching. Place the assembly onto your scrapbook page, burnish thoroughly through the transfer tape, and then slowly peel the tape back at a flat, 180-degree angle, leaving the pristine copper design perfectly adhered to the page.
Sealing and Protecting Copper Stickers to Prevent Peeling
Once your copper sticker is perfectly applied, protecting it from the elements is the final step in ensuring its longevity. In scrapbooking, pages are constantly turned, rubbed, and exposed to air. Over time, friction can catch the delicate edges of a sticker, causing them to lift. Furthermore, real copper elements are highly susceptible to oxidation, which can turn a bright, reflective metallic finish into a dull, tarnished brown or green.
Choosing the right sealant is critical to preserving both the sticker and the underlying paper. You must avoid water-heavy sealants, such as standard school glues or thin decoupage mediums, because excess water will warp the scrapbook paper and can reactivate or dissolve the water-soluble adhesives used on many stickers. Instead, opt for high-quality, acid-free, and photo-safe sealants.
Consider these two primary options:
- Spray-on acrylic sealants: A light, archival-grade matte or gloss spray sealant is ideal for large layouts. It provides an even, touch-free barrier that locks down edges without disturbing the sticker. Always spray in a well-ventilated area, holding the can at least 30 centimeters away from the page, and apply two to three micro-coats rather than one heavy, wet coat.
- Brush-on gel mediums: For targeted protection, a thin layer of acid-free matte gel medium can be brushed carefully over the sticker edges using a soft-bristled brush. This physically bridges the gap between the sticker edge and the paper, preventing any future snagging.
Always check the product label to ensure the sealant is acid-free and lignin-free. Acidic products will yellow your paper and degrade the metallic foil over time. Allow the sealant to cure completely in a dust-free environment before closing your scrapbook or inserting the page into a plastic protector sleeve.
Troubleshooting Wrinkles, Bubbles, and Peeling Edges
Even with meticulous preparation, mistakes can happen. Because metallic foil stickers are fragile, standard correction methods—like peeling the sticker off to try again—will stretch, tear, or permanently ruin the metallic finish. Instead, use these low-risk, targeted troubleshooting techniques to salvage your layout.
If you discover a trapped air bubble after burnishing, do not attempt to push it to the edge, as this will crease the foil. Instead, take a very fine, sharp craft needle or pin. Gently prick the center of the bubble at a slight angle, creating a microscopic escape hole. Use your bone folder to press the air out through the hole, working from the edges of the bubble toward the puncture point. The tiny hole will remain virtually invisible, and the foil will lay completely flat.
For minor wrinkles or creases, do not try to lift the foil. Instead, place a piece of smooth parchment paper over the creased area to protect it from friction. Take the tip of your bone folder and apply firm, concentrated pressure directly over the wrinkle, rubbing in small, tight circular motions. This technique burnishes and flattens the soft copper foil, blending the crease into the texture of the paper beneath it so it is much less noticeable.
If the edges of your copper sticker begin to lift or peel, you can rescue them using a precision adhesive applicator. Dip a toothpick or a fine-tipped detail brush into a small amount of clear-drying, acid-free PVA craft glue. Gently lift the peeling edge of the sticker, slide the adhesive-coated toothpick underneath, and apply a microscopic layer of glue to the paper. Press the edge down firmly with a clean cloth, holding it in place for 30 seconds, and immediately wipe away any tiny beads of squeeze-out glue with a damp cotton swab.
Frequently Asked Questions (FAQ)
Can I use a hair dryer or heat gun to smooth out copper stickers?
Using a hair dryer or heat gun to smooth out copper stickers is generally not recommended unless the sticker manufacturer’s instructions explicitly advise it. High heat can easily melt or degrade the pressure-sensitive adhesive, causing it to lose its tack or seep out from the edges of the sticker. Additionally, intense heat can warp your scrapbook paper and cause real copper foil to distort or discolor. It is much safer and more effective to rely on mechanical smoothing tools, such as a Teflon bone folder or a soft squeegee, to press out imperfections.
Will copper stickers tarnish or oxidize over time in a scrapbook?
Whether your sticker tarnishes depends entirely on its material composition. Real copper foil stickers will naturally oxidize and develop a patina over time when exposed to oxygen, moisture, and the natural acids found in non-archival papers. In high-humidity regions like the Philippines, this oxidation process happens much faster. To preserve the bright, original metallic shine of real copper, always use acid-free, archival-grade scrapbook paper and apply a protective, photo-safe acrylic sealant over the layout. Conversely, copper-colored metallic plastic stickers (such as those made from metallized polyester or Mylar) do not contain real copper and will not tarnish, though they still benefit from a sealant to prevent their edges from peeling.

Community discussion
Share your experience or ask a question. Comments are reviewed before publication.