
Applying a double adhesive sheet to your scrapbook pages without creating unsightly bubbles or wrinkles requires a controlled, systematic approach. The secret lies in preparing a clean workspace, cutting the adhesive sheet slightly smaller than your target item, and using a “hinge method” to slowly expose the adhesive while burnishing from the center outward. By managing the release liner carefully and using a firm smoothing tool like a bone folder, you can achieve a perfectly flat, professional-grade bond that preserves your photos and paper crafts for years.
Preparing Your Scrapbooking Materials and Workspace
Before peeling any backing, you must ensure your materials and environment are ready for the application process. Double adhesive sheets are highly sensitive to dust, static, and moisture, which can easily trap air or weaken the bond. In the tropical climate of the Philippines, high humidity can make adhesive surfaces exceptionally tacky and cause lightweight papers to curl. Working in a dry, fan-cooled or air-conditioned room helps stabilize both the paper fibers and the adhesive layer.
Start by verifying the compatibility of your materials. Check the manufacturer labels on your adhesive sheets to ensure they are rated for the specific paper weight or photo finish you are using. Glossy photo papers, textured cardstocks, and delicate vellums all react differently to pressure-sensitive adhesives. Performing a quick trial with small scrap pieces of your chosen paper and adhesive is the best way to observe how they bond, checking for any bleed-through or surface warping before committing to your main project.
Products mentioned in this guide
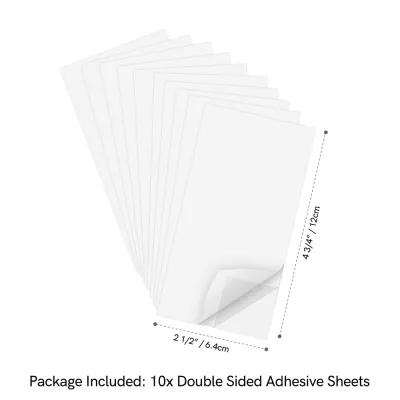
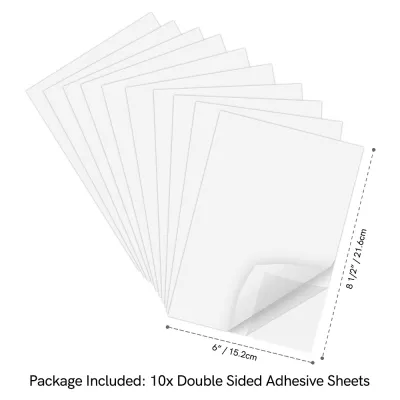
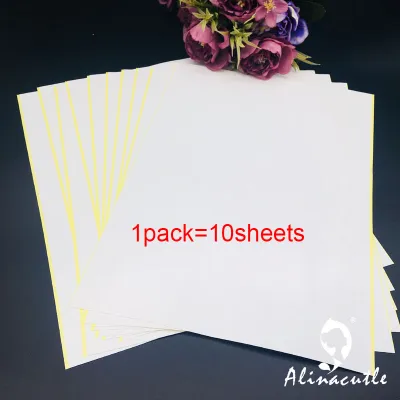
Prices are valid at publication and may change. Please refer to the product page for the latest price.
Next, prepare your physical workspace. Wipe down your cutting mat or table with a clean, damp cloth to remove any lingering paper dust, lint, or debris. Wash your hands thoroughly with soap and water, drying them completely to prevent transferring natural skin oils or moisture to the adhesive sheet. Even a tiny speck of dust or a fingerprint can create a permanent bubble or a weak spot where the adhesive fails to stick.
Finally, gather your essential smoothing and burnishing tools. A classic bone folder made of polished bone or plastic is ideal for detailed work, while a wide acrylic scraper or squeegee works well for larger photos and background sheets. If you do not have these specialized tools, a clean, lint-free microfiber cloth wrapped tightly around a plastic card can serve as an effective alternative. Having these tools within arm’s reach ensures you can maintain continuous pressure during the application.
Step-by-Step Technique for Bubble-Free Application
Achieving a flawless, professional finish requires a deliberate physical workflow that prevents the adhesive sheet from sticking prematurely. By breaking the process down into distinct stages—measuring, dry-fitting, hinging, and burnishing—you maintain complete control over the sticky surface. Managing the release liner step-by-step is the single most effective way to eliminate air pockets and wrinkles.

Measuring, Cutting, and Dry-Fitting
Precision at the start of your project prevents messy edges and alignment errors later. Begin by measuring your photo, cardstock, or embellishment carefully. When cutting the double adhesive sheet, aim to make it approximately one to two millimeters smaller than the target item on all sides. This slight margin prevents the sticky adhesive from oozing out past the edges of your paper when you apply pressure, keeping your scrapbook pages from sticking together when the album is closed.
To make clean, straight cuts, place the adhesive sheet on a self-healing cutting mat. Use a sharp craft knife and a heavy metal ruler as a guide, pressing down firmly to slice through both the adhesive and its protective backing liners in a single pass. Dull blades can tear the release liner or drag the adhesive, creating jagged edges that are difficult to smooth out.
Once cut, perform a dry-fit of your elements directly on your scrapbook layout. Position the unpeeled adhesive sheet, the embellishment, and any surrounding page elements exactly where you want them to go. This step allows you to confirm your composition and alignment before any permanent bonding occurs. You can use light pencil marks or low-tack painter’s tape on the page margins to serve as visual guides for the final placement.
Peeling the Backing and Initial Placement
The most common mistake in scrapbooking is peeling off the entire backing sheet at once, which often leads to the adhesive curling, sticking to itself, or trapping large pockets of air. Instead, use the hinge method to maintain control. Peel back only a small strip—about one to two centimeters—of the release liner along one edge of the adhesive sheet, folding the peeled backing flat against the remaining covered portion.
Carefully align this exposed adhesive edge with the corresponding edge on the back of your photo or paper embellishment. Once you are certain the alignment is correct, press the exposed strip down gently to anchor it in place. This creates a secure hinge that keeps the rest of the sheet perfectly aligned while you work on the remaining surface.
Throughout this step, make a conscious effort to avoid touching the exposed adhesive with your bare fingers. The natural oils on your skin can instantly degrade the adhesive’s tackiness, leading to lifting corners or edges later on. Always handle the sheet by its covered portions or by the very outer margins that will be trimmed away.
Smoothing and Burnishing for a Secure Bond
With your adhesive sheet anchored by the hinge, you can now begin the final bonding process. Hold your bone folder or acrylic scraper in one hand and grasp the folded release liner with the other. Slowly and steadily pull the release liner away from under the sheet, exposing more adhesive in small, controlled increments.
As you pull the liner with one hand, use your smoothing tool in the other hand to apply firm, even pressure over the top of the paper. Always work in a sweeping motion from the center of the item outward toward the edges. This outward motion actively pushes any trapped air out from under the paper, preventing bubbles from forming in the first place.
Once the entire release liner is removed and the sheet is down, perform a final burnishing pass. Rub the bone folder firmly across the entire surface, paying special attention to the corners and outer edges. Inspect the paper from an angle under a bright light; look for any observable wrinkles, bubbles, or dull spots that indicate incomplete contact. If you spot any uneven areas, re-burnish them immediately with firm, outward strokes to ensure a complete, permanent bond.
Troubleshooting Bubbles, Wrinkles, and Lifting Edges
Even with careful application, minor imperfections can occasionally occur due to paper texture or sudden shifts during burnishing. Fortunately, you can resolve most common issues without ruining your scrapbook page or precious photos.
If you discover a small, trapped air bubble after burnishing, do not try to peel the paper back up, as this will likely tear the fibers. Instead, take a very fine sewing needle or a precision pin and gently prick the center of the bubble. Use the edge of your bone folder or a clean fingertip to press the trapped air out through the tiny puncture, smoothing the paper flat against the adhesive. The microscopic hole will be virtually invisible once the air is released.
For minor wrinkles in cardstock or heavy paper, you can sometimes relax the fibers and the adhesive using localized, low heat. Hold a craft heat gun or a hair dryer on its lowest setting several inches away from the wrinkled area, using a clean sheet of parchment paper as a protective barrier. Apply the heat for only a few seconds at a time to soften the adhesive slightly, then immediately smooth the wrinkle flat with your bone folder. Stop the process immediately if you notice the paper beginning to scorch, or if you are working with a photo, as excess heat can permanently cloud or distort photographic finishes.
If you notice the edges or corners of your mounted item lifting after a few days, it is usually a sign of insufficient adhesive coverage or high environmental humidity. Rather than trying to slide another piece of adhesive sheet underneath, secure the lifting edges with a small amount of compatible, acid-free liquid glue or a precision tape runner. Apply a very thin layer to avoid warping the paper, press the edge down firmly, and place a heavy book over the area for an hour to ensure a flat, secure cure.
Adapting the Technique for Different Scrapbooking Elements
Different scrapbooking materials require slight adjustments to your application technique to accommodate their unique thicknesses, textures, and shapes.
When working with delicate, thin materials like dried flowers, skeleton leaves, or lightweight tissue paper, applying a double adhesive sheet directly can cause tearing. Instead, apply the adhesive sheet to a heavier piece of acid-free carrier paper or cardstock first. Once the adhesive is secured to the carrier paper, you can carefully press your delicate elements onto the sticky surface, using a soft, clean cloth instead of a hard scraper to avoid crushing the fragile textures.
For thick materials like heavy chipboard, wooden veneers, or thick cardstock, you must ensure your adhesive sheet is rated for heavy-duty or high-tack bonding. These thicker elements have more structural memory and resist lying flat, meaning they require extra burnishing pressure. Use the flat edge of your bone folder to press down repeatedly along the entire perimeter of the thick embellishment, ensuring the adhesive fully conforms to any textured surfaces.
If you are working with intricate, irregularly shaped die-cuts or detailed paper cuts, trying to cut the adhesive sheet to match the shape beforehand is incredibly difficult. Instead, apply the double adhesive sheet to the back of your solid paper sheet before you run it through your die-cutting machine or cut it with precision scissors. This turns your paper into a custom sticker, allowing you to cut out intricate designs with perfectly clean, adhesive-covered edges in a single step.
Frequently Asked Questions (FAQ)
Can I reposition a double adhesive sheet once it is fully applied?
Most double adhesive sheets are designed for permanent, archival bonding and will bond instantly upon contact. Attempting to peel up a fully applied sheet will almost certainly tear delicate paper fibers, warp photos, or ruin your scrapbook layout. If you are unsure about your placement or are working with highly sensitive materials, always test the adhesive’s repositionability on a small scrap piece of the exact same paper stock first. This trial allows you to observe how the adhesive behaves and determine if it allows for any adjustment before setting permanently.
How should I store unused double adhesive sheets to maintain their stickiness?
To preserve the tackiness and quality of your unused double adhesive sheets, store them completely flat inside their original packaging or a sealed plastic sleeve. This keeps dust, lint, and pet hair from settling on the exposed edges of the adhesive. Keep your storage container in a cool, dry environment away from direct sunlight, radiators, or high-humidity areas. Excessive heat and moisture can cause the adhesive to degrade, bleed past the release liners, or lose its bonding strength over time.

Community discussion
Share your experience or ask a question. Comments are reviewed before publication.