
Writing on glass is an exceptional way to brainstorm, display menus, organize schedules, or create vibrant storefront displays. However, the very qualities that make glass an attractive canvas—its high gloss, non-porous surface, and absolute clarity—also make it a challenging medium for writing instruments. Unlike paper or whiteboards, glass does not absorb ink, meaning the marker must rely entirely on surface tension and specialized binders to lay down a smooth, visible line. If the ink formulation is incorrect, you may find yourself dealing with beaded lines, translucent writing, or stubborn ghosting that permanently shadows your glass panels.
Selecting the right glass marker requires balancing ink chemistry, nib design, and environmental factors. In tropical climates where high humidity and warm temperatures are common, these variables become even more critical, as moisture in the air can delay drying times or cause certain inks to smear. By understanding how different markers interact with glass surfaces, you can ensure your writing remains bold, legible, and incredibly easy to clean without leaving a trace of residue.
Identifying the Right Ink Type for Clean Removal
The primary factor that determines how easily a marker wipes away is its ink formulation. Glass markers generally fall into three categories: dry-erase, liquid chalk, and wet-erase. Dry-erase inks utilize an alcohol solvent and a silicone release agent. When you write on glass, the solvent evaporates rapidly, leaving behind a colorful polymer film that sits loosely on the surface. Because the silicone prevents the pigment from bonding to the glass, a simple pass with a dry cloth or eraser easily lifts the dry film. However, because dry-erase ink is designed to release easily, it can sometimes appear translucent or bead up on highly polished glass surfaces.
Products mentioned in this guide
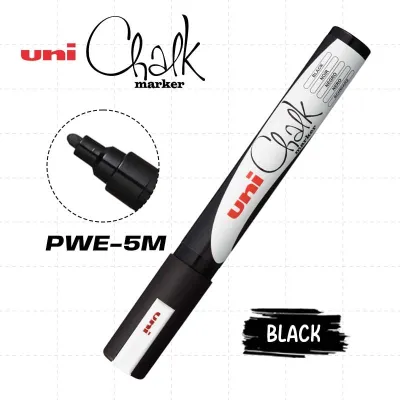
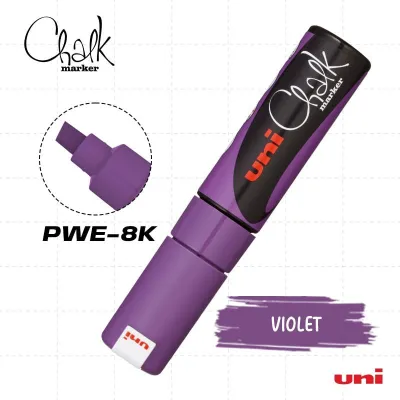
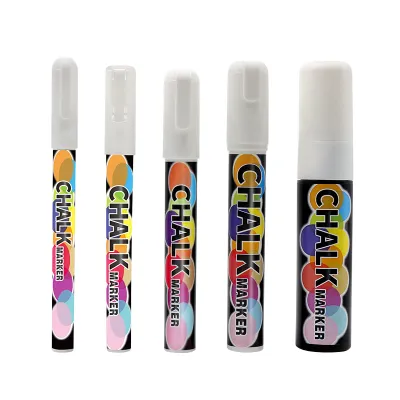
Prices are valid at publication and may change. Please refer to the product page for the latest price.
Liquid chalk markers offer a water-based alternative that delivers exceptional opacity and vibrant color. These markers use a dense suspension of pigment particles and clay-like binders that mimic the appearance of traditional chalk once dry. Liquid chalk is highly resistant to dry smudging, making it ideal for high-traffic areas where people might accidentally brush against the glass. To erase liquid chalk cleanly, you must use a damp cloth to rehydrate the binders and dissolve the pigment. If you attempt to dry-erase liquid chalk, you will likely end up with a dusty, smeared mess and potential ghosting.
Wet-erase markers bridge the gap between dry-erase and liquid chalk. They use a water-soluble binder that dries to a semi-permanent finish, resisting dry friction and light handling. Like liquid chalk, wet-erase ink requires a damp cloth or sponge for complete removal. The advantage of wet-erase ink is its precision; it rarely beads up on glass and allows for incredibly sharp, fine lines that remain intact until you intentionally introduce moisture.
When choosing an ink type, you must also consider the opacity and vibrancy trade-offs relative to your glass type. Clear glass panels require highly opaque inks, such as liquid chalk, to remain legible against busy background environments. If you are writing on tinted, frosted, or black glass boards, standard dry-erase inks can provide sufficient contrast, but liquid chalk will still offer the most striking visual impact.
Environmental conditions also play a significant role in how these inks behave on glass. In humid tropical environments, water-based inks like liquid chalk and wet-erase formulations take longer to dry completely. If you attempt to erase or touch the writing before the water carrier has fully evaporated, the ink will smear and leave a cloudy film across the glass. Conversely, intense heat or direct sunlight on storefront windows can “bake” dry-erase polymer films onto the glass, making them exceptionally difficult to remove without a specialized solvent.
Evaluating Nib and Flow Features for Smooth Writing
The physical construction of the marker directly influences how smoothly the ink glides onto the glass without skipping, streaking, or pooling. The nib material is your primary point of contact. Most glass markers feature nibs made of polyester, acrylic, or felt. Acrylic nibs are highly rigid and durable, allowing them to maintain their shape even when pressed firmly against hard, unyielding glass. Polyester nibs are slightly softer, offering a quieter and smoother writing experience, though they can fray over time if used on textured or frosted glass surfaces. Felt nibs are the softest but tend to absorb a lot of ink, which can lead to faster drying if left uncapped.

Nib shapes are tailored to specific writing styles and applications. Bullet tips are the most versatile, providing a consistent line width that is perfect for general writing, diagramming, and sketching. Chisel tips feature a slanted edge that allows you to create both broad strokes and fine lines simply by rotating the marker, making them excellent for calligraphy and decorative borders. For detailed calendars, small text, or intricate technical drawings, fine-tip markers (ranging from 0.5mm to 2mm) are essential to prevent your writing from turning into an illegible blur.
To deliver ink to the nib, markers use either a valve-action or a free-flow mechanism. Valve-action markers, often referred to as pump-action, keep the ink sealed inside an internal reservoir. To prime the marker, you must shake it thoroughly to mix the pigment and solvent, then press the nib down repeatedly on a scrap surface to compress the internal spring and saturate the tip. This design prevents the ink from drying out during storage and allows for a highly concentrated pigment mixture. However, over-pumping can cause ink to pool on the glass, leading to messy runs and extended drying times. Free-flow markers, on the other hand, use a capillary system that delivers ink continuously to the nib without pumping. While they are ready to write instantly, they can dry out more quickly if the cap is left off.
Maintaining the quality of the nib and ink flow requires proper storage and cap care. Always look for markers with tight, clicking cap seals that prevent air from entering the chamber. Storing your glass markers horizontally is highly recommended. If you store them vertically with the tip pointing up, the pigment will settle at the bottom, resulting in faint, watery lines when you next write. If you store them vertically with the tip pointing down, gravity can cause the pigment to clog the nib or leak into the cap, creating a messy cleanup when you open the marker.
Testing and Verifying Marker Performance on Glass
Before purchasing glass markers in bulk for an office, classroom, or commercial space, it is wise to perform a practical, hands-on trial to verify their performance. Because erasability and smoothness depend heavily on the specific combination of ink formulation and glass type, a localized test will save you from future frustration. Begin by selecting a small, inconspicuous corner of your glass surface to conduct your evaluation.
First, perform a smoothness and flow check. Draw a series of continuous, overlapping spirals and long straight lines across the glass. Observe the ink deposit closely. A high-quality glass marker should lay down a solid, unbroken line of color with minimal hand pressure. If you notice “railroading”—where the ink splits to the outer edges of the stroke, leaving a translucent gap in the middle—the ink flow is insufficient or the nib is not properly saturated. The ink should also resist beading up into tiny droplets, which indicates a poor wetting agent in the ink formula.
Next, evaluate the drying time. Draw five parallel lines on the glass. Use a clean cloth to wipe the first line after 5 seconds, the second after 10 seconds, the third after 20 seconds, and so on. Note the exact point at which the ink wipes away cleanly without smearing or leaving a wet trail. This test helps you establish the necessary waiting time during daily use, which is particularly important in humid conditions where evaporation is naturally slower.
To test erasability, write a few words and leave them on the glass for at least 24 hours. This simulated aging process allows the ink to settle completely. After 24 hours, attempt to erase the writing using a dry microfiber cloth. If the marker is a dry-erase type, it should lift effortlessly as a dry powder or film. If it is a liquid chalk or wet-erase marker, apply a small amount of water to a clean section of the cloth and wipe. The ink should dissolve quickly without requiring heavy scrubbing, which can fatigue your arm and potentially scratch the glass over time.
Finally, conduct a ghosting inspection. After erasing the 24-hour-old writing, dim the ambient room lights and shine a flashlight or mobile phone light directly at the erased area from a 45-degree angle. Look closely for any faint, cloudy silhouettes of the original text. True residue-free markers will leave the glass completely clear, whereas lower-quality inks may leave a polymer shadow that becomes increasingly difficult to remove as more layers of writing are applied over time.
Matching Marker Profiles to Your Specific Glass Surface
Not all glass surfaces are created equal, and matching your marker profile to your specific installation ensures optimal performance and visual appeal. Glass whiteboards, office partitions, storefront windows, and home mirrors each present unique physical characteristics that demand different marker traits.
For indoor office partitions, collaborative glass whiteboards, and personal desktop organizers, fine-tip dry-erase markers are the ideal choice. These environments typically involve detailed scheduling, small text, and rapid brainstorming sessions where information is constantly updated. The quick-drying, dry-wipe nature of these markers allows you to make instant corrections without waiting for water to dry, keeping your meetings moving at a fast pace. Because these boards are usually viewed from a short distance, the ultra-fine lines remain perfectly legible.
For storefront signage, cafe menu boards, and outdoor promotional displays, broad-tip liquid chalk markers are far superior. These applications require high-impact, bold visuals that can be easily read from a distance, even under bright sunlight or competing streetlights. The thick, opaque lines of liquid chalk stand out beautifully against clear glass windows and dark-tinted background boards. Because these displays are meant to remain intact for days or weeks, the smudge-resistant properties of liquid chalk ensure your message stays pristine despite wind, dust, or accidental contact.
If your glass surface is located outdoors or in a semi-outdoor area—such as an open-air cafe patio or an external building directory—you must consider weather resistance and UV stability. Standard dry-erase inks will quickly fade under direct sunlight and can wash away completely with a light drizzle. For these environments, look for specialized weather-resistant wet-erase markers or outdoor liquid chalk formulations. These inks are designed to withstand light moisture and UV exposure, yet they can still be removed cleanly when scrubbed with a damp microfiber cloth and a mild cleaning solution.
To help you decide which marker profile best suits your daily routine, consider the balance between ink vibrancy and erasing frequency. If you update your glass surface multiple times a day, prioritize dry-erase profiles for maximum convenience. If you update your display weekly or monthly, choose liquid chalk or wet-erase profiles to achieve the boldest visual presentation, accepting the minor trade-off of needing a damp cloth for cleanup.
Removing Stubborn Residue and Maintaining Glass Clarity
Even when using high-quality glass markers, improper erasing techniques or prolonged exposure to heat can occasionally leave behind stubborn residue, cloudy films, or ghosting. To maintain the pristine clarity of your glass, it is essential to use safe, non-abrasive cleaning methods that restore the surface without causing permanent damage.
When erasing large areas of writing, always use a systematic cloth-folding technique. Fold a clean microfiber cloth into quarters. Wipe the glass in single, downward strokes, flipping the cloth to a fresh, clean quadrant as soon as it becomes saturated with pigment. If you simply rub a dirty cloth back and forth across the glass, you will redistribute the dissolved ink polymers, creating a hazy, cloudy film that ruins the clarity of the pane.
For stubborn, baked-on dry-erase residue, standard water may not be enough to break the polymer bonds. In these cases, isopropyl alcohol (70% concentration) is an incredibly effective and safe solvent. Dampen a microfiber cloth with the alcohol and gently wipe the affected area; the solvent will quickly dissolve the silicone binders, allowing you to lift the pigment away effortlessly. For liquid chalk buildup, a mild solution of warm water and a few drops of dish soap will easily break down the water-soluble binders.
There are several tools and materials you must strictly avoid when cleaning glass boards. Never use metal razor blades, steel wool, abrasive scouring pads, or harsh chemical powders. While these tools may remove the ink quickly, they create microscopic scratches on the highly polished surface of the glass. These tiny grooves act as traps for future ink pigments, making subsequent writing nearly impossible to erase cleanly and permanently ruining the board’s optical clarity.
Finally, always be mindful of specialized glass types. If you are writing on low-iron glass, tempered safety glass, frosted partitions, or smart glass with electronic laminates, check the manufacturer’s care and warranty guidelines before applying any chemical solvents or cleaning agents. Some specialized coatings can react negatively to alcohol or ammonia-based cleaners, so verifying compatibility beforehand is the best way to protect your investment.
Frequently Asked Questions (FAQ)
Can I use standard whiteboard markers on glass?
While you can use standard whiteboard markers on glass, they generally do not perform as well as dedicated glass markers. Standard whiteboard markers are formulated for painted steel or melamine surfaces, which have a slightly different surface energy than highly polished glass. On glass, standard whiteboard ink often beads up, resulting in translucent, streaky lines that are difficult to read. Additionally, because standard whiteboard inks have a lower pigment concentration, they lack the opacity needed to stand out against clear or dark glass backgrounds, and they are much more prone to leaving ghosting shadows after erasing.
How do I prevent liquid chalk from smudging when erasing?
To prevent liquid chalk from smudging and leaving a cloudy film, you must always use a damp microfiber cloth rather than a dry eraser. Liquid chalk is a water-based formulation that requires moisture to fully rehydrate and dissolve the binders. Before wiping, ensure your cloth is damp but not dripping wet. Wipe the glass in single, directional strokes, folding the cloth frequently to expose a clean surface. Once the ink is removed, pass over the area with a dry microfiber cloth to absorb any remaining moisture and prevent water spots from forming as the glass dries.

Community discussion
Share your experience or ask a question. Comments are reviewed before publication.