
Selecting the right DIY book-making kits for school art classes in the Philippines requires balancing student skill levels, curriculum goals, and the unique challenges of a tropical climate. High humidity can warp thin paper and delay adhesive drying times, making material selection critical for classroom success. By focusing on durable components, safe tools, and cost-effective bulk options priced in ₱, educators can provide an engaging, hands-on experience that teaches the fundamentals of bookbinding without exceeding school budgets.
Key Criteria for Evaluating DIY Book Kits for Students
When selecting book-making kits for a classroom, durability is a primary concern. Students handle their projects frequently during the creation process and long after the class ends. In the Philippines, high relative humidity can soften paper fibers, making lightweight sheets prone to tearing when pulled tight during stitching. Educators should look for kits that feature sturdy materials capable of withstanding repeated handling, erasing, and heavy application of art mediums.
The chosen kits must also align closely with your specific art curriculum goals and project outcomes. If the lesson focuses on illustration or creative writing, the kit should prioritize smooth, bleed-resistant paper that accommodates fine-liner pens and colored pencils. If the goal is to teach traditional craft techniques, the kit should emphasize structural assembly, such as exposed stitching or historical folding methods, rather than pre-assembled components that leave little room for technical learning.
Products mentioned in this guide
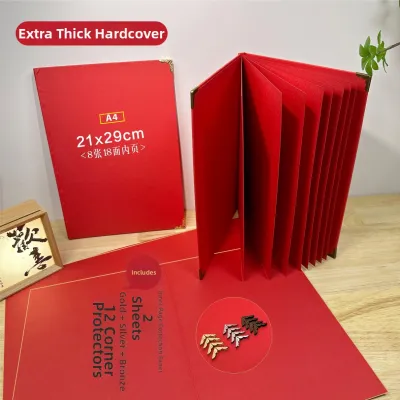
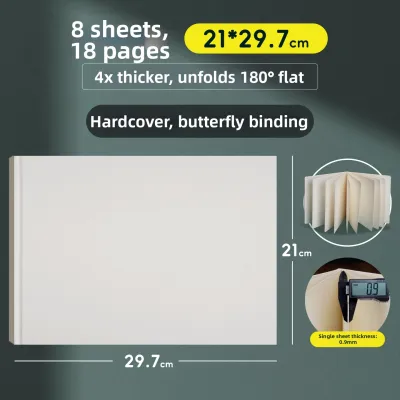

Prices are valid at publication and may change. Please refer to the product page for the latest price.
Cost-effectiveness is a practical reality when budgeting in ₱ for bulk school purchases. Art teachers often work with limited budgets and must stretch resources across multiple class sections. When evaluating kits, calculate the total cost per student by dividing the bulk price by the number of complete books that can be produced. Look for options that package consumable materials like paper and thread in large quantities while keeping the number of specialized tools to a minimum, allowing students to share non-consumable items.
Overall ease of assembly is crucial for maintaining classroom momentum. A kit that is too complex can lead to student frustration and a high volume of mistakes, leaving the teacher overwhelmed with troubleshooting. The ideal kit should match the students’ developmental stage, offering clear, visual instructions that allow for self-paced learning. This independence empowers students to take ownership of their projects while keeping the classroom environment organized and productive.
Essential Components to Check in a Binding Kit
Before purchasing any bookbinding kit, it is essential to verify the specifications of the paper included. Paper weight is measured in grams per square meter (GSM), which directly determines how the pages will handle different art mediums. For general writing and light sketching, a paper weight of 100 to 120 GSM is sufficient. However, if your curriculum involves wet mediums like watercolors, poster paints, or heavy ink washes, look for kits that provide watercolor paper or mixed-media cardstock of at least 200 to 300 GSM to prevent severe warping and bleed-through.

Paper grain direction is another critical factor that affects how easily a book folds and stays flat. Paper fibers run parallel to one direction of the sheet; folding along this grain results in a clean, crisp fold, whereas folding against the grain causes the paper to crack and buckle. In humid tropical conditions, paper folded against the grain is even more susceptible to warping. Since most budget kits do not explicitly state grain direction, you can verify this by gently bending a sample sheet horizontally and vertically; the direction with less resistance is the grain direction, which should run parallel to the spine of the book.
The binding mechanism provided in the kit dictates both the difficulty of the project and the style of the finished book. Kits designed for beginners often feature pre-punched holes for easy stitching, metal split rings, or plastic binding combs. These mechanisms eliminate the need for sharp tools and allow for quick assembly. For more advanced classes, kits may include waxed polyester thread, which provides excellent grip and prevents slipping during complex stitching patterns, or adhesive strips that require careful alignment to secure the pages.
Cover materials must be robust enough to protect the inner pages and serve as a canvas for student creativity. Look for kits that include thick greyboard, chipboard, or heavyweight kraft cardstock for the covers. These materials should have a matte, uncoated surface so that students can easily decorate them using markers, acrylic paints, or collage techniques. Glossy or plastic-coated covers should be avoided unless the project specifically calls for specialized permanent markers, as standard school paints and glues will not adhere to them.
Finally, check which specialized tools are included in the kit and which must be sourced separately. A complete bookbinding kit typically includes a bone folder for creasing paper, an awl for punching sewing holes, and large-eye binding needles. If a kit only provides the paper and thread, you will need to budget separately for these tools. For classroom settings, wooden or plastic bone folders are highly durable and safe, while blunt tapestry needles can often replace sharp sewing needles to minimize the risk of injury.
Matching Kit Complexity to Grade Levels
Selecting the right difficulty level ensures that students remain engaged without becoming overwhelmed by technical challenges. For younger students in primary grades, the focus should be on developing basic fine motor skills through simple folding, stapling, or tie-binding kits. These kits often use pre-cut, colorful cardstock and pre-punched holes, allowing children to thread thick yarn or ribbon through the pages. This approach teaches the basic concept of a book’s structure without requiring sharp tools or precise measurements.
As students transition into the middle grades, they can progress to basic saddle-stitch, ring binding, or simple glue-bound projects. Saddle-stitching involves sewing thread through the fold of the pages, which introduces students to basic needlework and alignment. Ring-bound kits, which use metal rings inserted through punched holes, are highly forgiving and allow students to easily add, remove, or rearrange pages. Simple glue-bound kits, utilizing flexible white craft glue along the spine, teach the basics of adhesive binding while keeping the process straightforward and clean.
For high school students, advanced techniques like Coptic stitching or Japanese stab binding offer an excellent opportunity to explore complex structures and historical crafts. Coptic binding features an exposed, decorative spine that allows the book to lay completely flat when open, making it a favorite for sketchbooks and journals. Japanese stab binding involves sewing through the face of the book near the spine, creating intricate geometric patterns on the cover. These methods require precise measurements, patience, and the use of real bookbinding tools, making them ideal for older students developing advanced artistic portfolios.
Safety and Classroom Management Considerations
Managing a bookbinding project in a busy school art class requires careful planning around tool safety and material handling. Sharp tools like awls and utility knives present obvious safety risks in a crowded classroom. To mitigate these hazards, select kits that feature blunt-tipped needles and rounded plastic awls, or pre-punch the signature holes yourself before the class begins. If students must punch their own holes, establish a dedicated punching station equipped with protective foam mats and supervise the process closely.
Adhesive safety is another critical consideration, especially when working with younger students. Always read the manufacturer labels on the included glues to verify they are non-toxic, acid-free, and safe for school use. Avoid solvent-based adhesives or rubber cements that emit strong fumes, as these require specialized ventilation that standard classrooms may not have. Water-based polyvinyl acetate (PVA) glue is the industry standard for bookbinding because it remains flexible when dry, does not yellow over time, and cleans up easily with water.
Storage of partially completed projects can be a logistical challenge, particularly in humid tropical climates. Wet glue takes longer to dry in high humidity, and stacking damp books can cause them to stick together or develop mold. Designate a flat, well-ventilated area in the classroom, such as a drying rack or open shelving, where students can lay their books flat to dry. To prevent warping as the glue cures, place a sheet of wax paper between the glued sections and weight the books down with flat boards or heavy textbooks.
Time allocation is key to a successful bookbinding lesson. A single class period is rarely enough to complete a book from start to finish. Break the project down into manageable phases: folding and preparing the signatures in the first session, sewing or gluing the binding in the second, and decorating the covers in the third. Ensure you allocate at least ten minutes at the end of each session for cleanup, particularly when adhesives are used, to prevent glue from drying on brushes, desks, and tools.
Sourcing and Verifying Supplies in the Philippines
Finding reliable DIY book-making kits in the Philippines involves navigating both local stationery stores and online marketplaces. Local brick-and-mortar stationery shops are excellent for inspecting paper quality, testing cover thickness, and purchasing immediate replacements. However, online marketplaces often provide a wider selection of specialized bookbinding kits and more competitive pricing for bulk orders. When sourcing online, look for established sellers that specialize in art and craft supplies rather than general novelty items.
To avoid purchasing substandard materials, always verify the product specifications rather than relying on promotional images. Sellers often use stylized photos that make thin paper look thick and luxurious. Read the product description carefully to confirm the exact GSM of the paper, the material of the tools, and the quantity of items included in the package. Pay close attention to customer reviews, looking for photos uploaded by other buyers to assess the actual color, texture, and quality of the components.
Before committing to a large bulk order for an entire grade level, it is highly recommended to purchase a single sample unit. Use this sample to conduct a trial run of the project. Test how the paper reacts to the specific art mediums your students will use, checking for ink bleeding, feathering, or warping. Evaluate the clarity of the written instructions to ensure they are easy for students to follow, and test the durability of the included tools to make sure they will not break during class.
Finally, verify the seller’s return and replacement policies before placing a bulk order. Incomplete kits with missing needles, thread, or covers can disrupt your lesson plans. Choose sellers who offer responsive customer service and clear policies for replacing defective or missing components. Having a few extra kits on hand as spares is also a wise classroom management strategy to cover any unexpected shortages or student mistakes during the binding process.
Frequently Asked Questions (FAQ)
Can regular craft glue be used instead of the adhesive provided in the kit?
Yes, standard white school glue or craft glue can be used, but it may not offer the same longevity or flexibility as specialized bookbinding PVA glue. Regular craft glue has a higher water content, which can cause paper to warp or wrinkle, especially in humid tropical climates. If using regular craft glue, apply it sparingly with a brush and allow extra drying time. Always check the kit manufacturer’s instructions to see if a specific adhesive is required for structural integrity.
How many students can typically share one DIY book kit?
While consumable materials like paper, covers, and thread must be provided on a per-student basis, specialized tools can easily be shared. In a typical classroom setting, one set of tools—such as bone folders, rulers, and awls—can be shared among a small group of three to four students. This sharing strategy helps reduce the overall cost of bulk purchases in ₱, making bookbinding projects much more accessible for school budgets.
What should be done if a kit is missing essential binding tools?
If a kit arrives incomplete, contact the seller immediately to request a replacement or refund. For immediate classroom needs, you can substitute missing tools with common school supplies. A plastic ruler or the edge of a clean glue stick can serve as a makeshift bone folder. If needles are missing, you can stiffen the end of the binding thread with a small dab of white glue or tape to thread it through pre-punched holes, or pivot the lesson to a simple folded or stapled binding method.

Community discussion
Share your experience or ask a question. Comments are reviewed before publication.