
Choosing the right illuminated drawing board requires matching the device’s physical dimensions, light output, and power source to your specific artistic medium and workspace. Whether you are tracing intricate animation frames, practicing calligraphy, or transferring detailed sketches onto thick watercolor paper, the ideal board must provide consistent illumination without causing eye strain or overheating. By evaluating your current skill level and the physical demands of your preferred art style, you can select a tool that enhances your creative workflow rather than complicating it.
Diagnose Your Art Style and Tracing Requirements
Your primary art style dictates the physical size and light intensity your illuminated drawing board must deliver. Animators and illustrators working on large-scale compositions typically require an A3 or A2 format to accommodate standard animation paper and registration pegs. Conversely, calligraphers, hand-lettering artists, and casual sketchers often find that a compact A4 board fits comfortably on a standard desk and leaves plenty of room for other tools.
The weight of your drawing medium is equally critical when assessing light penetration. Standard tracing paper and lightweight copy paper (around 70 to 80 GSM) require very little light to reveal underlying guidelines. However, if your style involves transferring sketches onto heavy cardstock, bristol board, or 300 GSM watercolor paper, you must verify that the board’s maximum brightness can penetrate these dense fibers. Before starting a major project, perform a quick manual test by placing your thickest paper over a detailed sketch on the board to ensure the lines remain sharp and visible.
Products mentioned in this guide
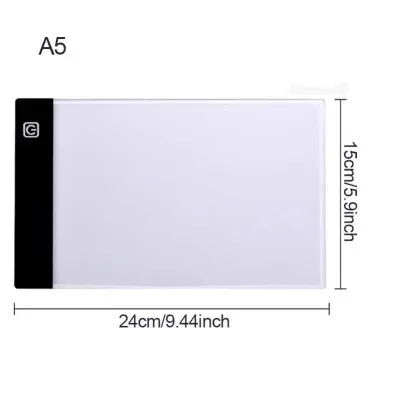
Prices are valid at publication and may change. Please refer to the product page for the latest price.
Workspace layout and environmental conditions also shape your requirements. In tropical climates where humidity can cause paper to warp, a board that runs cool is essential for preserving your medium. If you frequently move between a home studio, local cafes, or art classes, a lightweight, USB-powered board offers excellent portability. These models can run directly off a portable power bank, allowing you to work during power interruptions or in outdoor spaces without relying on a wall outlet. For dedicated studio spaces, a larger, plug-in model with a sturdier frame provides a more permanent and stable drawing surface.
Align Board Specifications With Your Skill Level
Selecting an illuminated drawing board that aligns with your current proficiency ensures you do not overpay for advanced features you may not use, while still securing the reliability you need.

For beginners and hobbyists, simplicity is key. Prioritize straightforward operation, such as a single-button interface that handles both power and basic stepless dimming. Stepless dimming allows you to adjust the brightness smoothly by holding down the power button until the light reaches a comfortable level. At this stage, standard USB power inputs are ideal because they work with common phone chargers and power banks, keeping your initial investment low—often finding reliable entry-level options for under ₱1,500 in local stationery shops.
Intermediate artists who work across multiple mediums benefit from more versatile features. Look for boards that offer adjustable color temperatures, allowing you to switch between cool white light for high-contrast tracing and warm yellow light for softer, long-duration sketching sessions. A brightness memory function is also highly valuable at this level; it automatically restores your last-used light level when you power the board back on, saving you from constant readjustments. Additionally, look for integrated anti-slip framing, magnetic clips, or physical clamps that secure your paper in place as you work.
Professional illustrators, architects, and animators require high-precision specifications to maintain accuracy. When evaluating professional-grade boards, check the manufacturer’s specifications for high color rendering metrics (CRI), which ensure that the colors of your inks and markers remain true under the backlight. Look for ultra-thin bezels that maximize the active drawing area, allowing your hands to glide smoothly off the edge of the board without catching. The surface material should be a premium, scratch-resistant acrylic that can withstand the repeated pressure of hard graphite pencils, drafting compasses, and metal rulers without scuffing.
Inspect Essential Features and Build Quality
Before finalizing your purchase or immediately upon unboxing a new illuminated drawing board, conducting a thorough physical inspection will save you from future frustration.
Begin by testing the light uniformity of the panel. Power the board on in a dimly lit room and set it to its maximum brightness. Inspect the surface closely for any dark spots, uneven light distribution near the edges, or subtle flickering. The light should be perfectly consistent across the entire active area; any localized dimming can distort your view of fine details and lead to premature eye fatigue during long drawing sessions.
Next, examine the surface material and finish. A matte finish is highly recommended because it diffuses ambient light, reducing harsh glare from overhead fixtures or bright windows. Run your fingers across the panel to check for smoothness and structural rigidity. The board should not flex or bow when you apply moderate drawing pressure. Verify the manufacturer’s guidelines regarding scratch resistance, especially if you plan to use sharp tools like utility knives or heavy-duty drafting instruments near the surface.
Power connectivity is another critical point of inspection. Check the port type—modern USB-C ports generally offer a more secure and durable connection than older Micro-USB ports, which can become loose over time. Ensure that the included cables fit snugly into the port without wobbling. If you plan to use a power bank, verify that the board’s voltage and current requirements match your power source’s output to prevent underpowering or electrical strain.
Finally, monitor the board’s heat management. LED technology is naturally energy-efficient, meaning the drawing surface should remain cool or only slightly warm to the touch even after hours of continuous use. In warm, humid environments, efficient heat dissipation is crucial. If you notice the board becoming uncomfortably hot, or if you detect a chemical odor from warming adhesives, stop using the device immediately and consult the manufacturer’s safety guidelines.
Final Decision Checklist and Alternatives
To make your final decision, consolidate your requirements into a simple checklist. First, measure your workspace to confirm whether an A4, A3, or A2 board fits comfortably. Second, match the board’s maximum brightness to your thickest paper stock. Third, select a power configuration—USB-C for portability or an AC adapter for dedicated studio use—that fits your daily routine.
Before purchasing, consider whether an upgrade is truly necessary. If you only need to transfer a design occasionally, traditional tracing paper placed over a bright window pane or a basic, non-electric tracing frame may be sufficient. However, if you find yourself tracing regularly or working with opaque papers, a dedicated LED board is a highly practical investment that saves time and reduces physical strain.
When buying from online marketplaces or local stationery retailers, always clarify the return and exchange conditions. Plan to perform your visual inspection for dead pixels, flickering, and light uniformity immediately upon delivery. Having a clear return window ensures you can exchange the unit promptly if it exhibits any manufacturing defects before you begin your next major art project.
Frequently Asked Questions (FAQ)
Can I use an illuminated drawing board for crafts like diamond painting?
Yes, illuminated drawing boards are highly popular for diamond painting because the backlighting makes the tiny symbols on the canvas much easier to read. However, because diamond painting involves pressing down adhesive-backed resin drills, you should verify the board’s weight capacity and surface durability. To protect the acrylic surface from scratches or adhesive residue, consider placing a thin protective sheet or a self-healing cutting mat over the board when working on heavy crafts.
How do I prevent eye strain when using the board for long sessions?
To minimize eye strain, always adjust the board’s brightness to match the ambient light of your room rather than drawing in complete darkness. Using a high-intensity backlight in a pitch-black room creates harsh contrast that fatigues your eyes quickly. If your board features adjustable color temperatures, switch to a warmer, yellow-toned light during evening sessions. Remember to practice the 20-20-20 rule: every 20 minutes, look at an object 20 feet away for at least 20 seconds to rest your eye muscles.
Is an illuminated drawing board the same as a traditional tracing lightbox?
While they serve the same primary purpose, modern illuminated drawing boards are significantly different from traditional tracing lightboxes. Traditional lightboxes are bulky, box-like structures that utilize fluorescent or incandescent bulbs, which generate substantial heat and require a direct AC wall outlet. Modern illuminated drawing boards use ultra-thin LED technology, making them incredibly lightweight, energy-efficient, and cool to the touch. They are typically powered via USB, allowing for a highly portable workflow that traditional lightboxes cannot match.

Community discussion
Share your experience or ask a question. Comments are reviewed before publication.