
To choose the right luminous drawing board for your child, you must first identify whether they need an LED tracing pad for copying sketches or a neon glow board for creative freehand play. Key features to evaluate include adjustable brightness levels with eye-protection technology, a physical size that matches their workspace, a safe power source, and durable, non-toxic surface materials. In the Philippines, where heavy monsoon rains or intense tropical heat often keep children indoors for hours, these boards offer an engaging, screen-free activity that keeps young minds active. Selecting the right model requires balancing these technical specifications with your child’s age and developmental stage.
Clarifying the Type: LED Light Boards vs. Glow-in-the-Dark Pads
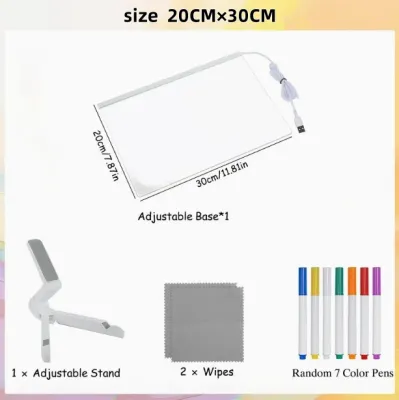
LED light pads are essentially ultra-thin lightboxes that project light upward through a translucent acrylic surface. This backlight allows children to place a template or reference drawing underneath a blank sheet of paper and trace the lines clearly. They are excellent for developing fine motor skills, practicing handwriting, or learning the basics of animation and illustration. Because they rely on light passing through paper, they require a continuous power source and work best with standard drawing paper, tracing paper, or vellum.
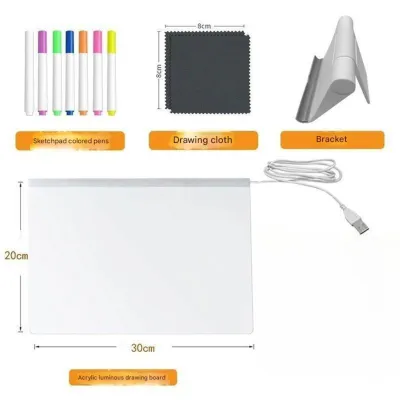
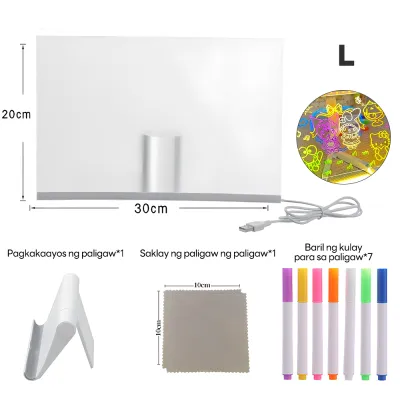
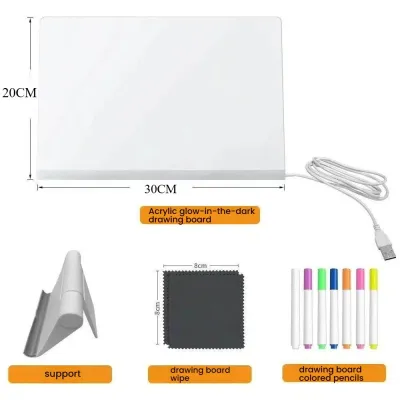
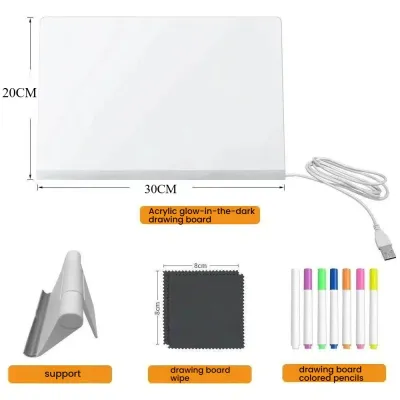
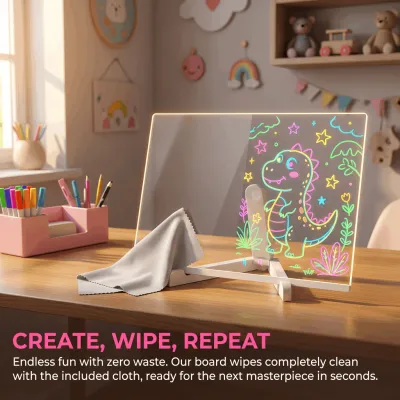
Glow-in-the-dark or neon boards operate on a completely different principle. Instead of shining light through paper, these boards feature a dark or clear acrylic screen paired with built-in LED edge lighting. Children draw directly on the surface using specialized fluorescent or liquid chalk markers. When the board is turned on, the light catches the pigment in the ink, making the drawings appear to glow vibrantly in the dark. These boards do not require paper and are highly reusable, making them ideal for quick doodles, sensory play, and temporary signs.
Products mentioned in this guide
Prices are valid at publication and may change. Please refer to the product page for the latest price.
If your child enjoys structured drawing, copying cartoon characters, or practicing calligraphy, an LED light pad is the appropriate tool. If they prefer spontaneous, freehand doodling, sensory light play, or drawing in a darkened bedroom before sleep, a neon glow board is the better fit. Understanding this distinction prevents the common mistake of buying an LED tracing pad when your child actually wants to draw glowing neon pictures directly on a screen.
Essential Features to Evaluate for Children
Selecting a luminous drawing board involves looking closely at the hardware specifications. Because these devices combine electrical components with active play, you must evaluate how the design handles daily wear, eye safety, and power delivery.

Brightness Levels and Eye Protection
Children’s eyes are sensitive, and staring at a bright light source for extended periods can cause fatigue or strain. When shopping, look for boards that offer adjustable brightness rather than a single, unchangeable setting. Stepless dimming—where holding down a button smoothly raises or lowers the light level—is highly desirable because it allows your child to fine-tune the illumination to match the ambient light in the room. If stepless dimming is not available, look for models with at least three distinct brightness presets.
The quality of the light diffusion is just as important as the brightness itself. High-quality boards use a frosted acrylic surface or an embedded micro-dot pattern to distribute the light evenly across the entire workspace. This prevents harsh hotspots or glare that can irritate a child’s eyes. When reading product descriptions, verify that the manufacturer specifies flicker-free operation, as rapid, invisible flickering is a primary cause of headaches and eye strain during long drawing sessions.
Additionally, check the packaging or product specifications for mentions of blue light reduction or eye-comfort certifications. While many budget boards are simple lightboxes, choosing a model designed specifically for eye protection ensures that your child can trace comfortably under various lighting conditions, whether in a bright living room or a dimly lit bedroom.
Board Size and Workspace Ergonomics
Luminous drawing boards come in several standard sizes, typically corresponding to international paper formats like A4 and A3. An A4 board is roughly the size of a standard sheet of bond paper, making it highly portable and easy for a child to manage on their lap or a small study desk. An A3 board is twice that size, offering a spacious canvas for larger art projects, but it requires a dedicated, flat workspace and can be cumbersome for younger children to carry.
Consider the physical weight and thickness of the board. Modern LED pads can be as thin as 5 millimeters and weigh less than a kilogram, making them highly portable. However, ultra-thin boards can sometimes be flexible; ensure the model you choose has a rigid frame that does not bend when your child presses down with a pencil. For younger children, a slightly thicker board with a robust plastic frame may offer better durability against accidental drops.
Pay close attention to the edge design. Look for boards with rounded corners and smooth, seamless edges to prevent scratches or discomfort during use. A flush surface—where the illuminated area is perfectly level with the outer frame—is also beneficial, as it allows your child’s hand to glide smoothly off the edge of the board without catching on a raised plastic border.
Power Source and Cable Management
The way a drawing board receives power affects both its safety and where your child can use it. Many LED light pads are USB-powered, meaning they must be plugged into a USB port, a power bank, or a wall adapter using a micro-USB or USB-C cable. While this design keeps the board lightweight and eliminates the need to replace batteries, it does tether your child to a power source. If you choose a USB-powered model, ensure the cable is long enough to reach your wall outlets safely without stretching across walkways.
Alternatively, some boards feature built-in rechargeable lithium batteries. These offer complete wireless freedom, allowing your child to draw in the car, on the couch, or outdoors without worrying about cables. However, rechargeable models are generally heavier and require regular charging. If you opt for a battery-powered board, check the estimated run time on a full charge and look for models that feature a battery indicator light so your child isn’t interrupted mid-drawing.
Cable safety is paramount. Look for models with reinforced, detachable cables and sturdy ports that resist damage if pulled at an angle. Some advanced models also include an automatic shut-off timer, which turns the light off after a set period of inactivity. This is an excellent feature for preserving battery life and preventing the device from overheating if your child leaves it turned on under a pile of papers or blankets.
Surface Material and Tool Compatibility
The drawing surface of a luminous board is typically made of acrylic (PMMA) or PET plastic. Acrylic is highly durable, scratch-resistant, and offers excellent light transmission, making it the standard choice for quality light pads. When using an LED tracing pad, this smooth surface is compatible with standard graphite pencils, colored pencils, and fine-liner pens, provided the paper used is thin enough to let the light pass through.
For neon glow boards, the surface material is designed to interact directly with specialized fluorescent markers or liquid chalk pens. Standard markers will not work on these surfaces; the ink will bead up, fail to glow, and can permanently stain or scratch the acrylic. Always verify what type of writing instruments are compatible with the board. Many neon boards come with a set of proprietary markers and a dedicated microfiber cleaning cloth or eraser.
Because your child’s hands and wrists will be in constant contact with the board’s surface, safety certifications are essential. Look for clear labels indicating that the materials are non-toxic and free from harmful chemicals like BPA or phthalates. Certifications such as ASTM D-4236 (for art materials) or EN71 (European toy safety standard) on the packaging provide peace of mind that the plastic and any included markers are safe for children to handle daily.
Because the exact combination of marker ink and acrylic surface determines how smoothly the pen glides, how quickly the ink dries, and how easily it wipes away, it is wise to perform a quick trial. Draw a few lines on the edge of the board, wait thirty seconds, and check if the ink smudges under a finger or wipes clean without leaving a faint shadow. This simple test ensures the board remains easy to clean and maintain over months of use.
Building Your Shortlist: Age and Skill Matching
To narrow down your options, match the board’s features to your child’s developmental stage and artistic skills. This ensures the toy remains engaging rather than becoming a source of frustration.
For toddlers and preschoolers (ages 3 to 5), prioritize simplicity, durability, and safety. At this stage, a battery-operated, shatter-resistant neon glow board is ideal. Look for models with chunky, easy-to-grip washable fluorescent markers and simple button controls. Avoid boards with long, dangling USB cables or delicate glass-like acrylic surfaces. The focus here is on sensory play, color recognition, and basic scribbling.
For early elementary students (ages 6 to 9), an A4-sized USB-powered LED light pad is highly effective. This size fits comfortably on school desks and matches standard drawing paper. Look for a model with basic three-level dimming. Children in this age group can use the board for tracing stencils, practicing letter formation, and copying simple illustrations. A lightweight, portable design allows them to bring the board to school or use it during long car rides powered by a portable power bank.
For older children, pre-teens, and young hobbyists (ages 10 and up), look for more advanced specifications. An A3-sized LED board provides the spacious canvas needed for detailed sketching, multi-frame animation, or comic book design. Prioritize boards with stepless dimming, high color rendering indexes to keep colors accurate, and a highly rigid frame. These users will appreciate a flush surface and a secure USB-C connection that supports precise, uninterrupted work.
Use this quick checklist to guide your final decision:
- Must-Haves: Eye-protection technology (flicker-free), rounded corners, non-toxic material certifications, and compatible drawing tools included or easily sourced.
- Nice-to-Haves: Built-in rechargeable battery for wireless use, protective storage sleeve, integrated paper clips to hold sheets in place, and an automatic shut-off timer.
Pre-Purchase Safety and Specification Checks
Before finalizing your purchase on any online marketplace or at a local stationery store, perform a few final verification steps. Always cross-reference the manufacturer’s recommended age grade on the packaging with your child’s actual age. Some boards contain small parts, such as marker caps or small power adapters, which present choking hazards for younger siblings.
Check the availability of replacement parts and consumables. For neon boards, markers will eventually dry out or run out of ink. Ensure that you can easily purchase compatible replacement fluorescent pens or liquid chalk markers separately. Similarly, check if the power cable is a standard format (like USB-C) that can be easily replaced if lost or damaged, rather than a proprietary connector.
Finally, inspect the product details for recognized electrical safety markings. If a board lacks clear safety certifications or does not provide detailed information about its material composition, stop and consult the manufacturer or choose an alternative model. Investing in a well-documented, certified product ensures a safe, creative, and long-lasting drawing experience for your child.
Frequently Asked Questions (FAQ)
Can I use regular markers on a glow-in-the-dark drawing board?
No, you should avoid using standard markers, permanent pens, or whiteboard markers on a glow-in-the-dark or neon drawing board. Standard inks lack the fluorescent pigments required to catch the LED edge light and glow. Furthermore, regular marker ink can permanently stain, scratch, or chemically damage the specialized acrylic surface, making it difficult or impossible to clean. Always use the manufacturer-recommended fluorescent or liquid chalk markers designed specifically for illuminated boards.
How do I clean an LED light board without damaging the surface?
To clean the surface of an LED light board or neon board, always unplug the device from its power source first. Use a dry or slightly damp microfiber cloth to gently wipe away dust, fingerprints, or marker residue. Avoid using harsh chemical solvents, glass cleaners, alcohol, or abrasive scrubbing sponges, as these can scratch the acrylic or strip away anti-glare coatings. If a stubborn spot remains, refer to the product manual for specific cleaning instructions and approved cleaning agents.

Community discussion
Share your experience or ask a question. Comments are reviewed before publication.