
Choosing your first watercolor set is a critical step that shapes your entire introduction to the medium. The right set should offer a balance of affordability, reliable pigment behavior, and ease of use, allowing you to focus on learning techniques rather than fighting poor-quality materials. For a beginner, the ideal starting point is a student-grade set containing 12 to 24 colors, which provides a rich enough palette to explore color mixing without becoming overwhelming. By focusing on key specifications like pigment labels, lightfastness, and format, you can find a set that fits your workspace and budget while ensuring a frustration-free painting experience.
Key Quality Markers to Check Before Buying
When browsing art supply stores or online marketplaces, the sheer volume of options can make any beginner feel lost. To make an informed decision, you must look past the colorful packaging and focus on the technical specifications of the paint.
The first marker of a practical beginner set is the size of the color palette. While a massive box of 48 or 72 colors might seem like a great value, it often hinders a beginner’s progress. A smaller palette of 12 to 24 colors is actually the sweet spot for learning. This range forces you to practice color mixing, which is the foundation of watercolor painting. It also prevents the overwhelm of having too many choices and ensures you do not leave dozens of unused colors to dry out and go to waste.
Products mentioned in this guide
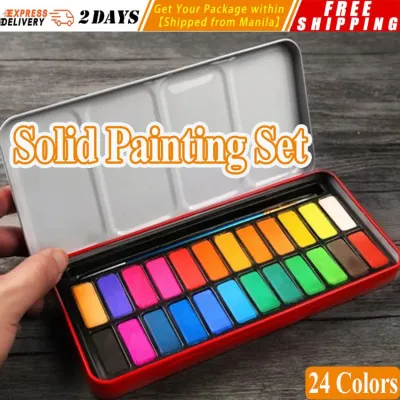
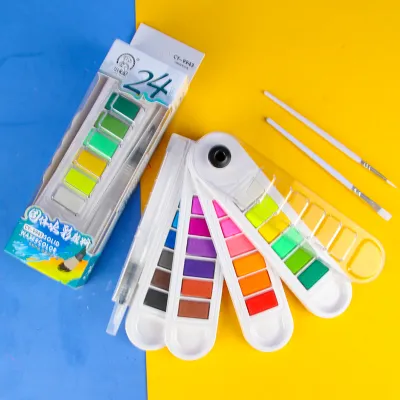
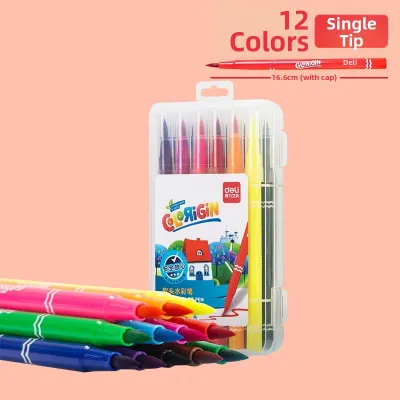
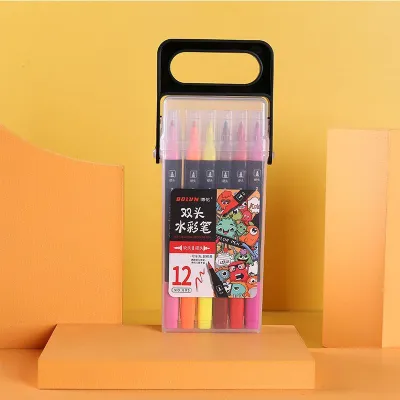
Prices are valid at publication and may change. Please refer to the product page for the latest price.
Another critical quality marker is the ratio of binder to filler in the paint. Watercolor consists of finely ground pigment suspended in a binder, usually gum arabic. Lower-quality sets often substitute cheap fillers or chalky extenders for actual pigment to cut costs. When you paint with these sets, the colors will look vibrant in the pan but dry to a dull, chalky, or muddy finish. When mixing these paints, the high filler content causes colors to lose their transparency, turning your washes gray or brown. To avoid this, check the manufacturer’s description for terms like “highly pigmented” or “excellent transparency,” and avoid sets that feel unusually heavy or look completely opaque in product demonstrations.
Lightfastness is the third essential marker to evaluate before purchasing. This rating measures how well a paint resists fading when exposed to light over time. Even as a beginner, you want your practice pieces and early masterpieces to last. Reliable manufacturers print lightfastness ratings directly on the packaging, tubes, or color charts. These are typically represented by Roman numerals (such as ASTM I for excellent lightfastness and ASTM II for very good) or a star rating system (where three or five stars indicate maximum permanence). If a watercolor set does not list any lightfastness information or uses vague terms like “fade-resistant” without a standardized rating, it is likely made with cheap dyes that will fade rapidly under sunlight.
Pan vs. Tube: Picking the Right Paint Format
Watercolor paints are primarily sold in two physical formats: dry pans or wet tubes. Understanding how these formats behave in different environments and painting styles will help you choose the one that fits your daily routine.

Pan sets consist of small, dry blocks of watercolor paint housed in plastic cups (known as half-pans or full-pans) arranged inside a portable metal or plastic case. These sets are highly favored for their portability, quick setup, and ease of clean-up. To use them, you simply activate the dry paint with a wet brush. This format naturally encourages controlled water usage, making it perfect for small-to-medium sketches, journaling, and outdoor painting sessions.
In contrast, tube sets contain moist, paste-like paint that you squeeze out onto a separate palette. Tubes are ideal if you prefer working on a larger scale or need to mix large volumes of paint for broad washes. Because the paint is already wet, it is much easier to pick up a large amount of pigment quickly without wearing down your brush bristles. This format is highly practical for studio-based painting where you have a dedicated desk space. However, tubes require a bit more discipline, as squeezing out too much paint can lead to waste if you do not plan to reuse the dried leftovers on your palette.
Your local climate should also play a major role in this decision. In warm, high-humidity environments like the Philippines, managing moisture is crucial for preserving your art supplies. High humidity can significantly prolong the drying time of both pans and squeezed tube paints. If you close a damp pan set and store it in a dark drawer, the trapped moisture creates a perfect breeding ground for mold. To prevent this, always let your pan sets air-dry completely in a well-ventilated room before closing the lid. If you choose tubes, only squeeze out what you need for a single session, and ensure your mixing palette is thoroughly dry before storing it away.
Student vs. Professional Grade: What Beginners Actually Need
As you shop, you will notice a massive price gap between student-grade and professional-grade watercolor sets. For beginners, student-grade paints are almost always the most sensible starting point. These paints are formulated to keep costs low while mimicking the handling characteristics of professional lines. To achieve this, manufacturers use “hue” substitutes—which are cheaper synthetic pigments that mimic rare or expensive minerals—along with lower pigment loads and a higher proportion of binders and fillers. This allows you to practice freely without worrying about the cost of every brushstroke, which is essential for building confidence.
To make sure you are getting a high-quality student set, you should learn to read pigment labels. Reputable brands print the specific pigment codes on their packaging or color charts. These codes consist of letters and numbers, such as PB29 for Ultramarine Blue, PY150 for Nickel Azo Yellow, or PR101 for Synthetic Red Iron Oxide. If a set only lists fanciful names like “Ocean Blue” or “Sunset Glow” without any pigment codes, it is a sign of low-quality, unpredictable paint. Checking for these codes ensures you are buying single-pigment colors where possible, which mix much cleaner than multi-pigment convenience mixes.
While student-grade paints are excellent for learning, you will eventually reach a point where your skills outgrow your materials. You will know it is time to upgrade to professional-grade paints when you notice specific technical limitations. For instance, if you try to layer colors (glazing) and the bottom layer constantly lifts or turns muddy, your student paint likely has too much binder. Similarly, if your secondary mixes (like greens and purples) look dull and lifeless despite using correct color theory, the lower pigment load is holding you back. Upgrading can be done gradually, replacing your most-used colors with professional tubes one by one.
Are the Included Brushes and Palettes Worth It?
Many beginner watercolor sets are sold as all-in-one kits, complete with brushes, palettes, and other accessories. While these bundles seem convenient, they are often a marketing trap that inflates the price of mediocre tools.
The brushes included in cheap starter sets are notorious for their poor quality. They are often made of stiff nylon bristles that do not hold enough water, or they shed hairs onto your wet paper. Instead of relying on a bundled brush, you are far better off purchasing a single, high-quality synthetic round brush in size 8 or 10. A good synthetic round brush holds a generous amount of water and tapers to a sharp point, allowing you to paint both broad washes and fine details with a single tool.
The mixing palette is another component that requires careful evaluation. Many pan sets feature built-in mixing areas on the inside of the lid. While these are highly portable, they are often too small or shallow to be practical. When mixing watercolors, you need deep, spacious wells where you can pool water and paint without it spilling into adjacent colors. If the built-in lid is divided into tiny, flat squares, your colors will inevitably bleed into one another, ruining your mixes. Look for sets that offer a detachable metal or plastic mixing tray, or plan to purchase a separate ceramic or plastic palette with generous mixing wells.
Finally, be skeptical of sets that pack in unnecessary extras like tiny sponges, cheap plastic water cups, or low-grade pencils. These items cost manufacturers pennies to produce but are used to justify a higher retail price. A simple glass jar from your kitchen makes a superior water container, and a standard household sponge or paper towel is perfect for blotting your brush. By focusing your budget strictly on the quality of the paint itself rather than these cheap plastic add-ons, you ensure that every peso you spend goes toward improving your actual painting experience.
Your First Watercolor Kit: A Practical Setup Checklist
Building your first watercolor kit does not require a massive financial investment, but it does require a smart allocation of your budget. To help you get started without wasting money on incompatible tools, here is a practical checklist for assembling a highly functional beginner setup.
Your core paint set should be a 12- to 24-color student-grade set, either in pans or tubes. This set must include warm and cool versions of the primary colors (red, yellow, and blue), along with a few essential earth tones like Burnt Sienna and Yellow Ochre. This selection gives you the perfect foundation to learn color theory and mix almost any shade you need.
The most common mistake beginners make is spending their entire budget on a premium paint set while using cheap drawing paper. Watercolor relies entirely on water control, and standard drawing or printer paper cannot handle wet washes. It will instantly warp, pill, and tear, causing the paint to pool unevenly and ruin your work. To prevent this, you must pair your paint set with dedicated watercolor paper. Look for cold-pressed paper with a weight of at least 300 gsm (grams per square meter). Cold-pressed paper has a slightly textured surface that holds water beautifully, allowing the pigment to flow and blend naturally.
When planning your purchases, aim for a balanced budget allocation strategy. A good rule of thumb is to spend roughly 40% of your budget on a reliable student-grade paint set, 40% on high-quality 300 gsm watercolor paper, and 20% on one or two excellent synthetic round brushes. This balanced approach ensures that no single component of your kit holds back your progress. Painting with student-grade paint on professional-grade paper will always yield better results than painting with professional-grade paint on cheap, thin paper. By prioritizing your paper and brush alongside your paint, you set yourself up for immediate success.
Frequently Asked Questions (FAQ)
Can I use regular drawing paper with my new watercolor set?
No, regular drawing paper or sketchbooks are not suitable for watercolor painting. These papers are too thin and lack the specialized sizing (a starch-like treatment) that controls water absorption. When you apply wet washes to standard paper, it will warp, buckle, and pill, creating small fibers that ruin your brushstrokes. The paint will also sink directly into the fibers rather than sitting on the surface, destroying the luminous, transparent quality that makes watercolor so unique. Always invest in dedicated watercolor paper of at least 300 gsm to ensure your paints behave correctly.
How do I keep my pan watercolors from molding in a humid climate?
In tropical, high-humidity regions, mold is a common threat to watercolor pans. To protect your set, never close the palette lid while the paints are still wet or damp. After every painting session, leave your palette open in a well-ventilated, dry room for several hours until the pans are completely dry to the touch. Avoid storing your art supplies in damp cabinets, drawers, or rooms without airflow. If you notice any dust or excess moisture on the edges of the plastic pans, gently wipe them down with a clean, dry paper towel before packing them away.
Should I buy a set with 48 colors or more for my first purchase?
It is highly recommended to avoid oversized sets of 48 colors or more when starting out. Large sets are not only more expensive, but they also stunt your artistic growth by discouraging you from learning how to mix colors. When you have a pre-made shade for every possible color, you miss out on understanding how warm and cool tones interact. Furthermore, many colors in massive sets go completely unused, eventually drying out or cracking. A compact set of 12 to 24 colors is far more practical, portable, and educational for a beginner.

Community discussion
Share your experience or ask a question. Comments are reviewed before publication.