
Cutting and sewing faux fur without ruining the pile requires a specialized approach that differs significantly from working with standard woven or knit fabrics. The primary challenge lies in preserving the long, synthetic fibers that give the material its characteristic depth and texture. If you cut through faux fur using standard fabric shears in a traditional manner, you risk chopping the pile, leaving blunt, unnatural edges, and creating an overwhelming amount of synthetic lint. By isolating the backing material and employing careful preparation, cutting, and stitching techniques, you can achieve clean, professional results on any project, from cozy home decor to detailed costumes.
Preparing and Marking Faux Fur
Before making any cuts, you must determine the “nap” of the faux fur, which is the natural direction in which the pile lays. To identify this, perform a simple stroke test: run your hand gently across the surface of the fur in different directions. The direction that feels smooth and causes the fibers to lie flat is the nap direction, while brushing against it will feel rough and push the fibers upright. Once you have identified the nap, flip the fabric over to the wrong side (the backing) and use a fabric marker, tailor’s chalk, or a soft pencil to draw clear arrows indicating this direction across the entire surface.
When laying out your pattern pieces on the backing, it is crucial to align them so that the nap flows consistently across the finished project. For most garments and plush items, the fur should flow downward. If you ignore this alignment, adjacent panels may have fur running in opposite directions, resulting in an awkward, patchy appearance that is highly visible.
Products mentioned in this guide
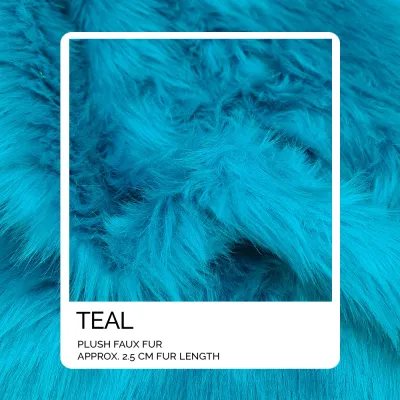

Prices are valid at publication and may change. Please refer to the product page for the latest price.
Avoid using standard sewing pins to secure your paper patterns to the fabric. Pins easily get lost in the thick pile, which can distort the fabric backing and pose a safety hazard during sewing. Instead, place the fabric pile-side down on your work surface and use heavy pattern weights, smooth stones, or small household items to hold the paper templates in place. Trace the outlines of your pattern pieces directly onto the backing material using your marking tool, ensuring you transfer all alignment notches and seam lines clearly.
Cutting Techniques to Protect the Pile
The most critical step in preserving the pile is the cutting method. Standard fabric scissors or rotary cutters should not be used to cut through both the backing and the pile simultaneously, as this shears the fibers and leaves a blunt, artificial-looking edge. Instead, the goal is to cut only the backing fabric, leaving the long fur fibers completely intact.

To execute this technique, select a highly suitable tool such as a sharp utility knife, a single-edge razor blade, or specialized micro-serrated craft scissors. If you are using a knife or razor blade, place the faux fur pile-side down on a self-healing cutting mat. Carefully slide the tip of the blade through the backing material along your marked lines, applying just enough pressure to slice the knit or woven base without penetrating deep enough to cut the fur fibers underneath.
If you prefer using scissors, slide the bottom blade gently between the backing and the pile, keeping the blade flat against the backing. Make small, controlled snips, parting the fur fibers with your fingers as you advance to ensure you are only cutting the base fabric. Once the backing is fully cut, gently pull the two pieces of fabric apart; the uncut fur fibers will naturally separate, creating a feathered, realistic edge that blends seamlessly when sewn.
Managing the inevitable shedding is essential for a clean workspace, especially in humid or tropical environments like the Philippines where synthetic fibers can easily cling to your skin and tools. Keep a lint roller, a damp microfiber cloth, or a vacuum cleaner with a hose attachment nearby. Working in a well-ventilated room with a steady workspace setup will help keep the loose fibers from settling onto your sewing equipment.
Preparing the Seams for Stitching
Once your pieces are cut, preparing the seams properly will prevent bulkiness and ensure a smooth stitching process. Because faux fur backing can be thick and the pile adds substantial volume, standard pinning methods are often ineffective.
Instead of traditional pins, use sturdy sewing clips to secure the fabric pieces with their right sides together. If you must use pins, select long, bright-topped quilting pins and insert them parallel to the raw edge, keeping them strictly within the seam allowance so they are easy to spot and remove before they reach the needle.
As you clip the edges together, use your fingers, a blunt tapestry needle, or a small comb to tuck the loose fur fibers inward, away from the cut edge and toward the center of the fabric pieces. This prevents the pile from getting trapped in the seam line during stitching, which can create a visible, indented line on the right side of the project.
Evaluate the thickness of your fabric’s backing to determine if you need to grade or trim the seam allowances. For exceptionally thick or long-pile fur, use small embroidery scissors to carefully shear the fur fibers down to the backing within the seam allowance area (typically 1/2 inch or 1 cm from the edge). This simple step reduces bulk significantly, allowing your sewing machine to feed the layers evenly and preventing stiff, bulky joints in the finished item.
Sewing Faux Fur: Machine and Hand Methods
Before sewing your main project, always perform an observable trial on a scrap piece of the exact faux fur and backing combination. This allows you to verify stitch smoothness, needle penetration, and thread tension without risking your main pattern pieces.
When machine sewing, select a needle size and type that matches the backing material. If the faux fur has a stretchy, knit backing, use a ballpoint or stretch needle (size 90/14) to prevent skipped stitches. For stable, woven backings, a heavy-duty universal or denim needle (size 100/16) is more appropriate. Use a strong, high-quality 100% polyester thread, as cotton thread may break under the tension and weight of heavy synthetic fabric.
A walking foot or an even-feed foot is highly recommended for this process. It helps feed the top and bottom layers of fabric through the machine at the same rate, preventing the layers from shifting or puckering due to the slippery nature of the pile. If a walking foot is not available, a Teflon or roller foot can help glide over the backing material. Set your machine to a slightly longer straight stitch (3.0 mm to 3.5 mm) or a narrow zigzag stitch if the backing has stretch.
For areas that are difficult to reach with a machine, such as small curves, plush toy limbs, or final closures, hand sewing is a reliable and precise alternative. Use a strong polyester or upholstery thread and a sturdy hand-sewing needle. A ladder stitch (also known as an invisible stitch) is highly effective for closing seams from the outside, while a backstitch provides a highly secure, flexible seam from the inside.
During the sewing process, pay close attention to how the fabric feeds. If you hear the machine motor straining, or if the fabric stops moving forward, stop sewing immediately. Do not attempt to force the thick layers through. Raise the needle, lift the presser foot, and check for a thread jam or trapped pile in the feed dogs. Clearing the jam and re-threading the machine promptly prevents needle breakage and tension issues.
Finishing and Grooming the Seams
After stitching, the final step is to open the seams and release any trapped fibers to achieve a seamless, natural look. Turn the project to the wrong side and gently press the seams open.
Never use a hot iron directly on faux fur. Synthetic fibers like acrylic and polyester melt easily under high temperatures, which will permanently ruin the texture of the pile. Instead, finger-press the seams open, or use a cool iron set to the lowest synthetic setting with a dry pressing cloth between the iron and the fabric. Always test the iron temperature on a scrap piece first to ensure it does not warp the backing or fibers.
Turn the project right-side out. You will likely notice that some fur fibers have been caught in the stitching, creating a visible line. Use a wire slicker brush, a fine-toothed pet comb, or the tip of a blunt tapestry needle to gently pull the trapped pile out of the seam line. Work slowly, brushing back and forth along the seam until the fibers are released and blend naturally with the surrounding fur, effectively hiding the stitch line.
To finalize the project, take it outdoors and give it a vigorous shake to release any remaining loose fibers. Use a vacuum cleaner with a brush attachment to clean your workspace and the bobbin area of your sewing machine, ensuring that synthetic lint does not accumulate in the mechanical parts.
Frequently Asked Questions (FAQ)
What type of needle and thread should I use for faux fur?
Selecting the right needle and thread depends on the specific weight and stretch of your fabric’s backing. For stretchy, knit backings, use a ballpoint or stretch needle (size 90/14) to avoid skipped stitches. For stable, woven backings, a heavy-duty universal or denim needle (size 90/14 to 100/16) is highly suitable. Always pair these with a strong, 100% polyester thread, which provides the necessary durability and slight elasticity to handle the weight and movement of synthetic fur without snapping.
How do I fix a visible seam line after sewing?
If your seam line remains visible or looks flat after sewing, use a fine-toothed comb or a blunt needle to carefully tease out the trapped fibers caught in the stitches. If the backing is still exposed, check if your stitch tension was too tight, which can cause the backing to pucker and pull the pile inward. Adjusting your machine’s tension on a scrap piece and sewing with a slightly longer stitch length can prevent this issue on future seams.

Community discussion
Share your experience or ask a question. Comments are reviewed before publication.