
Designing a beautiful bouquet wrap is an art that transforms a simple bunch of flowers into a stunning, professional-grade gift. The secret lies in selecting materials that harmonize with your blooms, mastering structural folding techniques, and finishing with a perfectly balanced bow. In tropical climates like the Philippines, where high humidity and warm temperatures can quickly cause fresh flowers to wilt and paper to soften, choosing the right wrapping supplies and preparing a proper moisture barrier are essential steps to ensure your arrangement remains crisp and elegant from the moment it is crafted to the final handover.
Essential Wrapping Supplies and Selection Criteria
To achieve a professional look, you must carefully evaluate your wrapping paper’s thickness, opacity, and texture. Standard lightweight papers often fail when exposed to the moisture of fresh stems, leading to unsightly tearing or drooping. Instead, opt for heavy-duty kraft paper, non-woven wrapping sheets, or waterproof matte OPP (oriented polypropylene) plastic sheets. These materials provide the structural integrity needed to support heavy stems while resisting water damage. Before committing to a full wrap, perform a quick water-resistance test by placing a few drops of water on a scrap piece of paper to observe if it absorbs moisture or maintains its shape. High-quality waterproof sheets are widely available at local craft stores for around ₱15 to ₱30 per sheet, making them an affordable way to elevate your presentation.
The scale of your wrapping paper must match the physical dimensions of your bouquet. For a standard medium-sized arrangement, sheets measuring approximately 50 centimeters by 70 centimeters are highly versatile. You will typically need two to three sheets to create a layered, voluminous look. If your paper is too small, the bouquet will look cramped; if it is too large, the flowers will be swallowed by the wrap.
Products mentioned in this guide
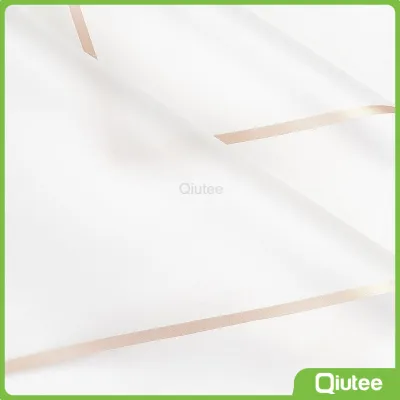
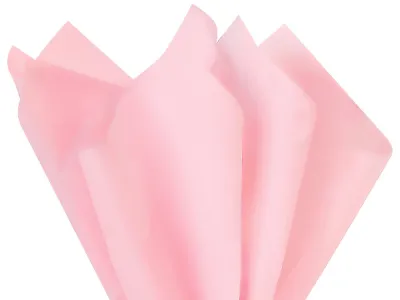

Prices are valid at publication and may change. Please refer to the product page for the latest price.
Your choice of ribbon should complement both the flowers and the paper texture. Satin ribbons offer a luxurious, glossy contrast to matte papers, while grosgrain and jute twine provide a rustic, textured appeal. Select a ribbon width that matches the scale of the bouquet—typically 1 inch (2.5 cm) to 1.5 inches (3.8 cm) for medium to large arrangements. Ensure the ribbon material is strong enough to hold a tight knot without slipping, especially when exposed to humid air.
Preparing the Bouquet and Workspace
Before you begin wrapping, prepare your flowers and workspace to ensure a smooth, efficient process. Start by trimming all stems to an even length using sharp floral shears, cutting at a 45-degree angle to maximize water absorption. Strip away all lower foliage, thorns, and damaged leaves from the bottom third of the stems. This creates a clean, comfortable grip area and prevents leaves from rotting inside the wrap, which can cause unpleasant odors and accelerate decay.

Because fresh flowers require moisture, implementing a reliable water barrier is crucial, particularly in warm climates. Wrap the freshly cut stem ends in a damp paper towel, then cover the wet bundle with a small plastic bag or a piece of plastic wrap. Secure this moisture barrier tightly with floral tape or a rubber band. This step keeps the stems hydrated while preventing water from seeping into your outer wrapping paper.
Organize your workspace by clearing a flat, dry table. Lay out your cutting tools, double-sided tape, floral wire, and pre-cut sheets of paper within easy reach. Having these materials prepared beforehand prevents you from losing your grip on the bouquet mid-wrap, ensuring a tight and secure assembly.
Step-by-Step Wrapping Paper Techniques
To create a professional, dimensional silhouette, utilize a layered wrapping technique with multiple sheets of paper. Lay your first sheet of wrapping paper flat on the workspace, positioning it diagonally so it forms a diamond shape. Place the bouquet in the center, ensuring the top of the paper extends slightly above the flower heads to frame them. Fold the left and right corners of the paper inward toward the stems, creating a gentle cradle that supports the back of the arrangement.
For the second layer, use two smaller sheets or fold a single sheet in half slightly offset to create staggered heights. Place these sheets on the left and right sides of the bouquet, overlapping the first layer. As you bring the paper around the front, fold the edges outward to create a flared, trumpet-like shape. This flaring technique adds volume and gives the illusion of a much larger, more luxurious arrangement.
To build structural depth, incorporate accordion pleats at the base of the wrap. Gently pinch the paper where it meets the stems, folding it back and forth in small, even pleats. This creates a neat, gathered look at the handle while allowing the top of the paper to spread wide. Avoid pressing the paper flat against the flowers; instead, let the natural stiffness of the paper maintain a hollow, protective dome around the blooms.
Secure the base of the paper tightly around the stems using high-quality double-sided tape or floral tape. Wrap the tape firmly around the gathered paper at the designated grip area, ensuring it holds all layers in place without crushing the delicate plant stems. A secure base is the foundation of the entire wrap, preventing the paper from sliding or shifting during transport.
Adding Ribbons and Bows for a Polished Finish
Adding a ribbon is the final touch that conceals your structural mechanics and elevates the overall presentation. To determine the correct ribbon length, measure the circumference of your wrapped handle and multiply it by four, adding an extra 50 to 60 centimeters for the bow. For a standard bouquet, a ribbon length of approximately 1.2 to 1.5 meters is ideal. This ensures you have plenty of material to wrap the handle securely and tie a full, elegant bow without running short.
Begin by wrapping the ribbon tightly over the taped area of the handle, starting from the top of the grip and working your way down, then back up. This double-wrapping technique completely hides any visible tape, staples, or structural wire, creating a seamless, polished band. Tie a secure double knot at the front of the handle to establish a firm foundation before attempting to tie the bow.
To tie a classic, proportionate bow, form two even loops with the ribbon ends, cross them, and pull one loop through the center space. Adjust the loops so they are symmetrical and match the scale of the bouquet—a bow that is too large will overpower the flowers, while one that is too small will look unfinished. Cut the ribbon tails at a sharp diagonal angle or a V-shape to prevent fraying and add a professional, clean finish.
Final Inspection and Gift-Ready Adjustments
Before presenting your gift, conduct a thorough final inspection to ensure the bouquet is structurally sound and visually balanced. Hold the bouquet at arm’s length and check the paper’s symmetry from all sides. The paper should flare out evenly, framing the flowers without blocking them from view. If one side appears flatter than the other, gently insert your hand inside the wrap to puff out the paper and restore the balanced silhouette.
Examine the arrangement of the flowers themselves, ensuring that filler greens and focal blooms are evenly distributed. If any flower heads have slipped down during the wrapping process, gently pull them upward to restore their visibility. Finally, test the grip area by holding the bouquet as a recipient would. The handle should feel dry, secure, and comfortable to hold, with no sharp wire ends or sticky tape exposed.
Frequently Asked Questions (FAQ)
How do I prevent wrapping paper from wrinkling or drooping during transport?
To maintain a crisp, professional look during transport, choose stiffer paper grades such as heavy kraft paper or matte OPP sheets, which resist bending. You can also insert a sturdy piece of cardboard or a thick layer of non-woven fabric behind the primary wrapping paper to act as an internal support spine. When transporting the bouquet, always hold it upright by the handle or place it inside a specialized bouquet carrier box to prevent the outer paper from rubbing against surfaces and wrinkling.
What is the best way to wrap an irregularly shaped or cascading bouquet?
Wrapping an asymmetrical or cascading bouquet requires a customized, multi-sheet approach rather than a single symmetrical wrap. Start by placing a supportive, stiff backing sheet behind the tallest flowers to establish a clear frame. Instead of wrapping the paper tightly around the entire arrangement, use smaller, individual sheets of paper folded at varying angles to frame the sides and the trailing elements. Secure each sheet independently at the handle, ensuring the paper follows the natural flow of the cascading flowers without compressing or hiding the downward-trailing blooms.

Community discussion
Share your experience or ask a question. Comments are reviewed before publication.