
Designing and ordering customized stickers for your planner from local sellers in the Philippines is an excellent way to personalize your scheduling system, track unique habits, and match your specific aesthetic. By creating your own layouts, you can tailor every functional box, icon, and decorative border to fit the exact grid or column dimensions of your favorite planner. The process involves preparing a digital design, choosing the right paper material for your writing tools, finding a reliable local printer, and managing the proofing process to ensure clean cuts and accurate colors.
Preparing Your Customized Sticker Design for Print
When you create a print-ready file, pay careful attention to dimensions and layout software. You can use vector-based design programs or user-friendly online graphic design tools to set up your sticker sheets. If you are designing functional stickers like habit trackers or weekly headers, measure your planner columns with a physical ruler in millimeters to ensure a perfect fit. Standard planner inserts often have specific column widths, and even a one-millimeter discrepancy can cause your stickers to overlap the grid lines.
When setting up your digital canvas, always work in high resolution, preferably 300 dots per inch (DPI). This prevents your text and small icons from appearing blurry or pixelated when printed. If your design software allows, set your color space to CMYK, which is the standard color profile used by professional printing presses. Designing in RGB can lead to unexpected color shifts, making your physical stickers look duller than the bright images on your backlit screen.
Products mentioned in this guide
Prices are valid at publication and may change. Please refer to the product page for the latest price.
A crucial step in sticker sheet design is establishing clear cut lines and bleed areas. The bleed area is an extra border of color or pattern that extends beyond the final cut line, ensuring that slight shifting during the mechanical cutting process does not leave unsightly white edges. For kiss-cut sticker sheets, where multiple stickers are peeled from a single backing sheet, you must define the cut paths. Many local printers prefer these paths to be on a separate layer in your design file, marked with a distinct stroke color.
Before exporting, double-check your file format requirements with your chosen seller. Most local printing services accept high-resolution PDF, PNG, or vector formats like SVG or EPS. If your design includes transparent backgrounds, ensure your PNG files are exported with transparency preserved. Organize your layers clearly, labeling your artwork layer and your cut-line layer separately to help the printer understand your exact specifications.
Selecting Sticker Materials and Finishes for Your Planner
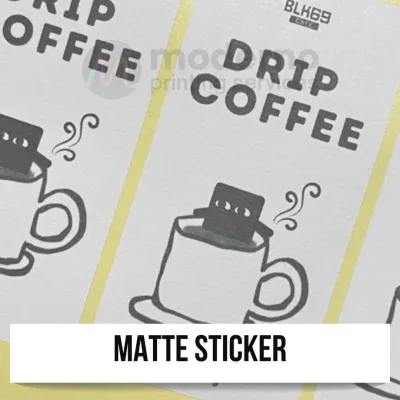
The material you choose for your customized stickers directly affects how they look, feel, and function inside your planner. Common options include matte sticker paper, glossy paper, transparent sheets, and vinyl. Matte paper is highly popular for functional planning because it blends seamlessly with the texture of standard planner pages. Glossy paper offers vibrant color reproduction and a shiny finish, making decorative illustrations pop, though it can reflect overhead light and make text harder to read.

Your choice of writing instruments should guide your selection of sticker finishes. Matte sticker paper is highly versatile, allowing you to write easily with gel pens, ballpoints, and even fountain pens without significant feathering or long drying times. Glossy and vinyl surfaces, however, are non-porous and repel water-based inks. If you prefer using gel pens or fountain pens, writing on glossy or vinyl stickers will likely result in smudging; these materials generally require permanent markers or specialized ballpoint pens to dry properly.
Transparent stickers offer a unique, borderless look that allows your planner’s grid lines or background colors to show through. They are excellent for minimal icons or floral overlays, but they require high-contrast designs to remain legible against your planner pages. When ordering transparent stickers, verify whether the seller prints with a white ink underlay. Without a white base layer, the colors on transparent stickers may appear faint or wash out when placed on colored planner paper.
Adhesive strength and repositionability are also critical factors to consider. Some planner enthusiasts prefer repositionable or “removable” adhesive, which allows you to peel a sticker off and move it if your plans change. Permanent adhesive, on the other hand, bonds quickly and can tear delicate planner pages if you attempt to lift it. Check the seller’s product descriptions or ask them directly about the tackiness of their sticker backing to ensure it matches your planning style.
Finding and Evaluating Local Sticker Sellers
The Philippines has a thriving community of independent sticker makers and commercial printing shops. You can find these services by searching local e-commerce platforms, social media marketplaces, and creative portfolio sites. Use search terms like “customized stickers,” “custom kiss-cut sheets,” or “planner sticker printing” to locate active shops. Many independent creators run their own small businesses and offer highly personalized customer service, while larger commercial printers may offer lower bulk rates.
When evaluating potential sellers, look closely at their portfolios and customer reviews. Pay attention to close-up photos of their finished products to assess the print quality and cut alignment. A common issue with low-quality sticker printing is “off-center cutting,” where the blade cuts slightly to the side of the design. Reliable sellers will showcase clean, centered cuts and crisp, legible text even on tiny functional icons.
Ordering a sample pack is a highly recommended step before committing to a large custom order. Many local printers offer inexpensive sample sheets featuring different materials and finishes. This allows you to test how your favorite pens write on their matte paper, check the true colors under your local lighting conditions, and feel the thickness of the backing sheets. It also gives you a firsthand look at their packaging quality, which is important for preventing damage during transit.
Additionally, verify the seller’s production timelines and shipping policies. Custom printing is a multi-step process that can take anywhere from a few days to several weeks, depending on the seller’s current queue and the complexity of your order. In the Philippines, local shipping times can vary significantly between regions, especially during the rainy season or peak holiday shopping periods. Choose a seller who communicates clearly about their lead times and provides reliable tracking details.
Navigating the Ordering and Proofing Process
Once your designs are ready and you have selected a seller, the ordering process begins with submitting your files. Most local sellers will provide a specific upload link, email address, or file-sharing folder for your high-resolution designs. When submitting, clearly specify your desired cut type. Kiss-cut sheets are ideal for planners because they keep all your stickers organized on a single sheet, whereas die-cut stickers are cut completely through both the sticker and the backing paper, making them better suited as individual handouts.
Always request a digital proof before the seller begins the actual printing run. A digital proof is a mockup showing exactly where the cutting blades will slice your stickers. Review this proof meticulously. Check that the cut lines do not clip any important text or design elements, and ensure that the spacing between stickers is sufficient to prevent tearing when peeling. If you spot any alignment errors or typos, communicate them immediately to the seller for adjustment.
Confirming the pricing and payment details is the final step before production. Prices for customized stickers in the Philippines are typically calculated per sheet or per individual sticker, with discounts often available for larger quantities. Ensure that the total cost, including local shipping fees, is clearly stated in ₱. Most local sellers accept payments through popular mobile wallets, local bank transfers, or cash on delivery, depending on their business scale.
Keep in mind that colors on a digital screen will always look slightly different from the printed product due to the differences between light emission (RGB) and ink absorption (CMYK). If color accuracy is absolutely critical for your planner theme, ask the seller if they can provide a physical proof sheet for a small fee. While this adds to the initial cost and timeline, it is the most reliable way to guarantee that the final colors match your expectations.
Applying and Storing Your Custom Stickers
To get the best results from your customized stickers, proper application and storage are essential, especially given the tropical climate of the Philippines. High humidity can affect both the paper fibers of your planner and the adhesive backing of your stickers. Before applying any sticker, ensure your hands are clean and dry. Oils and moisture from your fingers can weaken the adhesive, causing the edges of the sticker to lift over time.
When placing a sticker on your planner page, start from one edge and gently smooth it down toward the other side. This technique prevents air bubbles from getting trapped underneath, which is particularly common with glossy and vinyl materials. If you are using large functional boxes, you can use a plastic card or a clean ruler to press the sticker down evenly. For delicate planner papers, avoid pressing too hard until you are certain of the placement, as some adhesives bond instantly.
Storing your unused sticker sheets correctly is vital to prevent curling and adhesive degradation. The high humidity and heat in tropical regions can cause sticker backing paper to absorb moisture and warp. Store your sticker sheets flat inside a plastic organizer, a zippered pouch, or a dedicated sticker book. Keep them in a cool, dry place away from direct sunlight, as prolonged exposure to UV rays can fade the printed ink and dry out the adhesive, making the stickers brittle and difficult to peel.
Frequently Asked Questions (FAQ)
What is the typical minimum order quantity for customized stickers locally?
The minimum order quantity (MOQ) for customized stickers varies depending on the printer’s setup. Many independent local sellers cater specifically to planner enthusiasts and offer low MOQs, sometimes allowing you to order as few as one or two custom sheets. Commercial printers, however, may require a minimum of 10 to 50 sheets per design to cover their machine setup costs. Always check the seller’s specific policy, as some may offer single-sheet orders at a premium while providing significant discounts for bulk quantities.
What should I do if my printed stickers have color or cutting errors?
If your stickers arrive with noticeable defects, such as off-center cuts that slice through your designs or severe color misprints, document the issues immediately. Take clear, well-lit photos or a short video showing the errors next to your original design files. Contact the seller promptly and politely, sharing the visual evidence. Most reputable local sellers value customer satisfaction and will offer to reprint the affected sheets or provide a refund in accordance with their shop’s resolution policies.

Community discussion
Share your experience or ask a question. Comments are reviewed before publication.