
To design a cohesive journal layout using personalized washi tape and stickers, you must balance visual weight, establish a clear color story, and plan your page structure before peeling any backing. Personalized stationery allows you to express your unique style, but without a clear plan, a spread can quickly look cluttered. By treating your tapes as structural frames and your stickers as focal anchors, you can create beautiful, functional pages that preserve your memories without sacrificing writing space.
Planning Your Journal Spread Before Applying Adhesives
Establishing a cohesive theme begins long before you lay down your first strip of tape. Start by choosing a central color palette or visual motif for your entry. For instance, a warm sunset theme might utilize terracotta, mustard yellow, and soft peach tones. If you are documenting a weekend trip in the Philippines, a tropical botanical theme featuring lush greens and sandy neutrals works beautifully. Limiting your palette to three or four coordinating colors prevents the layout from feeling chaotic.
Once you have selected your theme, use a light pencil to map out your layout directly on the page. Draw faint boxes where your text blocks will go, and mark designated zones for your decorative elements. This step is crucial for maintaining “white space”—the empty areas of the page that allow your eyes to rest. If you fill every corner with decoration, your actual writing will get lost in the noise.
Products mentioned in this guide
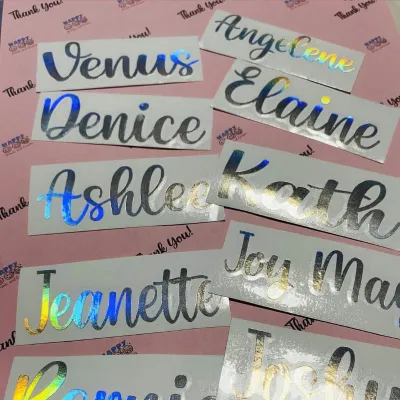
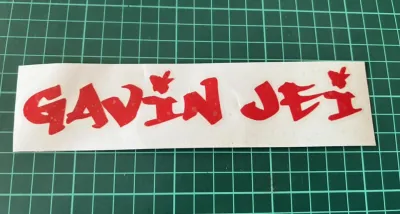
Prices are valid at publication and may change. Please refer to the product page for the latest price.
Before committing to any permanent placement, gather your personalized stickers and coordinating washi tapes. Lay them flat on your desk next to your journal to preview how they interact. This physical mockup allows you to verify if the scale of a custom die-cut sticker is too large for your notebook size, whether you are working in a compact B6 traveler’s notebook or a spacious A5 bullet journal. Adjust the arrangement until the visual weight feels balanced across both pages of the spread.
Practical Techniques for Styling with Washi Tape
Washi tape is highly versatile, serving as both a structural tool and a decorative accent. One of the easiest ways to organize your journal entries is by using thin, solid-colored or minimally patterned tapes to create clean borders, frames, and section dividers. Placing a strip of tape along the outer edge of your page instantly frames your thoughts, while horizontal strips can neatly separate different days of the week or distinct topics within a single entry.

The way you separate your tape changes the entire mood of the spread. Cutting tape with scissors or a precision craft ruler yields sharp, modern, and clean lines that suit minimalist or geometric layouts. Conversely, tearing the tape by hand creates a textured, deckled edge that adds a cozy, vintage, or rustic feel. You can also use the torn-edge technique to create organic-looking layers that mimic torn paper scraps without adding bulk to your notebook.
Because washi tape is naturally translucent, you can layer multiple strips to build custom background blocks for your writing or titles. Try placing a wide, neutral grid tape down first, then layering a thinner, semi-transparent pastel tape slightly offset on top. This creates a beautiful, textured base.
Ink Compatibility Check Before writing directly over your layered tape, always perform a quick test on a scrap piece. While ballpoint pens and permanent fine-liners glide smoothly over most paper-based tapes, some glossy or highly coated washi tapes cause gel inks and fountain pen inks to smudge, pool, or take an exceptionally long time to dry.
Strategically Placing Personalized Stickers
To create a professional-looking layout, you must position your stickers to establish a clear visual hierarchy. Large, detailed, or highly colorful personalized stickers should act as your layout’s primary anchors. Place these focal points first—typically in the upper-left corner to start the page, or in the bottom-right corner to close it. This placement mimics the natural reading flow and draws the eye directly to the most important decorative element on the page.
Instead of scattering tiny stickers randomly across the page, group them in small clusters of two or three near your text blocks or photos. Combine a medium-sized icon sticker with a tiny star, dot, or floral accent. This clustering technique creates “visual resting spots” and makes the embellishments feel like intentional design choices rather than random clutter. Keep these clusters close to your writing boundaries to frame your text beautifully.
Maintaining readability requires a careful balance between sticker placement and negative space. If you place a large custom sticker on one side of the page, balance it by leaving the opposite side relatively clean, using only light text or a minimal border. If your journal paper is exceptionally thin, such as 52gsm Tomoe River paper, be mindful of the weight and thickness of your stickers; heavy vinyl stickers can cause thin pages to sag, so opt for lightweight paper-based stickers for delicate journals.
Combining Tape and Stickers for a Unified Look
To make your tape and stickers look like they belong to the same collection, focus on echoing colors and motifs across both mediums. If your personalized sticker features a delicate floral illustration, pair it with a washi tape that shares the same leaf-green accent color or a subtle botanical pattern. This repetition of design elements ties the entire spread together, making it feel like a curated stationery set.
Floating stickers can sometimes look disconnected from the page. You can easily “ground” a die-cut sticker by placing a strip of washi tape underneath it to act as a shelf, pedestal, or background banner. This simple trick anchors the sticker visually, making it feel integrated into the layout rather than just slapped on top of the paper. You can also layer a transparent sticker slightly over the edge of a torn piece of tape to create a seamless, multi-dimensional effect.
Always let your planned writing dictate your decoration density. If you have a long, detailed journal entry to write, keep your tape borders thin and use only one or two small stickers. If you are creating a quick mood board, a weekly tracker, or a memory-keeping spread with minimal text, you can afford to use wider tapes, layered backgrounds, and larger, more expressive custom sticker sheets. Adjusting the density ensures your journal remains a functional tool for writing rather than just a scrapbook.
Common Layout Mistakes and How to Fix Them
The most common journaling mistake is overcrowding the page and obscuring your actual writing space. If you find your page has become too busy, you do not need to start over. You can easily fix this by covering a portion of the excess decoration with a clean scrap of white, cream, or kraft paper. Glue it down directly over the cluttered area to create a fresh, clean block where you can write your text, instantly restoring balance to the layout.
If your colors are fighting for attention, simplify your palette immediately. Stick to a maximum of three primary colors per spread. If you have already applied clashing tapes, you can tone down their intensity by layering a strip of semi-translucent white vellum or matte tracing paper over them. This softens the bright colors and busy patterns underneath, allowing your writing or main stickers to take center stage.
In warm, humid tropical environments like the Philippines, paper naturally absorbs moisture from the air, which can weaken sticker adhesives or cause thin journal pages to warp. If your stickers start lifting at the edges, gently press them down using a clean bone folder or the back of your fingernail to reactivate the pressure-sensitive adhesive. If you must remove a misplaced tape, peel it back slowly at a sharp 180-degree angle parallel to the page, rather than pulling straight up, to avoid tearing the delicate, moisture-softened paper fibers.
Frequently Asked Questions (FAQ)
Can I reposition washi tape and stickers without tearing the journal paper?
Repositioning success depends heavily on your paper type and the adhesive’s tackiness. Standard washi tape is designed to be low-tack and removable, but thin, uncoated, or highly absorbent papers can still tear if the tape is peeled too quickly. To minimize damage, gently warm the adhesive by rubbing your finger over the tape to soften the glue, then peel slowly from one corner. For personalized stickers with stronger permanent adhesives, try sticking them to your hand or a clean piece of clothing once or twice before applying them to the page to reduce their initial grip.
How do I store leftover personalized tape and stickers to maintain their stickiness?
To preserve the quality of your stationery in a humid climate, store your rolls and sticker sheets in a cool, dry place away from direct sunlight. High heat and humidity can melt adhesives, making tapes gummy or causing sticker backings to curl and peel. Keep your washi rolls stored upright or flat in a plastic organizer box with a tight-fitting lid. Adding a small packet of silica gel to your storage container is an excellent, low-cost way to absorb excess moisture and keep your personalized stationery collection in ready-to-use condition.

Community discussion
Share your experience or ask a question. Comments are reviewed before publication.