
Organizing your personal data sheet form alongside other Civil Service Commission requirements is a critical step when applying for government positions or updating your official records. A disorganized stack of papers can lead to misplaced documents, delayed applications, or damaged originals. By establishing a systematic filing system, you ensure that every certificate, identification card, and clearance is protected and easy to retrieve.
To build an effective filing system, you must combine logical document sorting with the right stationery choices. In tropical climates, physical paperwork faces unique environmental challenges like high humidity, which can warp paper and cause ink to bleed. Selecting the appropriate folders, protective sleeves, and storage methods will safeguard your hard work and keep your application portfolio in pristine condition.
Gather and Sort Your Civil Service Commission Documents
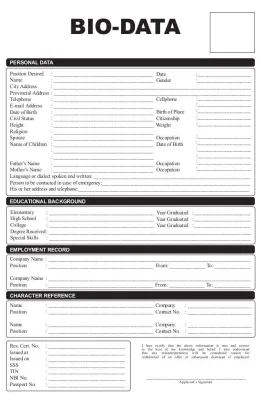
Before purchasing any filing supplies, you must gather all the necessary paperwork and assess its physical characteristics. The cornerstone of your application is the personal data sheet form, officially known as Civil Service Commission Form No. 212. This multi-page document requires careful handling, as it contains extensive personal, educational, and work history details that must remain legible and unblemished.
Products mentioned in this guide
![[WHOLESALE] Biodata personal data form](https://img.lazcdn.com/g/p/6806f7ab2d5bc54b574b200d5c0b6258.png_400x400q80.png_.webp)
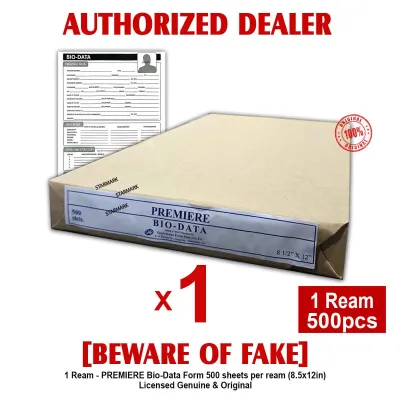
Prices are valid at publication and may change. Please refer to the product page for the latest price.
Alongside your personal data sheet form, compile all supporting documents required for your specific submission. This typically includes your Certificate of Eligibility, Transcript of Records, college diploma, NBI clearance, and various government-issued identification cards. You should also gather any certificates of employment, seminar invitations, and training certificates that validate the entries on your form.
Once all documents are in one place, sort them by size and paper type. In the Philippines, government forms and official documents are commonly printed on a mix of A4, letter, and long or legal bond paper. The personal data sheet form itself is traditionally printed on long bond paper. Recognizing these size variations early prevents the mistake of buying folders that are too short, which would leave the top edges of your forms exposed to bending and tearing.
After checking the sizes, group the documents into distinct categories based on the submission checklist. Create separate piles for primary application forms, identity verification documents, educational credentials, and professional eligibility records. This initial sorting streamlines the physical assembly process and helps you determine exactly how many folders, dividers, or protective sleeves you will need.
Choose the Right Folders and Filing Supplies
Selecting the right stationery is about balancing document protection, accessibility, and privacy. When dealing with original certificates and sensitive personal information, a single, basic paper folder is rarely sufficient. You need a combination of protective layers to shield your documents from physical wear and environmental moisture.

Clear plastic sheet protectors are excellent for safeguarding original certificates, diplomas, and clearances. These sleeves allow evaluators to view both sides of a document without physically handling the paper, preventing oil from fingers from staining the sheets. Look for acid-free, non-glare polypropylene sleeves, as they prevent ink from lifting off the page over time. However, because these sleeves are transparent, they do not offer privacy for sensitive documents like your personal data sheet form.
To protect your privacy and keep the entire set organized, pair these plastic sleeves with opaque folders or expanding envelopes. Opaque plastic or heavy-duty pressboard folders conceal your personal data from casual onlookers while providing a rigid structure that prevents bending. For a complete application set that includes multiple thick documents like transcripts and training portfolios, a multi-pocket accordion file or a legal-size expanding envelope with a secure snap button closure is highly practical.
Always verify that the dimensions of your chosen folders match the largest document in your stack. Since the personal data sheet form is typically printed on long bond paper, standard letter-size folders will not offer adequate protection. Ensure the product specifications explicitly state “long” or “legal” size. Investing in a durable, water-resistant plastic expanding envelope will provide peace of mind during transit, especially during the rainy season.
Step-by-Step Filing System for Your Application Set
With your documents sorted and your supplies ready, you can begin assembling your physical application portfolio. A logical, standardized order makes it easy for human resource officers or evaluators to review your file, which can significantly speed up the processing of your application.
Start by placing your fully accomplished and signed personal data sheet form at the very front of your primary folder. If your form includes the supplementary Work Experience Sheet, secure this directly behind the main four-page form. Because the personal data sheet form is the primary summary of your qualifications, it must be the first thing an evaluator sees when opening your file.
Next, arrange your supporting documents in a chronological or checklist-based sequence. A highly effective method is to follow the exact order listed on the official submission checklist. Typically, this means placing your proof of eligibility immediately after the main form. Follow this with your educational records, starting with your highest degree earned, and then stack your work clearances and training certificates.
To make navigation seamless, insert color-coded divider sheets or attach sticky index tabs to the edge of each section. For instance, you can use a blue tab for “Eligibility,” a yellow tab for “Education,” and a green tab for “Work Experience.” Position the tabs in a staggered layout along the side of the folder so that all labels are visible at a glance. This simple addition transforms a confusing stack of papers into a highly professional, navigable portfolio.
Before finalizing the arrangement, double-check that all ink signatures, dry seals, and passport-sized photos on your personal data sheet form are completely dry. Fresh ink or adhesive can smudge or stick to adjacent pages under pressure. If you have attached a photo to your form using glue or double-sided tape, place a clean sheet of scrap paper over it temporarily to ensure it does not adhere to the protective sleeve or the folder flap.
Maintain and Update Your Filed Records
Organizing your documents is not a one-time task; maintaining the physical integrity of your files requires ongoing care. The tropical climate presents challenges like high humidity and mold, which can rapidly deteriorate paper quality and cause printed text to fade.
Store your master filing folder in an elevated, dry, and dark location, such as a dedicated filing cabinet or a plastic storage box. Avoid storing important documents on the floor or against external walls, where moisture can seep in. To combat humidity, place a few silica gel packets inside your expanding envelope or storage box to actively absorb excess moisture and prevent the growth of mildew.
Creating a digital backup is an essential step in modern record-keeping. Before submitting any physical copies, use a high-quality scanner or a mobile scanning app to digitize your completed personal data sheet form and all supporting certificates. Save these files as clear, high-resolution PDFs and organize them in a cloud storage folder that mirrors your physical filing system. This ensures that if your physical documents are lost, damaged, or submitted permanently, you can print identical copies instantly.
Finally, establish a routine to review and update your filed records periodically. Many government clearances, such as NBI clearances or specific medical certificates, have expiration dates or are only valid for a few months. Set a calendar reminder every six months to check these dates. By proactively replacing expired documents and updating your personal data sheet form with new training certificates or work experience, you ensure that your application portfolio remains constantly ready for any sudden career opportunities.
Frequently Asked Questions (FAQ)
Should I staple or paperclip my personal data sheet form to other documents?
Using metal staples to bind your personal data sheet form to other documents is generally discouraged unless specifically requested by the receiving agency. Staples permanently puncture the paper, and removing them can easily tear your documents. Furthermore, in humid environments, standard metal staples and cheap paperclips are highly susceptible to rusting, which leaves permanent, unsightly brown stains on your official forms. Instead, use vinyl-coated paperclips to hold temporary sets together, or keep the pages loose but organized within individual pockets of an expanding folder or clear plastic sleeves.
How do I handle oversized or irregularly shaped certificates?
Oversized diplomas or uniquely shaped training certificates should never be folded to fit into standard-sized folders, as folding permanently creases the paper fibers and detracts from their professional appearance. Instead, store these documents flat in legal-size or oversized expanding envelopes. You can also purchase large, clear plastic document sleeves or presentation portfolios designed specifically for oversized media. If you must submit a copy of an oversized certificate, consider having it professionally photocopied or scanned and resized to fit standard A4 or long bond paper while keeping the original safely stored flat at home.

Community discussion
Share your experience or ask a question. Comments are reviewed before publication.