
Organizing documents in a three-layer bag relies on a systematic division of files based on urgency, frequency of use, and physical protection needs. By assigning a specific operational role to each of the three compartments, you transform a chaotic stack of loose papers into a mobile, highly functional workstation. In tropical environments where high humidity and sudden downpours can quickly compromise paper integrity, a structured filing system inside a secure bag is not just about neatness—it is essential for preserving critical records.
Assess Your Three-Layer Bag Structure and Capacity
Before placing a single sheet of paper inside, examine the physical architecture of your organizer. Most three-layer bags feature a distinct front, middle, and back compartment, each secured by its own closure mechanism. Look closely at how these sections open; some use heavy-duty zippers that seal completely against moisture, while others rely on quick-access magnetic snaps, hook-and-loop fasteners, or flexible elastic bands. Understanding these mechanisms helps you decide which compartment is best suited for items you need to grab in a hurry versus those that require maximum security.
Next, evaluate the physical limits of each layer by checking the depth of the gussets and the strength of the stitching. Forcing too many documents into a single compartment can strain the seams, warp the zippers, or tear the inner lining. A good rule of thumb is to leave at least a finger-width of clearance at the top and sides of each section so the closures glide smoothly. If you notice the fabric stretching or the zipper teeth separating under tension, it is a clear sign that you have exceeded the safe capacity of that layer.
Products mentioned in this guide
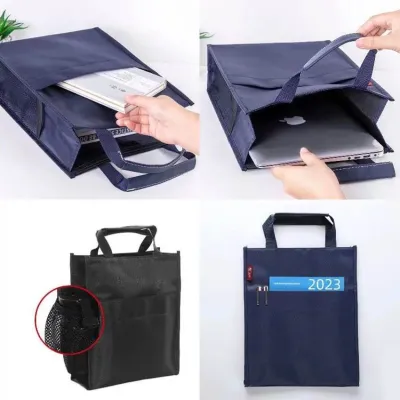
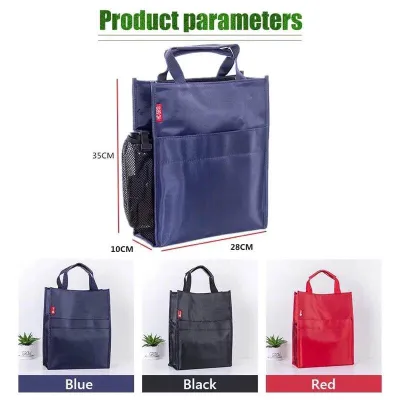
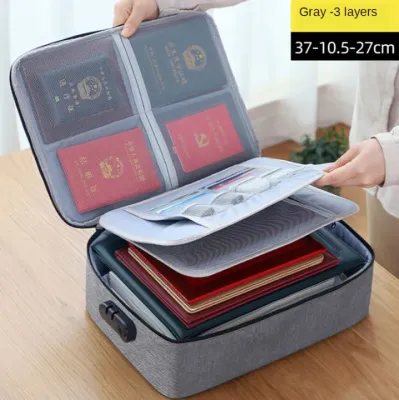
Prices are valid at publication and may change. Please refer to the product page for the latest price.
Do not overlook the smaller integrated features that many modern document bags offer. Built-in mesh pockets, dedicated pen loops, and small card slots are incredibly useful for keeping your essential writing instruments and accessories organized. Keeping these small items in their designated slots prevents them from sliding to the bottom of the bag, where they could easily crease your documents or puncture delicate plastic sleeves.
Sort and Purge Documents Before Filing
An effective organization system is only as good as the papers you choose to keep. Begin by gathering every loose document, receipt, and note currently scattered across your desk, backpack, or workspace. Lay them out on a clean, flat surface where you can inspect each item individually. This is your opportunity to discard outdated drafts, duplicate printouts, and expired receipts that no longer serve a purpose, immediately reducing the physical volume you need to carry.

Once you have cleared away the clutter, begin grouping the remaining papers into logical categories based on their subject matter, project association, or required action. For example, you might create separate piles for active client projects, monthly utility bills, and reference materials. Keeping these groups distinct from the outset makes it much easier to assign them to their permanent homes within your three-layer bag.
During this sorting process, pay special attention to vital original records such as signed contracts, government-issued identification documents, and official certificates. These high-value papers must be kept separate from everyday working copies and rough drafts. Because original documents are often difficult or expensive to replace, they require the highest level of physical protection within your bag, away from daily wear and tear.
Assign a Logical Purpose to Each Layer
The secret to maintaining an organized bag over time is establishing a clear, intuitive rule for what goes where. Instead of stuffing papers into the nearest open slot, assign a specific operational status—such as immediate action, active reference, or long-term archive—to each of the three layers. This logical division ensures that you always know exactly where to look for a specific document, saving you valuable time during busy meetings or study sessions.
To keep your bag comfortable to carry and structurally sound, always place the heaviest or bulkiest items in the compartment that offers the most physical support. Typically, this is the back layer closest to your body or the center compartment of a free-standing bag. Distributing the weight in this manner prevents the bag from sagging, tipping over, or putting uneven stress on your shoulders and back during your daily commute.
Front Layer: Active and Daily Tasks
The front layer of your bag is your immediate action zone, designed for items that require your attention throughout the day. Because this compartment is usually the easiest to access, it should house your daily to-do lists, pending documents awaiting your signature, and active meeting notes. Keeping these high-priority papers right at the front ensures they remain top-of-mind and are never forgotten at the bottom of a deep pocket.
To maintain the efficiency of this layer, keep the volume of paper here as thin as possible. This compartment is meant for rapid retrieval and quick updates, so overloading it with thick folders will only slow you down and make the bag difficult to close. Aim to carry only the documents you absolutely need for your current day’s tasks, transferring them to other sections as soon as they are processed.
Middle Layer: In-Progress and Reference Materials
The middle layer serves as the transition space for ongoing projects and essential reference materials that you need to consult regularly, though not necessarily multiple times a day. This is the ideal home for weekly progress reports, project guidelines, course syllabi, and frequently used templates. By keeping these files in the center, you protect them from the constant handling of the front layer while keeping them close at hand.
This central compartment acts as a direct support system for the active tasks stored in your front layer. For instance, if you have a pending contract to sign in the front pocket, the background research and project brief should reside here in the middle. This logical proximity allows you to quickly pull out supporting data whenever an active task requires deeper context or verification.
Back Layer: Archives and Vital Records
The back layer is the most secure and protected compartment in your bag, making it the perfect repository for long-term archives and vital original records. This section should hold completed project files, signed agreements, academic transcripts, and official identification documents. Because this layer is closest to the bag’s main structural support, it offers the best defense against bending, creasing, and external impacts.
In humid tropical climates, protecting these sensitive papers from moisture and environmental wear is a constant challenge. Storing your most important documents in the back layer keeps them shielded from frequent exposure to air and light every time you open your bag for daily tasks. For added security, consider placing these vital records inside moisture-resistant plastic sleeves before sliding them into this deep compartment.
Add Sub-Categories and Visual Labels
Even with three distinct layers, papers can easily become jumbled within a single compartment if they are not further subdivided. To prevent this, insert slim, clear plastic sleeves or lightweight colored folders inside each layer to separate different subjects or clients. These inner organizers add minimal bulk while providing an extra layer of structure that keeps your documents upright and pristine.
Visual cues are incredibly powerful for speeding up your filing workflow. Apply small sticky notes, color-coded tabs, or write-on edge labels to the tops of your inner folders so you can identify the contents at a glance without pulling the entire folder out of the bag. When choosing labels, opt for gentle adhesives or clip-on tabs that can be easily removed or repositioned without tearing your folders or leaving a sticky residue on the bag’s interior lining.
For thicker stacks of paper that must stay together, align the edges neatly and secure them with a sturdy binder clip before placing them in the bag. However, always verify that the added thickness of the clip does not interfere with the bag’s closure mechanism. If a metal clip is too bulky and threatens to puncture adjacent papers or strain the zipper, switch to a slim paperclip or divide the stack into smaller, more manageable sub-folders.
Maintain and Reset the System Regularly
No organization system can remain effective without regular maintenance. Set aside a dedicated time each week or at the end of every month to conduct a quick audit of your bag’s contents. During this reset, move completed projects from the active front or middle layers into the back archive layer, or transfer them entirely to an external home filing cabinet to free up valuable mobile space.
Be ruthless about purging papers that are no longer useful. Shred or recycle outdated drafts, duplicate prints, and temporary notes to keep your bag light and prevent unnecessary strain on the seams and zippers. Maintaining a lighter load not only protects the structural integrity of your bag but also makes your daily commute significantly more comfortable.
Finally, take care of the bag itself to ensure it continues to protect your documents for years to come. Periodically wipe down the exterior with a damp cloth and check the seams, corners, and zippers for any signs of wear or fraying, following the manufacturer’s specific care instructions. Keeping the zippers clean and occasionally applying a recommended lubricant can prevent sticking and ensure smooth operation, keeping your documents safe from sudden exposure to the elements.
Frequently Asked Questions (FAQ)
Can I use a three-layer bag for digital device storage along with documents?
Yes, but you must take specific precautions to protect both your electronics and your paper files. Placing a tablet or slim laptop in the same compartment as loose papers carries a high risk of scratching screens, bending ports, or damaging delicate components with sharp paper edges and metal binder clips. Conversely, a heavy device can easily crush or crease your neatly organized documents if they are pressed tightly together.
To safely mix devices and documents, always check if your three-layer bag features a dedicated, padded compartment designed specifically for electronics. If it does not, always house your digital devices in their own protective sleeves before placing them in the bag. It is best to reserve one entire layer—ideally the back layer for maximum structural support—for your device, keeping your paper documents completely separate in the remaining compartments.
What should I do if my documents exceed the capacity of the three layers?
When your paperwork begins to overflow, forcing the zippers or overstuffing the compartments will inevitably damage both your bag and your documents. The most effective solution is to establish a strict boundary between your mobile files and your permanent archives. Transfer older, completed records and reference materials that you do not need on a daily basis to a dedicated home filing cabinet, a sturdy storage box, or a desktop binder.
Another highly efficient way to reduce physical paper volume is to digitize non-essential physical copies. Use a mobile scanning app or a desktop scanner to create high-quality digital PDFs of reference sheets, meeting notes, and receipts, saving them to a secure cloud storage service. By keeping only active, high-priority physical documents in your three-layer bag, you maintain a lightweight, highly functional system that is easy to carry and navigate.

Community discussion
Share your experience or ask a question. Comments are reviewed before publication.