
The perfect gift presentation relies on a thoughtful harmony between the package itself and the decorative flourishes that crown it. Successfully pairing ribbons and bows with different gift shapes and sizes requires balancing physical proportions, material textures, and structural integrity. By matching the scale of your ribbon to the footprint of your box and contrasting matte and glossy surfaces, you can elevate a simple package into an artistic statement. Understanding how these elements interact ensures your presentation remains secure, visually striking, and perfectly suited to the occasion.
Core Principles for Pairing Ribbons and Bows
Visual balance is the foundation of exceptional gift wrapping. The most critical guideline to follow is the rule of proportion, which dictates that the width and volume of your ribbon must scale directly with the physical footprint of the package. A tiny, thin ribbon wrapped around a large box will look lost, while an oversized, thick bow will completely overwhelm a delicate jewelry container.
Texture contrast serves as a powerful design tool to create depth. Try matching a matte wrapping paper with a high-shine glossy satin ribbon, or pairing a smooth paper with a heavily textured fabric like cotton herringbone, velvet, or natural abaca. This contrast prevents the design from looking flat and ensures that the ribbon stands out as a distinct decorative layer.
Products mentioned in this guide
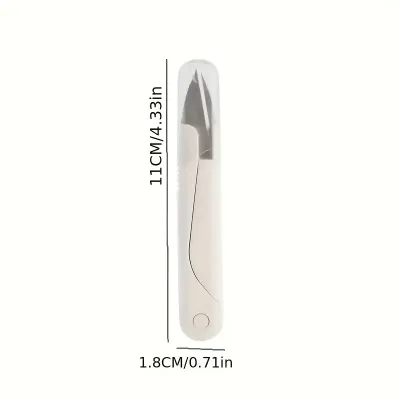
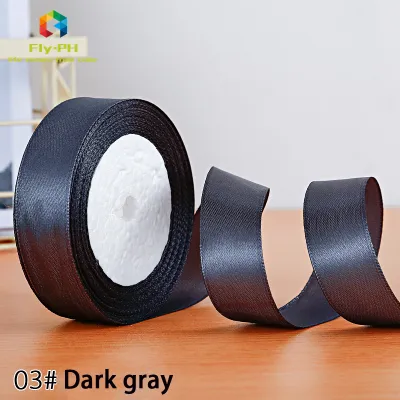
Prices are valid at publication and may change. Please refer to the product page for the latest price.
In tropical climates with high humidity, such as the Philippines, material selection requires extra care. Moisture in the air can cause cheap paper ribbons and lightweight satin to lose their stiffness and droop over time. Choosing high-density woven ribbons, grosgrain, or wired-edge fabrics ensures that your bows maintain their crisp loops and structural integrity.
The ultimate goal of pairing ribbons and bows is to enhance the presentation of the gift without overshadowing the item itself. The wrapping should build anticipation and reflect the care put into selecting the gift. By keeping these core principles of proportion, contrast, and climate-appropriate material selection in mind, you can confidently approach any wrapping task with a clear design strategy.
How to Match Ribbon Width to Gift Dimensions
Selecting the right ribbon width is a precise science that depends on the overall dimensions of your package. For small or flat items, such as jewelry boxes, gift cards, cosmetics, or thin pocketbooks, narrow ribbons ranging from 1/8 inch to 1/4 inch (approximately 3mm to 6mm) are ideal. These delicate widths accent the small package without covering up the patterns on your wrapping paper.

Standard rectangular boxes, such as shoe boxes, hardcovers, and medium-sized gift boxes, call for medium-width ribbons. Options measuring between 3/8 inch to 5/8 inch (approximately 9mm to 16mm), or up to 1 inch (25mm) for slightly larger items, provide a classic, balanced look. This width is highly versatile, offering enough surface area to showcase the ribbon’s texture while remaining easy to tie.
Large, bulky, or heavy items, such as home appliances, large toy boxes, or storage crates, require wide ribbons measuring 1.5 inches to 2 inches (approximately 38mm to 50mm) or more. These substantial widths provide the necessary visual weight to anchor a large package, ensuring the ribbon does not look like an afterthought. Additionally, wider ribbons offer actual structural support, helping to hold large folds of wrapping paper firmly in place.
Before cutting your ribbon, perform a quick visual test to verify the scale. Unroll a small portion of the ribbon and drape it across the top and sides of your wrapped package, observing it from different angles. If the ribbon covers more than one-third of the box’s surface area, or if it seems to disappear against the pattern of the paper, adjust your width up or down accordingly.
Best Ribbon and Bow Combinations by Gift Type
Small and Delicate Gifts (Jewelry, Cosmetics, Watches)
Small, high-value, or fragile gifts require refined wrapping techniques that emphasize precision and luxury. For these compact items, narrow ribbons made of premium, soft-textured fabrics like double-faced satin, velvet, or silk are highly recommended. These materials drape elegantly over small edges and feel pleasant to the touch, reinforcing the premium nature of the gift inside.
The bow style for a small package should remain simple, tidy, and perfectly scaled. A classic single-loop bow, a delicate rosette, or a tailored flat bow works beautifully because they do not obscure the face of the box. These clean styles ensure that the recipient can appreciate the pattern of the wrapping paper and the neatness of the folds without navigating a chaotic mass of fabric.
Achieving crisp, clean edges is essential when working with delicate, small-scale gifts. Use sharp fabric shears to make clean cuts, as dull household scissors can easily fray the ends of fine satin or silk. If you are writing a personalized message on a small gift tag, perform a quick ink-bleed test on a scrap piece of paper beforehand to ensure your pen does not smudge or bleed into the fibers of the tag.
Large and Heavy Gifts (Appliances, Shoeboxes, Large Toy Boxes)
Large and heavy packages demand robust wrapping materials that offer both visual weight and physical durability. For these substantial gifts, opt for wider ribbons with structured textures such as heavy grosgrain, wide cotton canvas, or natural rustic fibers like abaca and burlap. These materials are thick enough to withstand tension and will not tear or slip when wrapped tightly around large, heavy boxes.
The bows for these large items should be equally substantial and structured to prevent them from looking flattened or crushed during transport. Multi-loop boutique bows or large wired-edge bows are ideal because the wire reinforcement allows you to fluff and shape the loops, ensuring they retain their volume. These styles provide a festive, generous appearance that matches the scale of a significant gift.
Securing wide, heavy ribbons on large surfaces requires extra stability to prevent the bands from shifting. Apply a small piece of double-sided craft tape to the underside of the ribbon where it crosses the corners of the box to hold it firmly in place. When tying the central knot, pull the ribbon taut and secure it with a flat square knot before constructing your bow loops, ensuring the entire wrap remains tight.
Irregular and Soft-Shaped Gifts (Clothing, Plush Toys, Basket Sets)
Gifts without rigid edges, such as soft clothing, plush toys, or curated gift baskets, present a unique challenge because traditional flat wrapping techniques can compress or misshape the item. For these irregular shapes, medium-width ribbons with highly flexible and forgiving textures are the best choice. Organza, lightweight linen, and flexible wired ribbons conform easily to curves without crushing the contents underneath.
Natural, flowing bow styles are highly effective for soft-shaped items because they adapt gracefully to uneven surfaces. Consider using loose trailing bows with long, elegant tails, pom-pom bows, or gathered fabric rosettes that sit gently on top of the package. These styles add volume and a sense of whimsy, drawing the eye toward the decorative flourish rather than any unavoidable wrinkles in the wrapping material.
Wired ribbons are particularly useful for irregular items because they can be twisted, bent, and sculpted to hug the contours of the gift securely. You can wrap a wired ribbon around a plush toy or a fabric bundle, twist it at the base, and shape the loops to stand upright without needing a rigid box underneath. This flexibility allows you to create a secure, polished presentation on even the most challenging shapes.
Step-by-Step Guide to Tying and Layering Ribbons
Executing a flawless ribbon wrap requires a systematic approach to ensure the bands are straight, the knots are secure, and the bow loops are symmetrical.
- Securing the Base: Start by placing your wrapped box face down on your work surface. Drape the ribbon over the bottom of the box, ensuring equal lengths on both sides, then bring the ends up to the top, crossing them over each other in a clean 90-degree twist.
- Tying the Foundational Knot: Flip the box face up while keeping the crossed ribbon tight. Bring the ends around to the front, thread one end under the central cross, and tie a basic, tight knot to establish a secure foundation that will not slip as you work.
- Forming the Loops: Create two even loops with the ribbon ends, cross them over each other, and feed one loop through the central opening to tie a classic bow. Pull the loops tight while holding the center knot to ensure the bow sits flat against the package.
- Fluffing and Adjusting: Gently pull on the loops and tails to adjust their size until they are perfectly symmetrical. Use your fingers to open up the loops, giving them a rounded, three-dimensional shape.
Layering two different ribbons is an excellent way to add depth, color contrast, and a professional touch to your gift wrapping. To execute this technique, begin by selecting a wide, matte ribbon (such as a 1.5-inch grosgrain) to serve as your base, and a narrower, glossy ribbon (such as a 1/2-inch satin) in a coordinating color to serve as the accent. Lay the wide ribbon flat on your work surface, center the narrow ribbon directly on top of it, and wrap them around the box together as a single unit. When you tie the final bow, the contrasting textures and widths will create a beautiful, multi-dimensional effect that looks highly customized.
To give your gift a truly polished finish, pay close attention to how you trim the ribbon tails. Never cut them straight across, as this looks unfinished and can lead to rapid fraying of the fabric fibers. Instead, fold the ribbon tail in half vertically and cut upward at a 45-degree angle from the folded edge to the outer edge to create a classic chevron or V-notch. Alternatively, you can make a single clean cut at a sharp 45-degree angle across the flat ribbon tail. To ensure your scissors are safe to use, always cut away from your body, work on a flat surface, and store sharp crafting blades out of reach of children.
Common Ribbon and Bow Pairing Mistakes to Avoid
One of the most frequent wrapping mistakes is a severe mismatch in proportion between the gift and the decorative elements. Placing a tiny, thin bow on a massive appliance box makes the presentation look incomplete and cheap, while crowning a delicate jewelry box with a massive, heavy bow can crush the packaging and look comical. Always let the physical dimensions of the gift guide your ribbon selection to maintain a balanced visual scale.
Another common pitfall is clashing textures without a unifying design element or color palette. For example, mixing a highly rustic, rough burlap ribbon with a delicate, shimmering silk ribbon on the same package can look chaotic and unintentional unless they are tied together by a shared, neutral color scheme. If you want to mix contrasting textures, stick to a monochromatic or complementary color palette to ensure the final design feels deliberate and cohesive.
Finally, avoid using thin, non-wired, or flimsy ribbons for complex, multi-loop bows that require structural support to stay upright. In warm, humid environments, lightweight satin or paper ribbons will quickly lose their shape and sag, turning a beautiful bow into a limp, untidy mess. For intricate bow designs, always invest in high-quality wired-edge ribbons or stiff, high-density woven fabrics that are engineered to hold their shape regardless of the weather.
Frequently Asked Questions (FAQ)
How much ribbon do I need to tie a standard bow?
To determine the correct amount of ribbon to cut, you can use a simple, reliable measuring formula. First, calculate the perimeter of your box by wrapping a flexible measuring tape around the length and width of the package. Once you have this base measurement, add an additional 12 to 18 inches (approximately 30 to 45 centimeters) of ribbon to account for the loops and trailing tails of a standard bow. It is always best to cut slightly more ribbon than your calculation suggests, as this gives you plenty of material to work with and allows you to make clean, angled trims at the ends without making the tails too short.
Can I mix different ribbon textures on a single gift?
Yes, mixing different ribbon textures on a single package is an excellent way to create a sophisticated, designer look. To keep the presentation from looking cluttered or chaotic, it is best to stick to a cohesive or monochromatic color palette, such as pairing a forest green velvet ribbon with a sage green satin ribbon. Additionally, you should always use contrasting widths—such as placing a very narrow, glossy ribbon directly on top of a wide, matte ribbon—to ensure the layering looks intentional, structured, and balanced.

Community discussion
Share your experience or ask a question. Comments are reviewed before publication.