
Starting a scrapbook in an A4 size book is one of the most practical and rewarding ways to preserve your favorite memories. The A4 format, measuring 210 by 297 millimeters, provides a generous canvas that easily accommodates standard photo prints, detailed handwritten stories, and creative paper layers without feeling cramped. Unlike smaller pocket journals or massive square albums, an A4 scrapbook strikes a perfect balance between creative freedom and storage convenience, fitting neatly on standard bookshelves and study desks. By understanding how to select your materials, plan balanced layouts, and assemble your pages step-by-step, you can transform a blank book into a beautiful, lasting archive of your life’s milestones.
Essential Tools and Materials for Your A4 Scrapbook
To begin your journey, you do not need an overwhelming array of expensive art supplies. Focus first on the core foundation: a high-quality A4 scrapbook. This can be a classic ring binder with plastic sheet protectors or a spiral-bound book with thick, heavy-duty pages. Ensure that any paper or album you purchase is explicitly labeled acid-free and lignin-free. Acidic papers and adhesives will yellow and degrade your photographs over time, especially in warm, humid environments.
For adhesives, a combination of tools works best. Double-sided tape runners or glue rollers are ideal for flat paper layers and photos because they apply a thin, even bond without warping the paper. For heavier embellishments, a strong double-sided foam tape can add a subtle three-dimensional lift. Avoid standard liquid school glues, as their high water content causes thin papers to buckle and wrinkle.
Products mentioned in this guide
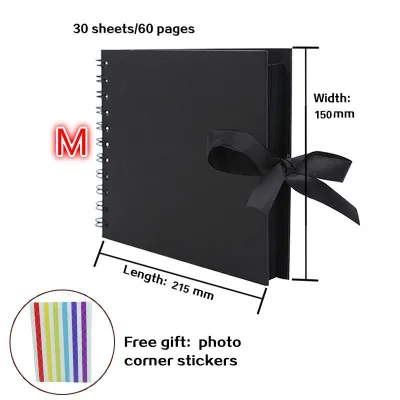
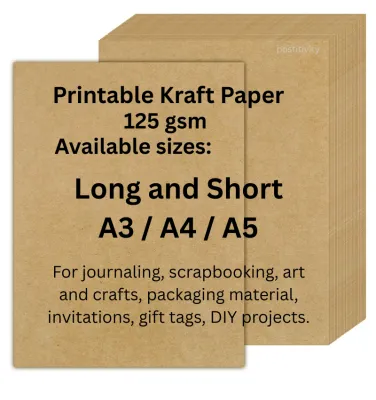
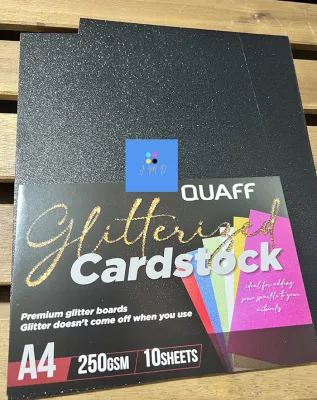


Prices are valid at publication and may change. Please refer to the product page for the latest price.
Cutting and measuring tools are crucial for working with the clean lines of the A4 format. A sturdy metal ruler and a sharp pair of craft scissors are essential. If you plan to crop many photos or cut straight background mats, investing in a rotary paper trimmer with an A4 measuring grid will save time and ensure perfectly square edges.
Setting a practical starter budget helps keep this hobby accessible. In the Philippines, a basic but reliable setup—consisting of an A4 kraft paper scrapbook, a roll of double-sided tape, a pack of colored cardstock, and a fine-tip journaling pen—can easily be assembled for around ₱500 to ₱1,200. You can always expand your collection with optional embellishments like washi tape, decorative stickers, and specialized pigment liners as you develop your personal style.
Planning Your A4 Scrapbook Layouts
The A4 canvas offers a unique vertical or horizontal orientation that requires a bit of planning to master. Because the page is taller than it is wide in portrait mode, it is easy to accidentally create layouts that feel top-heavy or bottom-heavy. To prevent this, always establish a clear focal point. This is typically your main photograph, which should be slightly larger or more prominently matted than the surrounding elements. Keep a consistent margin of at least 1.5 centimeters around the entire perimeter of the page to give your design a clean, framed appearance.

For beginners, choosing between a grid layout and a freeform layout can simplify the design process. A grid layout relies on straight lines, aligned edges, and structured blocks. It is highly efficient for displaying multiple photos from a single event, such as a family gathering or a weekend trip. On the other hand, a freeform layout allows you to layer papers at slight angles, overlap elements, and create organic clusters of decorations. Freeform designs work beautifully for artistic, single-photo pages where the mood of the memory is the central focus.
Before applying any adhesive, always perform a dry fit of your page. Lay out your background papers, cropped photos, journaling blocks, and embellishments directly onto the blank A4 page. Step back and observe the visual balance. Check if the colors harmonize and if there is a logical path for the viewer’s eye to follow—usually starting from the top-left and moving toward the bottom-right. This planning stage allows you to adjust spacing, trim overlapping edges, and correct mistakes before they become permanent.
Step-by-Step Process to Build Your First Page
Building your first page is a systematic process that becomes highly intuitive with practice. Start by selecting one to three photos that share a common theme, color palette, or story. Because an A4 page is spacious, you can comfortably fit two standard 3R or 4R photos. Use your paper trimmer to crop out unnecessary background details from the photos, focusing the viewer’s attention on the main subjects. If you are using delicate memorabilia like ticket stubs or boarding passes, trim them neatly or place them in small paper pockets.
Next, focus on layering your background papers to create visual depth. Instead of pasting your photos directly onto the white or kraft page of your album, create photo mats by cutting pieces of colored cardstock slightly larger than your photos—about 5 millimeters wider on all sides. Place these matted photos over a larger piece of patterned background paper. Layering contrasting colors and textures, such as pairing a smooth cardstock with a textured kraft paper, adds a professional, multi-dimensional look to the page without adding excessive bulk.
Once you are satisfied with the dry-fit arrangement of your layers, it is time to adhere the elements securely. Apply your double-sided tape or glue runner close to the edges of the backside of each paper layer to prevent the corners from lifting. Press down firmly from the center outward to smooth out any trapped air. If you are using thicker cardstock or attaching memorabilia, ensure the adhesive covers the entire surface area evenly. Taking your time during this step prevents the pages from warping or peeling apart when the scrapbook is stored vertically.
The final step is adding your journaling and embellishments to complete the narrative. Journaling is what transforms a simple photo album into a true scrapbook; write down the dates, locations, names, and personal reflections using a fade-resistant, waterproof pigment pen. You can write directly on the page or on a separate lined journaling card that you tuck into a pocket. Complete the layout by adding a few carefully chosen embellishments, such as a strip of patterned washi tape or a small cluster of stickers near the corner of your photos, keeping them balanced and purposeful.
Common Beginner Mistakes and How to Avoid Them
One of the most common pitfalls for beginners working with the larger A4 space is the tendency to overfill the page. It is natural to want to use every sticker and scrap of paper in your kit, but overcrowding can make the layout look chaotic and distract from your photos. Conversely, leaving too much unstructured white space can make the page look unfinished. Aim for a balanced distribution where empty areas feel intentional, serving as visual breathing room that guides the eye back to the focal points.
Another critical mistake is using non-archival adhesives and papers. Standard office tapes, rubber cement, and cheap school glues often contain acids that break down paper fibers and cause photographs to develop yellow spots, fade, or peel away over several years. Always check product labels for terms like acid-free, archival-safe, or photo-safe to ensure your hard work survives for decades.
Lastly, beginners often ignore the physical limits of their scrapbook binder. While adding thick 3D embellishments like wooden shapes, heavy ribbons, and thick chipboard stickers is fun, these elements quickly add up. An overstuffed binder will bulge, putting immense pressure on the binding mechanism and causing the inner pages to warp, bend, or tear at the ring holes. Keep your layers relatively flat, especially if you plan to fill the entire album.
Maintaining and Storing Your A4 Scrapbook
Preserving your completed A4 scrapbook requires careful attention to environmental conditions, particularly in tropical regions where high humidity and heat are common. Store your scrapbooks in a cool, dry room away from direct sunlight, which can rapidly fade colored papers and photos. Avoid damp areas like basements or walls directly adjacent to bathrooms. If you live in a highly humid area, placing silica gel packets inside your storage boxes or on the shelves can help absorb excess moisture and prevent mold growth.
When enjoying your scrapbook, handle the pages with clean, dry hands to avoid transferring natural skin oils to the paper. Turn the pages gently from the outer corners rather than pulling near the binder rings, which can cause the paper holes to stretch or tear over time. If your scrapbook uses a ring-binder system, investing in clear plastic page protectors is an excellent way to shield your layouts from dust, fingerprints, and accidental spills.
Keep the exterior of your scrapbook clean by dusting the cover periodically with a soft, dry microfiber cloth. If your album has a fabric or textured paper cover, avoid using liquid cleaners or damp cloths, as these can stain the material or weaken the binding glue. For heavily embellished covers, store the album vertically between other books to keep the cover flat and protect any raised elements from snagging.
Frequently Asked Questions (FAQ)
Can I use standard printer paper for my A4 scrapbook?
Standard printer paper, typically weighing around 70 to 80 gsm (grams per square meter), is generally too thin and fragile for scrapbooking. It easily buckles, wrinkles, and tears when exposed to adhesives, inks, or heavy photos. Furthermore, standard copy paper is rarely acid-free, meaning it will yellow and degrade your photos over time. For a durable scrapbook, it is best to use dedicated scrapbook paper or cardstock with a weight of at least 160 gsm to 220 gsm, ensuring it is labeled acid-free to preserve your memories safely.
How many pages can a standard A4 scrapbook binder hold?
The capacity of an A4 scrapbook binder depends heavily on the ring size and the thickness of your layouts. A standard 1-inch (25 mm) D-ring binder can comfortably hold approximately 20 to 30 fully embellished pages with protectors. If your pages are relatively flat with minimal 3D elements, you may be able to fit more. Always check the manufacturer’s specifications for ring capacity, and watch for signs of overstuffing, such as pages catching on the rings or the binder failing to close flat. If your album becomes too thick, consider using spacer rings or splitting your project into multiple volumes.

Community discussion
Share your experience or ask a question. Comments are reviewed before publication.