
Tying an elegant ribbon bow is the ultimate finishing touch that transforms a simple wedding gift wrapper into a memorable work of art. A beautifully crafted bow does more than just secure the wrapping paper; it conveys respect, thoughtfulness, and celebration for the newlyweds. Whether you are preparing a gift for a grand ballroom reception or an intimate beach ceremony, mastering the art of ribbon wrapping ensures your offering stands out on the gift table. By understanding how different materials behave and practicing precise folding techniques, anyone can achieve a boutique-quality presentation that remains pristine from the moment of wrapping to the grand unveiling.
Choosing the Right Ribbon for Wedding Gifts
Selecting the perfect ribbon requires balancing texture, weight, and visual harmony with your overall wedding gift wrapper design. Satin is a classic choice for weddings, offering a lustrous, smooth finish that catches the light beautifully, though its slippery texture requires a firm hand during tying. For a more tactile, luxurious feel, velvet ribbon adds rich depth and warmth, making it ideal for formal or evening weddings. Organza provides a sheer, airy quality that looks delicate and romantic, while grosgrain offers a ribbed texture that holds its shape exceptionally well, making it highly reliable in warm, humid tropical climates where softer ribbons might lose their bounce.
The width of your ribbon must scale proportionally with the size of the gift box to maintain visual balance. A tiny jewelry box wrapped in a wide, thick ribbon will look overwhelmed, while a large appliance box wrapped in a thin string can appear unfinished and sparse. As a general guideline, small boxes pair best with ribbons ranging from 6 millimeters to 15 millimeters in width. Medium-sized boxes, such as standard shirt boxes, look most balanced with ribbons between 25 millimeters and 38 millimeters wide. For exceptionally large gifts, look for wide ribbons of 50 millimeters or more to create a bold, dramatic statement that commands attention.
Products mentioned in this guide
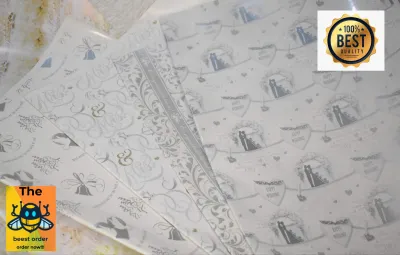
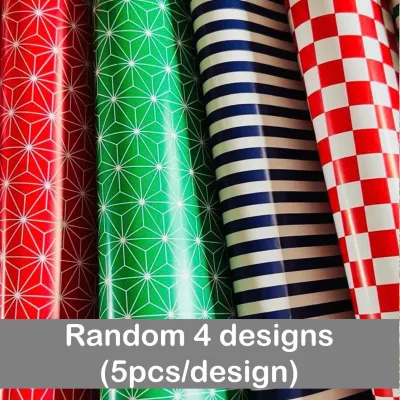
Prices are valid at publication and may change. Please refer to the product page for the latest price.
Color coordination is another critical element that ties the presentation to the wedding theme. Classic ivory, cream, and soft blush are timeless options that evoke traditional romance and pair effortlessly with metallic wrapping papers. If the couple has shared a specific wedding color palette, incorporating those exact hues—such as deep emerald, dusty blue, or champagne gold—shows an extra layer of personalization. Metallic accents, such as gold or silver edge detailing on a satin ribbon, add a touch of sophistication and catch the light beautifully on the reception table.
Essential Tools and Materials for Perfect Bows
Achieving a professional, clean finish on your wedding gift wrapper depends heavily on using the correct tools. Standard household scissors often dull over time, leading to jagged, frayed ribbon edges that detract from an elegant presentation. Investing in a dedicated pair of sharp fabric scissors is essential, as they glide through delicate satin and organza fibers without pulling or snagging. Keep these scissors reserved exclusively for fabric and ribbon to maintain their razor-sharp edge over time.

Securing materials are equally important for maintaining the structure of your bow, especially when transporting the gift. Double-sided tape is excellent for securing the ribbon flat against the box panels, preventing it from sliding out of alignment. For structured or multi-loop bows, glue dots offer a strong, instant bond that holds heavy fabric layers together without the mess or drying time of liquid glue. In tropical environments where high humidity can weaken standard adhesives, choosing high-tack, moisture-resistant glue dots or thin floral wire ensures your bow remains perfectly intact throughout the celebration.
Finally, prepare a clean, flat, and spacious workspace before you begin cutting your materials. A large cutting mat or a freshly wiped table provides ample room to measure and stretch long ribbon lengths without them twisting or gathering dust. Keep a flexible measuring tape nearby to calculate dimensions accurately, ensuring you never run short of ribbon mid-tie.
Step-by-Step Guide to Tying a Classic Elegant Bow
To begin crafting a classic, symmetrical bow, start by measuring and cutting your ribbon length. For a standard wrap where the ribbon wraps around all four sides of the box, you will generally need a length that is roughly five times the length of the box plus enough excess for the loops and tails. Lay the ribbon flat across the top of the box, centering it, then wrap the ends around the bottom, twisting them 90 degrees before bringing them back up to the top. This technique ensures the bottom of the box remains flat, allowing the gift to sit evenly on the table.
Once both ends of the ribbon are back on the top surface, pull them snug to ensure there is no slack, but avoid pulling so tightly that the gift box begins to warp or buckle. Tie a simple, tight half-knot at the center point where the ribbons meet. This knot serves as the foundation of your bow, so it must be secure. If you are working with slippery satin ribbon, you can place a single glue dot directly under this initial knot to anchor it firmly in place, freeing up your hands to focus on shaping the loops.
Next, form the primary loops by creating a single loop with one end of the ribbon, holding it firmly between your thumb and forefinger. Take the remaining free end of the ribbon, wrap it around the base of the first loop, and push it through the center space to form the second loop. As you pull both loops outward to tighten the knot, focus on maintaining equal tension on both sides. Gently tug the loops and the tails alternately until the loops are symmetrical and the center knot is neat and compact without crushing the fabric.
The final step in the classic bow process is refining the tails for a polished, professional look. Never leave the ribbon ends cut straight across, as this can look unfinished and prone to unraveling. Instead, fold the end of the tail vertically in half and cut upward at a 45-degree angle from the folded edge to the outer edge to create a classic swallowtail design. Alternatively, you can make a clean, single diagonal cut across the tail at a sharp angle. Both methods provide a clean, elegant finish that prevents fraying and highlights the quality of the ribbon.
Creating a Multi-Loop Bow for a Luxurious Look
For larger wedding gifts or premium presentations, a multi-loop bow offers a dramatic, high-volume aesthetic that exudes luxury. This style requires a significantly longer piece of ribbon, often up to eight times the length of the box, as you will be layering multiple loops on top of one another. Start by creating a series of accordion-style folds in your hand, stacking the loops on top of each other while keeping the center pinched tightly between your fingers.
To build a balanced, three-dimensional shape, alternate the sizes of the loops slightly as you stack them, making the outer loops slightly larger than the inner ones. This graduation of size prevents the bow from looking flat or clumped together. Once you have formed three to four loops on each side, wrap a short piece of thin floral wire or a coordinating narrow ribbon tightly around the pinched center to lock the structure in place.
After securing the center, gently pull and twist the individual loops outward from the middle, fluffing them to create a rounded, dome-like shape. If you are using a non-wired ribbon, you can insert small pieces of tissue paper inside the loops temporarily to help them retain their shape during transport, removing them just before presenting the gift.
Securing the Bow and Final Presentation Checks
Once your elegant bow is tied, securing it properly to the wedding gift wrapper ensures it survives transit and handling without shifting. Apply a high-tack glue dot or a small strip of double-sided tape directly to the underside of the center knot, then press it firmly onto the box lid. This simple step prevents the entire ribbon structure from sliding off the corners of the box if the gift is tilted or stacked during the wedding reception.
Take a moment to inspect the bow from all angles to ensure no structural elements are visible. If you used floral wire to secure a multi-loop bow, wrap a small, clean scrap of matching ribbon around the wire center and secure it at the back with a glue dot to conceal it completely. The goal is to make the bow appear seamless, as if it were tied effortlessly from a single, continuous strand of ribbon.
Perform a final symmetry check by placing the gift box at eye level. Adjust the fullness of each loop, ensuring they are equal in size and volume, and drape the tails gracefully across the face of the box. If the tails are too long and drag on the table, trim them slightly, keeping the angles sharp and clean. A well-proportioned, securely anchored bow reflects meticulous attention to detail, matching the joyous significance of the wedding day.
Troubleshooting Common Ribbon Bow Mistakes
Even with careful preparation, ribbon wrapping can present challenges that compromise the final look. One of the most common issues is twisted or crushed loops, which often occur when working with delicate satin or organza. To restore their volume, gently insert your fingers into the loops and pull outward to reshape them. If the ribbon has developed stubborn creases, you can use a handheld garment steamer on a low setting, holding it a few inches away from the bow to relax the fibers without melting synthetic materials.
Frayed ribbon edges can quickly make an elegant gift look messy. If you notice the ends beginning to unravel, apply a tiny drop of commercial fray-prevention liquid along the cut edge and let it dry completely. In a well-ventilated workspace away from any flammable materials, you can also carefully pass the very edge of a synthetic ribbon near a lighter flame for a fraction of a second. The heat will melt the polyester fibers slightly, sealing the edge permanently; however, always test this on a scrap piece first to avoid scorching or discoloring light fabrics.
If your center knot looks twisted or asymmetrical, avoid pulling harder on the tails, as this usually worsens the distortion. Instead, untie the loops back to the initial half-knot, ensure the ribbon lies completely flat against the box, and rebuild the loops while keeping even tension on both sides. Taking the time to reset the knot ensures a balanced, professional result that honors the special occasion.
Frequently Asked Questions (FAQ)
How much ribbon do I need for a standard wedding gift box?
To estimate the required ribbon length, use a simple formula: calculate the perimeter of your box (twice the length plus twice the width, plus four times the height) and add 60 to 90 centimeters of extra length. This additional margin ensures you have plenty of ribbon to form comfortable loops, tie a secure center knot, and cut elegant, sweeping tails. It is always better to have a slight excess that you can trim away at the end rather than running short and struggling to tie a tight knot.
Can I use wired ribbon for a softer, non-wired look?
Yes, you can easily manipulate wired ribbon to mimic the soft, romantic drape of non-wired fabric while still enjoying its structural benefits. To achieve this, gently run your thumb and forefinger along the wire edges to smooth out any stiff, sharp bends, creating soft, natural curves instead. When shaping the tails, bend the wire slightly downward to create a gentle, cascading wave that mimics the natural drape of heavy satin, effectively hiding the structural wire within the folds.
How do I keep white or ivory ribbons clean while wrapping?
Light-colored ribbons like white, cream, and ivory easily pick up oils, dust, and dirt from your hands and workspace. Before you begin wrapping, wash and dry your hands thoroughly, or wear clean, lightweight cotton gloves to handle the delicate fabric. Ensure your work surface is freshly wiped and completely dry, and keep the ribbon coiled inside its packaging or on its spool, pulling out only the length you need immediately to prevent it from dragging on the floor.

Community discussion
Share your experience or ask a question. Comments are reviewed before publication.