
Achieving a professional, boutique-quality finish with a holiday gift presentation does not require professional training. It relies on understanding how to coordinate, measure, and secure the various elements found inside a standard Christmas pack. These curated sets typically bundle a variety of ribbon widths, textures, and pre-made bows designed to complement one another. By learning how to handle different materials and applying structured wrapping techniques, you can elevate any package from simple to spectacular.
Success begins with analyzing the contents of your pack and matching them to the physical characteristics of your gifts. Whether you are working with smooth satin, sheer organza, or structured wired ribbons, each material requires specific handling to maintain its shape and luster. With a few basic tools and a systematic approach, you can ensure every loop, knot, and tail looks crisp, symmetrical, and securely anchored.
Preparing Your Workspace and Inspecting Pack Components
Before cutting any material, clear a spacious, flat surface such as a dining table or a clean desk. In warm, tropical environments like the Philippines, high humidity can cause wrapping paper to lose its crispness and make ribbon adhesives less effective. Working in a dry, well-ventilated room helps preserve the structural integrity of both the paper and the embellishments. Wipe down your work surface completely to remove any dust, moisture, or oils that could stain delicate fabrics.
Products mentioned in this guide
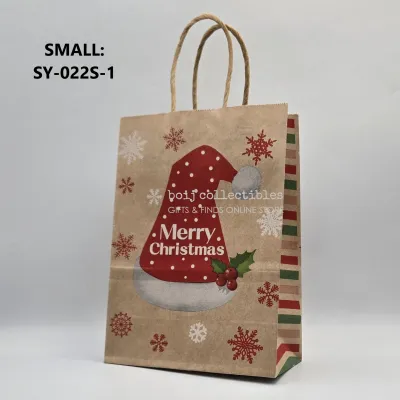
Prices are valid at publication and may change. Please refer to the product page for the latest price.
Open your Christmas pack and sort the components by material, width, and style. You will likely find a mix of smooth polyester satin, textured grosgrain, sheer organza, or flexible mesh ribbons. Take note of the edges; wired ribbons contain thin, flexible wires along the borders that hold shapes easily, while non-wired ribbons drape softly. Group the bows into categories, separating pre-formed adhesive star bows, flat-packed pull-bows that assemble with a tug of a string, and loose spools meant for manual tying.
Gather your supporting tools before you begin wrapping to keep your workflow seamless. You will need a pair of dedicated fabric scissors, as dull household scissors will chew through satin and organza, leaving unsightly frayed edges. Keep a roll of high-quality double-sided tape on hand for invisible securing, along with standard clear tape for anchoring base layers. A heavy tape dispenser allows for one-handed operation, which is incredibly helpful when you are holding a tight ribbon knot in place with your other hand.
Matching Ribbon Widths and Bow Styles to Gift Dimensions
A common mistake in gift wrapping is using embellishments that dwarf or get lost on the package. Visual balance is achieved by matching the scale of your ribbon and bow to the physical dimensions of the box. Small, delicate items like jewelry boxes, perfume bottles, or small stationery sets pair well with narrow ribbons, typically between 3mm and 10mm in width. Accompany these with petite pre-formed bows or simple, single-loop manual ties to keep the presentation delicate and refined.

Conversely, large, heavy, or deep boxes require substantial ribbons and bows to provide adequate visual anchoring. For a large shirt box or a toy package, select wider ribbons ranging from 25mm to 50mm. Mesh, burlap, or wide organza ribbons work exceptionally well here because they cover more surface area without adding excessive weight. Pair these larger boxes with prominent pre-formed star bows or multi-layered pull-bows that draw the eye to the center of the package.
To avoid wasting the materials in your Christmas pack, practice basic length estimation before cutting. A reliable rule of thumb for a standard cross-tie is to wrap the ribbon around the length of the box, cross it underneath, bring it up the width, and then add extra length for tying. For a basic knot, add at least 30 centimeters of extra ribbon; for a full, fluffy bow, add 60 centimeters or more. Measuring first ensures you do not end up with a ribbon that is too short to tie, saving you from wasting premium materials.
Tying and Securing Classic Ribbon Bows Step-by-Step
Tying a neat, symmetrical bow by hand is a highly satisfying skill that instantly elevates your gift presentation. Start by placing your wrapped box face down on the workspace. Center the ribbon over the top of the box, pull the two ends underneath, and cross them over each other so they run perpendicular to their original direction. Bring the ends back up to the top of the box, ensuring the ribbon lies completely flat against the paper without twisting at the corners.
Once the ribbon ends meet on the top face of the box, tie a secure, flat single knot. Keep the tension firm but avoid pulling so hard that the gift box buckles or warps. To prevent the knot from slipping while you form the loops, place a small piece of double-sided tape directly underneath the intersection. This anchors the ribbon to the wrapping paper, freeing up both of your hands to focus entirely on shaping the bow.
Form two equal-sized loops with the ribbon ends, crossing them over to tie a standard bow. As you pull the loops through, adjust the tension gradually, pulling the loops and the tails alternately until the central knot is tight and the loops are symmetrical. If you are using non-wired satin, gently fluff the loops from the inside with your fingers to give them a rounded, three-dimensional shape rather than letting them lie flat against the box.
Finish the presentation by tailoring the ribbon tails to prevent fraying and add a professional touch. Use your sharp fabric scissors to cut the ends at a clean 45-degree angle. Alternatively, fold the ribbon tail in half vertically and cut upward from the folded edge to the outer corner to create a classic swallowtail or V-shape. This simple detail prevents the woven threads of satin and grosgrain from unraveling during handling and transport.
Attaching Pre-Made Bows and Layering Embellishments
Pre-made bows are incredibly convenient, but they require proper application to look truly professional. Many adhesive star bows in a Christmas pack feature a small peel-and-stick backing. In warm or humid conditions, this factory adhesive can dry out or fail to grip textured, glittered, or matte wrapping papers. To ensure the bow does not fall off under the Christmas tree, peel off the backing paper and apply a small strip of heavy-duty double-sided tape directly to the adhesive pad before pressing it firmly onto the box.
For a more luxurious, multi-dimensional look, try layering different elements from your Christmas pack. Start by wrapping a wide, neutral-colored ribbon, such as a gold mesh or silver organza, flat around the box as a base band. Next, layer a thinner, vibrant satin ribbon directly over the center of the wide band, securing it at the back with double-sided tape. Top the intersection with a contrasting pre-made bow to create a rich, textured focal point that looks custom-designed.
If your Christmas pack includes curling ribbon, you can add movement and playfulness to your packages. Tie several strands of curling ribbon around the base of a pre-made bow, leaving long tails. Hold a pair of closed scissors, place the ribbon flat against the blade with your thumb applying light pressure, and pull the ribbon quickly across the blade. The friction will cause the ribbon to spiral beautifully, softening the rigid lines of the gift box and adding a festive, dynamic element.
Fixing Common Ribbon Slips and Bow Asymmetry
Even with careful preparation, minor mistakes can happen during the wrapping process. If you notice the ribbon wrinkling or buckling at the corners of the box, it usually means the wrapping paper underneath was not pulled taut enough, or the ribbon tension is uneven. To fix this without untying the entire structure, gently slide your fingers under the ribbon along the sides of the box, smoothing the paper outward and redistributing the ribbon tension toward the central knot.
Asymmetrical bow loops can make an otherwise neat package look sloppy. Instead of untying the bow and starting over, hold the central knot firmly with one hand to keep it locked in place. Use your other hand to gently pull the inner loop or the corresponding tail of the side you want to adjust. Making tiny, incremental adjustments while holding the knot secure allows you to balance the loops evenly without losing the bow’s overall structure.
Frayed edges on delicate organza or mesh ribbons can quickly ruin a clean presentation. If a ribbon begins to unravel, use ultra-sharp scissors to trim away the loose threads with a single, swift cut. For synthetic ribbons, you can run a tiny bead of clear craft glue or clear nail polish along the very edge of the cut to seal the fibers. If you choose to use heat to seal synthetic ribbon edges, do so with extreme caution, keeping the heat source far enough away to melt the fibers slightly without scorching or burning the material.
Storing Leftover Ribbons and Bows to Preserve Their Shape
A high-quality Christmas pack often contains more ribbons and bows than you need for a single holiday season. To preserve these leftover materials for future use, proper storage is essential. Never fold loose ribbons, as this creates permanent creases and hard fold marks that are incredibly difficult to smooth out later. Instead, roll the leftover ribbon tightly around empty toilet paper rolls, paper towel tubes, or specialized craft spools, securing the ends with a small piece of low-tack painter’s tape.
Pre-formed adhesive bows are highly susceptible to being crushed, which ruins their symmetrical loops permanently. Store these bows in a single layer inside rigid plastic containers, shoe boxes, or their original packaging rather than crowding them into soft bags. Avoid stacking heavy items on top of the storage containers to ensure the delicate paper or plastic loops remain well-rounded.
Keep your stored wrapping supplies in a cool, dark, and dry place, such as a closet shelf or a plastic under-bed storage box. In tropical climates, exposure to heat and humidity can degrade the adhesives on pre-made bows, making them useless by the next year. Direct sunlight will also fade the vibrant reds, greens, and metallics of your ribbons, so keeping them shielded from light ensures they remain bright and festive for your next wrapping project.
Frequently Asked Questions (FAQ)
How much extra ribbon should I cut to ensure I have enough for a bow?
To calculate the ideal ribbon length, measure the perimeter of your gift box (twice the width plus twice the height, plus twice the length). Once you have this base measurement, add an extra 60 to 90 centimeters depending on how large you want the final bow and tails to be. If you are a beginner, it is always safer to cut slightly more than your estimate. It is much easier to trim away a few centimeters of excess ribbon at the end than it is to struggle with a piece that is too short to tie a proper knot.
Can I combine different ribbon textures from the same Christmas pack?
Yes, combining different textures is an excellent way to add depth and a professional touch to your gift wrapping. Pairing a smooth, glossy satin ribbon with a textured grosgrain or a sheer organza ribbon creates a beautiful tactile contrast. To keep the design looking cohesive rather than cluttered, stick to a unified color palette, such as matching a deep forest green satin with a gold mesh ribbon. This ensures the textures complement each other while maintaining a clean, elegant holiday theme.

Community discussion
Share your experience or ask a question. Comments are reviewed before publication.