
A beautifully presented floral arrangement is a classic way to celebrate milestones, express gratitude, or brighten someone’s day. While the flowers themselves are the main attraction, the way the stems are bound and decorated completes the entire design. Learning how to wrap a bouquet with ribbon transforms a simple hand-tied bundle into an elegant, polished masterpiece that holds its shape perfectly.
When designing a professional floral gift, integrating your ribbon choice with a complementary wrapper bouquet style creates a cohesive, high-end look. The ribbon does not merely hide the structural elements; it acts as a design feature that highlights the colors and textures of your chosen blooms. By mastering a few fundamental wrapping and knotting techniques, you can ensure your floral arrangements look clean, secure, and ready for any special occasion.
Selecting Ribbon and Wrapper Bouquet Materials
Before beginning the wrapping process, gathering the correct tools is essential for achieving a clean, professional finish. The primary element is the ribbon itself, which comes in various textures, weights, and finishes. For most standard hand-tied bouquets, a ribbon width of 1.5 to 2.5 inches (approximately 3.8 to 6.4 centimeters) is the industry standard. This width provides excellent coverage over the stems without appearing bulky or overwhelming the delicate blooms above.
Products mentioned in this guide
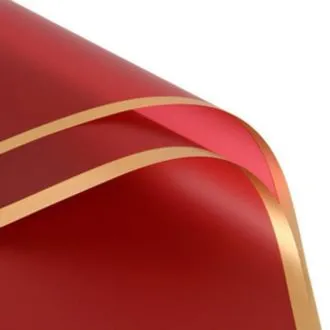

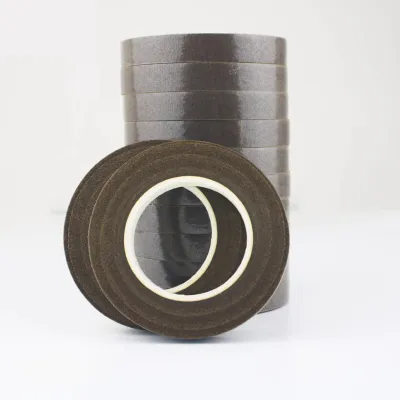




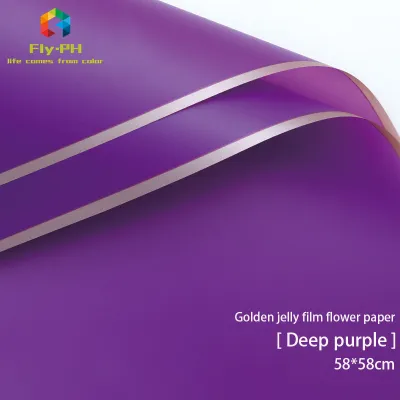
Prices are valid at publication and may change. Please refer to the product page for the latest price.
You will also need high-quality waterproof floral tape, which is a pressure-sensitive, paraffin-coated tape that sticks to itself when stretched. This tape is crucial for securing the stems before the decorative ribbon is applied. Additionally, keep a pair of ultra-sharp fabric scissors on hand specifically for cutting the ribbon, as dull blades will cause the edges of satin or organza to fray. Heavy-duty floral shears are necessary for trimming the woody or soft flower stems evenly, while wire cutters will help you manage any structural floral wire used to shape your bows.
To elevate the presentation further, consider incorporating decorative accents that match your overall wrapper bouquet design. Pearl-headed corsage pins add a vintage, sophisticated touch when securing the ribbon hem, while rustic jute twine can provide a charming contrast for bohemian arrangements. If you are preparing the bouquet as a gift, including a personalized cardstock tag attached with a delicate cord adds a thoughtful, custom feel. Sourcing these materials from local craft shops or online marketplaces in the Philippines is highly accessible, with quality ribbon rolls typically ranging from ₱100 to ₱300 depending on the material and width.
Preparing the Stems and Shaping the Bouquet
A flawless ribbon wrap relies entirely on the preparation of the stems underneath. Before any ribbon touches the bouquet, you must create a clean, uniform handle that is comfortable to hold and structurally sound. Start by stripping away all excess foliage, thorns, and small side shoots from the lower half of the stems. In warm, humid tropical climates like the Philippines, leaving leaves trapped underneath tight ribbon wraps creates a pocket of moisture that accelerates bacterial growth, leading to premature stem rot and unpleasant odors.

Once the lower stems are completely clean, gather the flowers into your desired arrangement, ensuring a balanced distribution of colors and textures. Hold the bundle at the natural binding point—the narrowest part of the handle directly beneath the blooms where your hand naturally rests. Use your sharp floral shears to trim the bottom of the stems to an even length. Leaving about 6 to 8 inches of exposed stem handle is generally ideal for a standard hand-tied arrangement, providing enough space for a secure grip without making the bouquet feel bottom-heavy.
Next, bind the stems temporarily at the binding point using your waterproof floral tape. Wrap the tape tightly around the stems two or three times, stretching it gently as you go to activate its adhesive properties. This step locks the spiral structure of the bouquet in place, ensuring the flowers do not shift or collapse during the ribbon-wrapping process. Finally, take a clean, dry towel and thoroughly wipe the entire handle. Removing any residual water or sap is critical, as moisture will cause the decorative ribbon to slip, stain, or lose its tension over time.
Step-by-Step Ribbon Wrapping Techniques
With the stems prepared, bound, and dried, you are ready to apply the decorative ribbon. The wrapping technique you choose can dramatically alter the style of the bouquet, ranging from a sleek modern look to a classic, romantic aesthetic.
The Classic Spiral Wrap
To begin the classic spiral wrap, cut a length of ribbon approximately three times the length of the stem handle. Anchor the starting end of the ribbon at the top of the handle, just below the lowest blooms, by pressing it firmly against the floral tape. You can secure this initial anchor point with a small piece of double-sided tape or by inserting a floral pin diagonally upward into the stem bundle.
Hold the bouquet firmly in your non-dominant hand. Using your dominant hand, pull the ribbon taut and begin wrapping downward at a consistent 45-degree angle. As you wrap, ensure that each turn overlaps the previous layer by exactly half the width of the ribbon. This generous overlap prevents the green stems or structural floral tape from peeking through when the bouquet is handled or moved.
Maintain steady, firm tension on the ribbon as you progress down the handle. If the tension is too loose, the ribbon will slide and bunch up when the recipient holds the bouquet; if it is too tight, you risk bruising delicate stems or squeezing out natural moisture. Continue this smooth, overlapping spiral until you reach approximately 1 to 2 inches above the bottom of the stems, leaving a small portion of the stems exposed to allow the bouquet to absorb water.
Tying a Professional Florist Bow
A beautiful bow serves as the focal point of your ribbon wrap, drawing the eye to the binding point and adding a sense of luxury. Avoid tying a standard shoelace knot directly around the stems, as this method pinches the ribbon fabric and often results in droopy, uneven loops. Instead, construct a structured florist bow separately before attaching it to the handle.
To create a professional bow, take a fresh length of ribbon and form a single loop, pinching the base of the loop between your thumb and forefinger. Create a second loop of identical size on the opposite side, forming a symmetrical figure-eight shape. Repeat this process, stacking two or three loops on each side to build a full, voluminous shape, keeping the center pinch point held tightly between your fingers.
Once you are satisfied with the size and symmetry of the loops, wrap a short piece of thin floral wire or a narrow strip of matching ribbon tightly around the center pinch point, twisting it securely at the back. Cut two long, elegant ribbon tails from your spool and secure them to the back of the bow using the same wire. To attach the finished bow, wrap the remaining wire ends around the binding point of the bouquet handle, twisting them tightly at the back and tucking the sharp wire ends safely into the stems. Gently fluff the loops and arrange the tails to drape naturally.
The Concealed Tape Finish
Securing the end of your spiral wrap cleanly is vital for maintaining a polished, seamless appearance. Once you reach the bottom of your spiral wrap, cut the ribbon, leaving a small tail of about 1 inch. Fold the raw edge of this tail under itself to create a clean, straight hem, which prevents the fabric from fraying over time.
To secure this folded hem without any visible fasteners, apply a small dab of floral adhesive or a strong, clear glue dot to the underside of the fold. Press the hem firmly against the wrapped handle, holding it in place for a few seconds until the adhesive sets completely. This creates a smooth, flush finish that looks entirely seamless from every angle.
Alternatively, for a classic bridal look, you can secure the folded hem using decorative pearl-headed pins. Insert two or three pins through the center of the fold, angling them sharply upward at a 45-degree angle into the core of the stems. Be extremely careful to ensure that the sharp tips of the pins are completely buried inside the woody stems and do not protrude through the opposite side of the handle, where they could scratch the recipient’s hands during use.
Common Wrapping Mistakes and How to Fix Them
Even experienced crafters encounter challenges when wrapping bouquets, but most issues can be easily resolved with a few simple adjustments. One of the most common problems is gapping, where spaces open up between the ribbon spirals, exposing the green stems underneath. This typically happens when the wrapping angle is too steep or the tension is uneven. To fix this, simply unroll the ribbon back to the slip point and re-wrap, focusing on keeping a consistent 45-degree angle and ensuring a full 50% overlap on every turn.
Another frequent mistake is wrapping the stems too tightly, which can crush soft, delicate stems like tulips or calla lilies. Squeezing the stems too hard can restrict water flow or cause physical bruising that shortens the lifespan of the flowers. If you are working with soft-stemmed varieties, switch to a wider, softer ribbon like chiffon or organza, which distributes pressure more evenly, and apply just enough tension to keep the fabric flat without compressing the stems.
Lopsided bows can also detract from an otherwise beautiful presentation. If you notice one loop is larger than the other, adjust the loops before tightening the center wire or knot completely. Always trim the ribbon tails only after the bow is securely attached to the bouquet, allowing you to judge the overall balance and length accurately.
Finally, avoid the temptation to use standard household clear tape or masking tape to secure your ribbon. These adhesives are not designed to withstand moisture or humidity, and they will quickly lose their grip, leaving a sticky, messy residue on your ribbon. Always rely on professional waterproof floral tape, high-quality glue dots, or sturdy floral pins to ensure your bouquet remains secure and pristine.
Finishing Touches for a Polished Presentation
The difference between an amateur arrangement and a professional-grade floral gift lies in the final details. Once your ribbon is wrapped and secured, take a moment to refine the presentation. Start by trimming the ribbon tails using your sharpest fabric scissors. Cut the ends at a clean 45-degree diagonal angle, or fold the tail in half vertically and cut upward at an angle to create a classic “V” or swallowtail shape. This simple step not only prevents the ribbon from fraying but also adds a tailored, high-end finish.
For added texture and visual interest, consider tucking a small sprig of dried lavender, baby’s breath, or preserved eucalyptus behind the central bow. This subtle addition introduces a contrasting organic element and can also provide a pleasant, gentle fragrance that complements the fresh blooms.
Before handing over or displaying your creation, perform a quick verification checklist. Ensure that no green floral tape or raw binding wire is visible anywhere on the handle. Gently shake the bouquet to confirm that the bow is firmly anchored and does not wobble. Most importantly, verify that the bottom 1.5 to 2 inches of the stems remain completely exposed and free of ribbon. This allows the bouquet to be placed in a vase of fresh water without soaking the fabric, keeping the blooms hydrated while preserving the pristine look of your ribbon work.
When transporting the finished bouquet, always keep it upright in a clean, dry container or a specialized transport box. In hot and humid conditions, avoid leaving the wrapped arrangement in a closed vehicle, as extreme heat can cause the flowers to wilt rapidly and may soften any adhesives used to secure the ribbon.
Frequently Asked Questions (FAQ)
What type of ribbon works best as a bouquet wrapper?
The best ribbon depends on the style of the arrangement and the occasion. Double-faced satin is the classic choice for weddings and formal gifts, offering a luxurious, high-shine finish that drapes beautifully. Organza is sheer, lightweight, and romantic, making it ideal for layering over other fabrics or wrapping delicate, airy blooms. Grosgrain ribbon features a ribbed texture that provides excellent grip and durability, making it highly resistant to slipping and perfect for structured, modern arrangements that need to withstand handling.
How much ribbon do I need to wrap a standard bouquet?
As a general rule of thumb, you will need approximately 2 to 3 yards (about 1.8 to 2.7 meters) of ribbon to wrap a standard 6-inch bouquet handle. If you plan to add a classic, multi-looped florist bow, you should allocate an additional 2 yards (about 1.8 meters) of ribbon. It is always wise to cut slightly more ribbon than you think you will need, as having extra length allows for easy adjustments, mistake corrections, and beautifully long, flowing tails.
How do I keep the ribbon from slipping on smooth stems?
To prevent ribbon from sliding on smooth, slick, or wet stems, always start by wrapping the handle with a base layer of stretched floral tape. The slightly tacky, rubberized texture of the floral tape provides excellent friction, giving the decorative ribbon a secure surface to grip onto. Additionally, placing a small dab of floral adhesive or a strong double-sided glue dot at the top and bottom anchor points will lock the ribbon firmly in place, preventing any unwanted movement.

Community discussion
Share your experience or ask a question. Comments are reviewed before publication.