
Wrapping a gift beautifully is an art that combines precision folding with the elegant flourish of a perfectly tied bow. To achieve a professional finish, you must master the balance of paper tension, clean cuts, and secure knotting. In warm, humid tropical climates like the Philippines, choosing the right materials is especially crucial, as moisture in the air can soften paper fibers and weaken standard adhesives. By selecting high-quality stationery tools and following a structured folding method, you can transform any standard box into a stunning presentation.
Gathering the Right Tools and Materials
Before you begin wrapping, assembling the correct tools will save you time and prevent frustration. You will need high-quality wrapping paper, a pair of sharp scissors, reliable tape, and your choice of decorative ribbon. Working on a clean, hard, and flat surface—such as a large dining table or a clean floor—is essential for achieving crisp, sharp folds.
When selecting wrapping paper, pay close attention to its thickness and weight. Paper that is too thin, like cheap newsprint, will tear easily at the corners of your box, while paper that is too thick or heavily plastic-coated will resist holding a crease. A medium-weight paper between 80 and 100 gsm is ideal because it offers the perfect balance of flexibility and durability. If you are working in a humid environment, store your paper rolls in a dry, sealed container to prevent them from absorbing moisture and becoming limp before you even begin.
Products mentioned in this guide
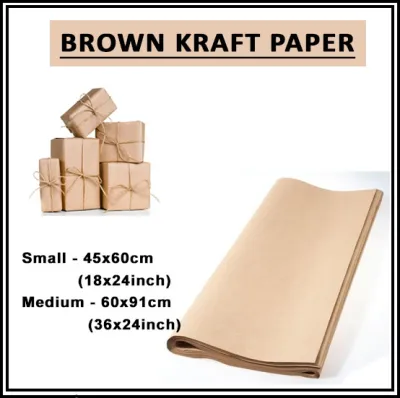
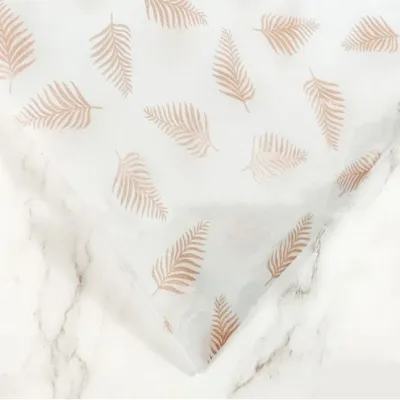
Prices are valid at publication and may change. Please refer to the product page for the latest price.
Your choice of ribbon should complement both the size of the gift and the style of the paper. Satin ribbon provides a smooth, luxurious sheen that drapes beautifully, making it excellent for formal occasions. Grosgrain ribbon features a ribbed texture that offers superior grip, which helps prevent your knots and loops from slipping out of place. For large, dramatic bows, wired ribbon is highly recommended because the thin wire embedded along the edges allows you to sculpt and hold voluminous shapes. As a general rule, match the ribbon width to the box size: use narrow ribbons under half an inch for small jewelry boxes, and wider ribbons of one to two inches for larger packages.
Step 1: Measuring and Cutting the Paper
The secret to a neat, professional-looking gift is using the exact amount of paper required. Excess paper creates bulky, messy folds, while too little paper will leave gaps that expose the box underneath. To start, unroll your wrapping paper face down on your flat workspace and place your gift box upside down in the center of the sheet. Placing the box upside down ensures that all your tape seams will be hidden on the bottom of the finished package.

To measure the width of the paper, pull the sheet up and over both sides of the box. The paper should wrap completely around the box with an overlap of approximately one to two inches. This overlap provides a clean margin to fold under and secure with tape. Mark this point lightly with a pencil or make a small fold in the paper to guide your cut.
To measure the length of the paper for the ends of the box, look at the paper extending from the open sides. The paper on each side should extend to a length slightly greater than half the height of your box. If the paper is too long, it will bunch up when you fold the ends; use your scissors to trim away any excess before proceeding.
To make a clean, straight cut, fold the paper over at your marked measurement to create a sharp crease, then slide your scissors smoothly along this crease line. Many high-quality wrapping papers feature grid lines printed on the reverse side, which make it incredibly easy to cut straight lines without a ruler. Always use long, sharp stationery shears rather than small craft scissors to avoid jagged, chewed edges.
Step 2: Folding and Securing the Paper
With your paper cut to the correct dimensions, you can now begin the folding process. Pull one side of the paper tightly over the bottom of the box and secure it to the center using a small piece of tape. For a truly professional look, use double-sided tape placed on the underside of the paper so no adhesive is visible on the outside.
Next, take the opposite edge of the paper and pull it taut over the first layer. Before taping it down, fold the raw edge under by about half an inch to create a clean, straight hem. Align this hemmed edge with the center of the box, pull it tight to eliminate any slack, and secure it with double-sided tape. This creates a seamless, polished seam along the bottom of your gift.
Now, turn the box so one of the open ends faces you. Push the top flap of paper down flat against the side of the box, which will naturally create two diagonal creases on the left and right sides. Use your thumb and forefinger to crease these diagonal edges sharply, forming two neat, triangular side flaps.
Fold the left and right triangular flaps inward, pressing them firmly against the end of the box. This will leave you with a single triangular flap pointing upward from the bottom. Fold this bottom flap upward over the other folded sections, pull it tight to remove any wrinkles, and secure it to the center of the box end with a piece of tape. Repeat this entire process on the opposite end of the box, ensuring the paper remains taut throughout.
Step 3: Positioning the Ribbon
Once your box is neatly wrapped, it is time to add the ribbon. The classic cross layout is the most popular and secure style, wrapping the ribbon vertically and horizontally around the center of the box. This layout provides a stable anchor for your bow and ensures the ribbon stays in place during handling.
To measure the ribbon for a classic cross, wrap the ribbon around the length of the box once, then around the width once, and add an extra 12 to 18 inches of length to accommodate the loops and tails of your bow. If you are unsure, it is always better to leave the ribbon slightly longer, as you can easily trim the excess later.
Place the center of your ribbon length across the top of the box. Hold it in place with your thumb, or use a tiny piece of removable tape to anchor it temporarily. Wrap both ends of the ribbon down the sides of the box, cross them over each other on the bottom surface, and turn them 90 degrees.
Bring the ribbon ends back up the remaining sides of the box to the top center. Thread the ends under the original top ribbon segment and pull them snug. This crossing technique locks the ribbon in place, ensuring it sits flat and secure against the wrapping paper without sliding.
Step 4: Tying a Classic Bow
Tying a beautiful, symmetrical bow is the crowning touch of your gift wrapping. Start by tying a simple, tight half-knot at the top center where the ribbon ends meet. Pull this knot firm against the box surface; it serves as the foundation for your bow and must remain tight to keep the ribbon from sagging.
Create a neat loop with one of the ribbon ends, keeping the shiny or patterned side facing outward. Take the second ribbon end and wrap it around the base of your first loop, moving from front to back.
As you wrap the second ribbon end, you will notice a small opening or gap form at the base of the knot. Push a portion of the second ribbon through this gap to form a second loop, then pull both loops outward simultaneously to tighten the bow.
Gently pull on the loops to adjust their size until they are symmetrical and proportional to the size of your gift box. Once the loops are set, pull the tails downward. Trim the ends of the tails at a sharp 45-degree angle, or fold each tail in half vertically and cut upward at an angle to create a classic, elegant V-shape (also known as a swallowtail cut).
Fixing Common Wrapping Mistakes
Even experienced wrappers encounter issues, but most mistakes are easy to correct with a few simple tricks. If you pull your paper too tight and it tears at a sharp corner, do not panic. You can easily conceal small tears by placing a decorative gift tag, a sticker, or a strategically positioned ribbon loop directly over the damaged area.
Bulky, messy corners usually happen when there is too much excess paper at the ends of the box. To fix this, trim away any excess paper before making your final folds, and use your fingernail or a bone folder to press every crease as flat as possible.
If your ribbon keeps sliding off the corners of a glossy or smooth wrapping paper, apply a small piece of double-sided tape to the underside of the ribbon where it meets the edges of the box. This invisible anchor keeps the ribbon perfectly positioned without affecting the overall look.
Wrapping cylinders, soft items, or irregular shapes can be incredibly frustrating with standard folding techniques. Instead of forcing flat folds, create a custom paper sleeve by wrapping the item in a tube, folding the ends like a cracker, or simply place the item inside a high-quality gift bag lined with colorful tissue paper.
Frequently Asked Questions (FAQ)
How much ribbon do I need for a standard bow?
To estimate the ribbon needed for a standard cross-wrap and bow, use the general formula: multiply the length of the box by two, the width by two, and the height by four, then add 24 inches for the bow itself. Alternatively, you can wrap the uncut ribbon loosely around the box along both axes, pull out an extra arm’s length of ribbon, and make your cut then to avoid any waste.
What is the best tape to use for gift wrapping?
For a truly professional, seamless finish, double-sided tape is the absolute best choice because it remains completely hidden between the overlapping layers of paper. If you prefer standard tape, look for matte-finish invisible tape, which blends seamlessly into the paper and does not reflect light. Avoid heavy-duty packing tapes or shiny, yellowing cellophane tapes, which can ruin the aesthetic of your wrapping paper.
How do I keep wired ribbon from fraying at the ends?
Wired ribbon is highly prone to fraying once cut, which can make your bow look messy over time. To prevent this, always use extremely sharp fabric scissors to make clean, decisive cuts at a sharp angle or in an inverted V-shape. For extra security, you can apply a microscopic dab of clear nail polish or specialized fabric fray-check sealant along the freshly cut edge to lock the fibers in place.

Community discussion
Share your experience or ask a question. Comments are reviewed before publication.